What's new

Spruced up the dash!

WOL

Members
Messages
24
Reaction score
4
Location
leeds
Car
Accord
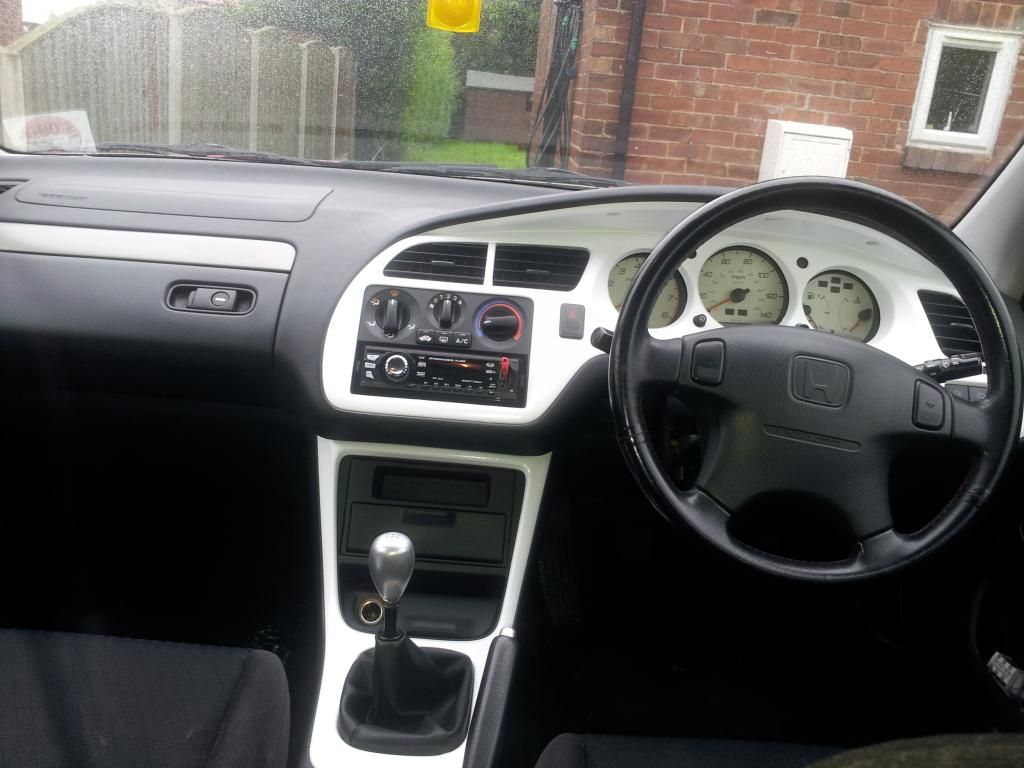
As we all know the whole dash fascia must come off to allow for head unit removal! Pain!

But as I had it off I thought I would tidy it up as I was a little tatty (plus majorly dull lol) so a little sanding and painting and it looks loads better.

Whilst I was there I just couldn't stand the state of the gear knob as it was all pitted and knackered so I spent the evening sanding it down to get rid of all the anodising and holes, this isn't finished yet though as I want to polish is but I only had as high as 1500 grit so its dull alloy at the moment but looks so much better already :)


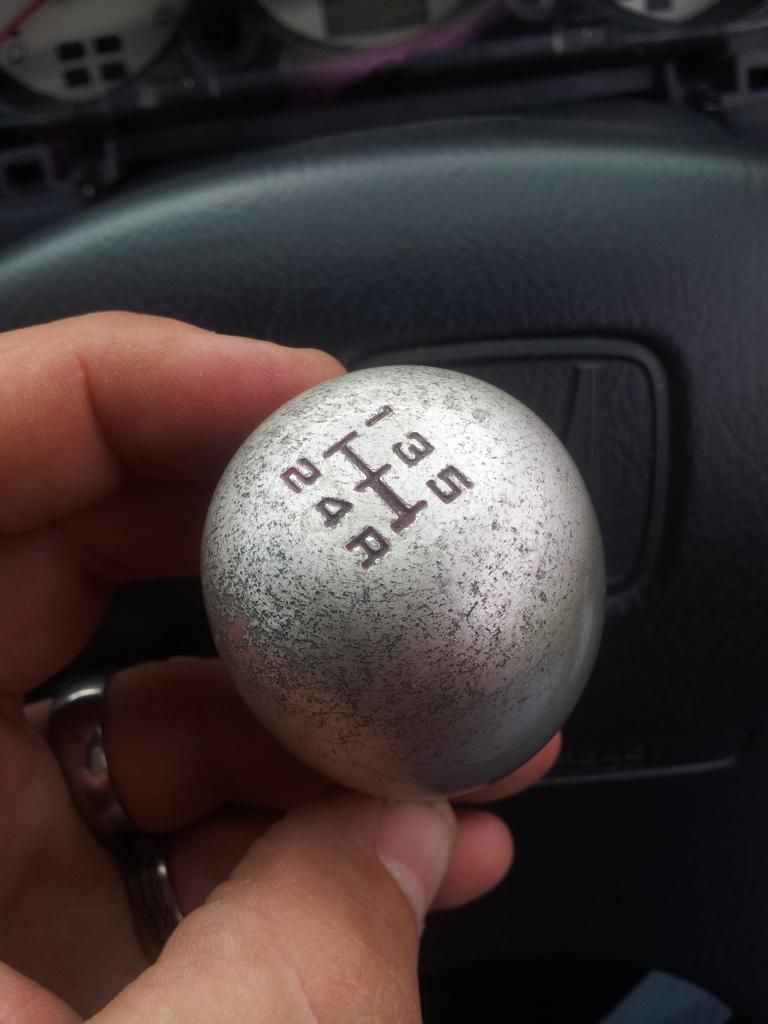
Obviously not to everyones taste but god its so much better than that dull grey/black
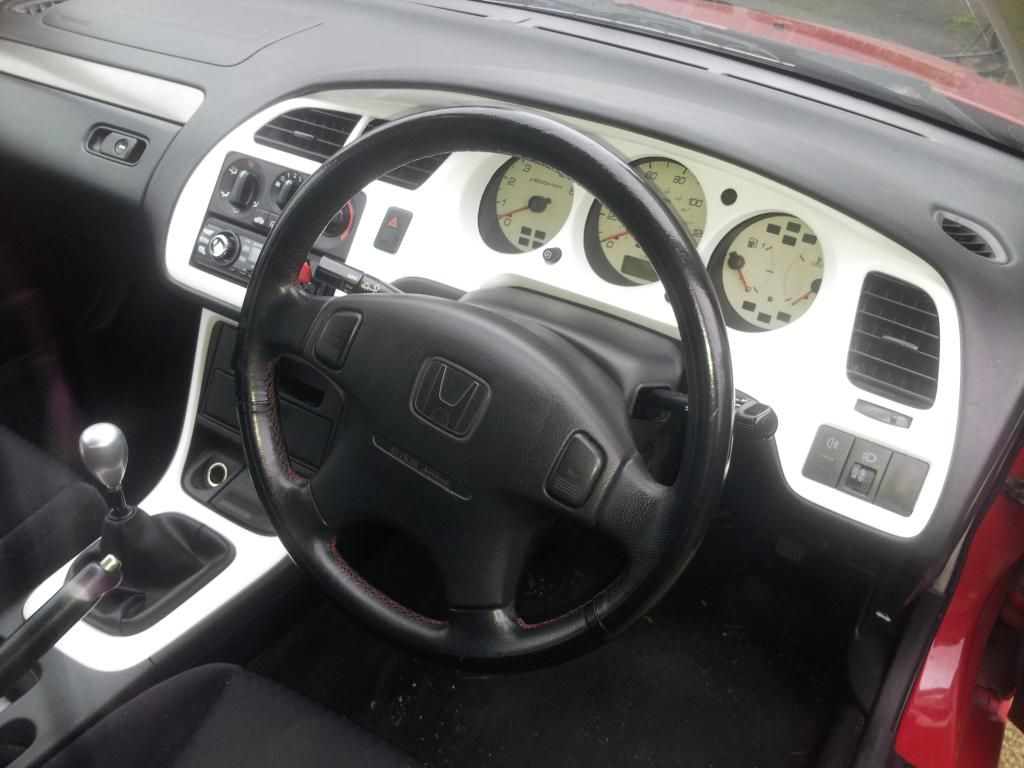
 
Thanks fella, not sure whetherwhether or not to do the strips on the glovebox and the
doors. Think it might be too much?
 
I say go for it! I'm colour coding mine to the bodywork of the car at some point.
 
That gear knob has come up great. Did you just polish it?
 
I might do the glovebox one and see how it looks. I'm highlighting really as the wheels and grill will be white so will hopefully look nice against the red body.

TyperR, I had to go at it with 600 wet n dry for an hour to remove the anodising then went to 800 grit to remove the scratches from the 600 then half and hour with 1500 for how it is now. But as I've not finished, I haven't clear coated it and it marks easily. Next I'll use 2000 grit which will smooth it nicely then buff it with polish and it will be mirror finish :) I would have used costic soda to remove the anodising but I wanted to keep the red numbering so went for the by hand route
 
Top work mate!
 
No its not a huge effort, the whole thing comes off with heavy tugging as the clips are strong, once off the heater vents have 2 screws each and a couple clips and then come off whole. The button for the trip counter has a square on the back that twists off if the press the button in from the front. That's it really. I have pics if you want
 
WOL said:
No its not a huge effort, the whole thing comes off with heavy tugging as the clips are strong, once off the heater vents have 2 screws each and a couple clips and then come off whole. The button for the trip counter has a square on the back that twists off if the press the button in from the front. That's it really. I have pics if you want
 
I like it!
 
So once you have the fascia off, the heater vents come with it, they are solid units so they don't fall apart or come out of alignment or anything.


The vents need to come off, there are 2 screws on the single one and 3 on the double the each has a few clips which are easy enough


Then you need to remove the button for the odometer reset, push it in as if resetting and on the back there is a square piece of plastic that twists 90° either way and comes off (there is a spring so don't lose it)


The only other bits that need to come off are the indicator arrows. They are just plastic circles on 3 plastic prongs that plastic welded on. I have no pics sorry but I just used a sharp knife to nik the heads off then the arrows just come off. Don't worry about replacing as they pop back on and hold fine :)

So its just the arrows, vents and button then you're ready for paint.

The gear surround is purely clipped on so undo the gear knob and then pull up. The gaiter is held on to the surround with 4 screws.

Sorry bit of a ramble but its really fairly easy :p
 
WOL said:
So once you have the fascia off, the heater vents come with it, they are solid units so they don't fall apart or come out of alignment or anything.


The vents need to come off, there are 2 screws on the single one and 3 on the double the each has a few clips which are easy enough


Then you need to remove the button for the odometer reset, push it in as if resetting and on the back there is a square piece of plastic that twists 90° either way and comes off (there is a spring so don't lose it)


The only other bits that need to come off are the indicator arrows. They are just plastic circles on 3 plastic prongs that plastic welded on. I have no pics sorry but I just used a sharp knife to nik the heads off then the arrows just come off. Don't worry about replacing as they pop back on and hold fine :)

So its just the arrows, vents and button then you're ready for paint.

The gear surround is purely clipped on so undo the gear knob and then pull up. The gaiter is held on to the surround with 4 screws.

Sorry bit of a ramble but its really fairly easy :p
Cheers for that fella might have a go at doing that
 
A quick question what did you do to prepare it for spraying and what did you spray it with?? Been think all day of what other parts would look good as inside mine is cream interior not a big fan of it lol
 
Well first off I decided I wanted to keep the rough plastic feel so I just gave it a quick light scuff with 600 w&d, then cleaned it with turps substitute and then just used halfords plastic primer and their own white spay paint and like I said I wanted it rougher so didn't use clear.

If you want it smooth and glossy, give it a really good sanding then use a filler primer then sand that smooth then paint (lots of light coats)then smooth the paint and the then clear coats.
 
Top