What's new

Dismantling parts what's involved?

Solvalou

Members
Messages
236
Reaction score
8
Location
Suffolk
Car
Accord 1.8 VTEC '51'
Well after searching (fruitless) for wheels, I stumbled accross a top spec Accord in the same colour as mine with one absolutely gorgeous leather heated interior. Sadly I couldn't possibly afford or have the time to gut the whole car and swap it over at the brakers but it has some bits that I would like and I am wondering what it takes to get them (especially as theres no Haynes manual for these (Euro models anyway).

Stuff i'm after:
  • Side Skirts
  • Front Fogs
  • Front Fog Relay
  • Front Fog Switch
  • Interiour Wood Trim (Passenger Doors)
  • Interior Clock/Cig Lighter/Ashtray ***embly

I am also wondering do I need a wiring loom for adding front fogs and the clock?

If I could get a quick(ish) response that would be excellent as i'm in the area of the breakers.

Thanks in advance.
 
The only bit I can sorta help with is the centre console.

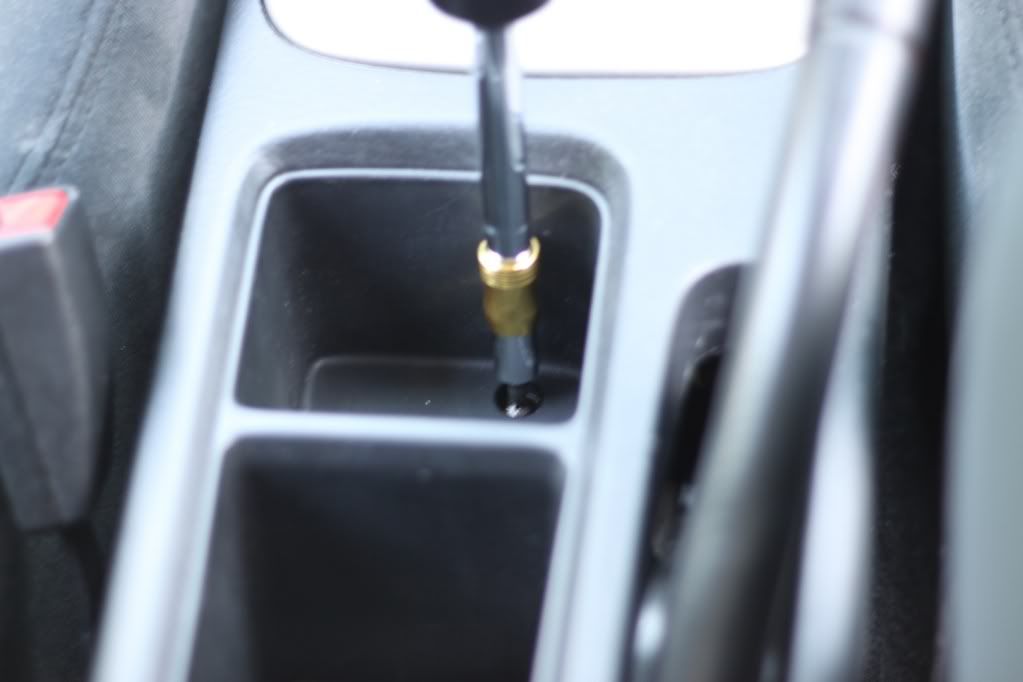
In this pic (ignore the screwdriver) the trim at the very top of the pic can be pried up. Towards the upper end/middle of this trim it should reveal 4 screws once off. I think once these four screws are off I recall there being a further 4 behind that. On mine this releases the centre console, ashtray etc. I don't have climate control or a clock in there but I guess it must be quite similar. Sorry I don't have any better pics

tn_IMG_5705.jpg

No, no, that's a good start thanks. I hope there is a way to disconnect the front foglights. I take it you are not aware if the wiring is present on models manufactured without them?
 
Oh not sure at all, obviously there is no switch on the dash but there needs to be a relay in the circuit aswell....

Have you tried the manual link?

here is a link for Honda ESM.no password needed.


http://downloads.hon...8-00_CD_ISO.zip
If trying to install under windows 7 check "run as administrator" and compatibility mode with XP sp3 on setup.exe file. ortherwise I believe you would not install it at all (just for win7)
wink.gif
 
Oh not sure at all, obviously there is no switch on the dash but there needs to be a relay in the circuit aswell....

Have you tried the manual link?
I can't say I have but i'm downloading it as I type this.

The front fog switch for this model appears to be mounted a fair bit below the rear fog switch (near the drivers storage drawer) though I have seen most models have it mounted on the dash like you say with the climate control console. Since mine is a pretty bog stock car, the single din stereo on the top part with the heater controls with the bottom double din used as storage areas.
 
Regarding the fogs....looks like it be asked before

http://typeaccord.co.uk/forum/topic/2096-fitting-fog-lights/
 
Regarding the fogs....looks like it be asked before

http://typeaccord.co.uk/forum/topic/2096-fitting-fog-lights/

I saw that a while back when I searched about it. Only thing is i'd ideally like an OEM type fitment rather than jury rigging a circuit for it. User "Puppy" said he had a kit and fitting instructions, if only I could get a scan or a PDF of that and the contents... :(

I know that my old Primera has the wires ready for fogs, I just never got round to fitting them before the accident.
 
No idea about fogs unfortunately but a few others:

•Side Skirts - couple of screws and tab screws

•Front Fogs - just a single bolt, accessible through a hole via lower inside bumper

•Interiour Wood Trim (Passenger Doors) - I'm trying to get them off mine for a retrim but I have a feeling they have screws on back of them so the doorcard probably needs to be taken off to access the screws.

Thanks for the info. I'l write these down and hopefully I can get help from one of the guys there (maybe even my old pop)...
 
Just to add about the wood trim...

Door trim is held on with push on star clips. Once these are on they never come off as they "bite" into the plastic tabs that hold the trim in place. Your only option is to snap the pegs and then reattach them by using either a strong double sided tape or melting the remains of the tab onto the doorcard...And yes doorcard has to come off!

The dash piece is much harder. It's held in with 3 screws, but to get to these screws you must first remove the entire glivebox asdembly (including "X" brace) and passenger side vent.
Well that's no problem, since theres no mounting holes on the passenger doors. Also the dashboard one isnt an issue as that is present on my car anyway. Only real concern right now is the front fogs.
 
Damn, gutted to read about the door trims being effectively permanently stuck on, I was 1/4th way through re-trimmimg my car. What exactly are star clips? Any links, would help in coming with another idea of re-attaching them. I'm thinking of gluing on some sort of screw type fixing.

The glove box one I saw 2 screws when doing pollen filter change but could never locate the third screw, guessing the vent is in the way then.

With the front fogs, are you after more the look or the actual use of the lights?
 
Well that's no problem, since theres no mounting holes on the passenger doors. Also the dashboard one isnt an issue as that is present on my car anyway. Only real concern right now is the front fogs.

Sorry not sure what you mean about the mounting holes? All the trim pieces held onto the doors have pegs that go through holes on the doorcards, so the only way to get the trim off is to remove the doorcards and snap the pegs, and like I said you have to remove the vent and glovebox ***embly to get the dash piece off.


Damn, gutted to read about the door trims being effectively permanently stuck on, I was 1/4th way through re-trimmimg my car. What exactly are star clips? Any links, would help in coming with another idea of re-attaching them. I'm thinking of gluing on some sort of screw type fixing.

The glove box one I saw 2 screws when doing pollen filter change but could never locate the third screw, guessing the vent is in the way then.

With the front fogs, are you after more the look or the actual use of the lights?

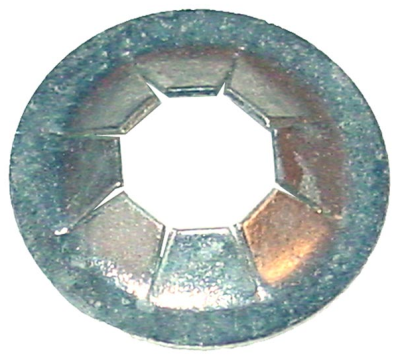
Yeah, the other screw is hiding under the vent there. If I remember right the vent is held in with two screws on the bottom and one at the top right, and as you probably know you have to remove the glovebox ***embly first. As for the starclips, I'm not sure what they are called but when the car is being built and the doorcards are put together, you push these clips onto the pegs when the trim is in place. As the clips slide down the peg, the teeth bend up and then "bite" into the plastic when stopped. No matter what way you pull and tug at them, they WILL NOT come off as the harder you pull, the harder they bite into the plastic. Just imagine the way a sharks teeth are pointed inwards, so that prey cannot escape once the teeth are latched on.

They are quite similiar to these, accept the "teeth" have a sharper edge. Gives you an idea on what they look like though!

l_abc374.png


Hope that helps anyway. I've had the trim off 6G's quite a bit now and have wrapped one of my 6G's trim, so if you need advice on removing the trim I'm sure I could help!
 
Sorry not sure what you mean about the mounting holes? All the trim pieces held onto the doors have pegs that go through holes on the doorcards, so the only way to get the trim off is to remove the doorcards and snap the pegs, and like I said you have to remove the vent and glovebox ***embly to get the dash piece off.
Sorry I wasn't clear, mine is just smooth so the new trim peices will have to be bonded on somehow anyway but I know exactly what you meant anyway.

Been a big help none-the-less so many thanks indeed. I've still yet to burn that Honda CD-ROM thing since I can't mount it. The software on the CD is a little dumb and only looks for drive "D:" ("D:" being the real CD drive).
 
Thanks for the info Frenchy, that helps a lot, I get what you mean now. How did you take off your trims and then reattach back when you retrimmed them?

Chris - You don't need to burn anything. Download and install this tool: http://www.7-zip.org/

Extract the ISO and then install the software.

Then open up the ESM software, it will error with a popup, just hit cancel and it will open up.

Then go to File > Open > Select the extracted folder and open the following file: HA98E.M14

Jobs a good'un!
 
Thanks for the info Frenchy, that helps a lot, I get what you mean now. How did you take off your trims and then reattach back when you retrimmed them?

I've wrapped/trimmed quite a few now as I've done both my 6G's and multiple friends 6G's. I've used both the melting and sticky tape method for re-attaching, and both are quite successful but the easiest way by far is using the sticky tape. Just snap off the pegs (Try and use snips and just work away at the, essentially snipping them off in fact. You can still bend and snap the pegs, but you could risk damaging the trim) and then when you are ready to reattach, use a strong double sided tape (numberplate tape for example) and slap them in place. Also, make sure you don't use a tape thats very thick as the trim will stick out. 3M will have the tape you need.

As for the dash piece, that just screws back in of course. :)
 
With the double sided tape, do you slap them on the whole of the panel or just in certain places? Also how difficult is it to remove afterwards? Worried that it will be difficult to remove and might end up snapping the panel when pulling it to take them off.

I was thinking of gluing some sort of threaded bit on it so it can be screwed on and off.

Something like this: http://thumbs.dreamstime.com/z/screw-nut-bolt-8692777.jpg

with the nut glued on and just screw the bolt on in place. or something similar in practice.

Will need some thinking...

BlueVTEC said:
I've wrapped/trimmed quite a few now as I've done both my 6G's and multiple friends 6G's. I've used both the melting and sticky tape method for re-attaching, and both are quite successful but the easiest way by far is using the sticky tape. Just snap off the pegs (Try and use snips and just work away at the, essentially snipping them off in fact. You can still bend and snap the pegs, but you could risk damaging the trim) and then when you are ready to reattach, use a strong double sided tape (numberplate tape for example) and slap them in place. Also, make sure you don't use a tape thats very thick as the trim will stick out. 3M will have the tape you need.

As for the dash piece, that just screws back in of course.
smile.gif
 
Top