What's new

EGR Valve Removal + Clean

2taol

Members
Messages
81
Reaction score
17
Location
Ireland
Car
'11 Accord 2.2 ES GT
Right, This was something I have been putting off since I bought the car earlier this year.

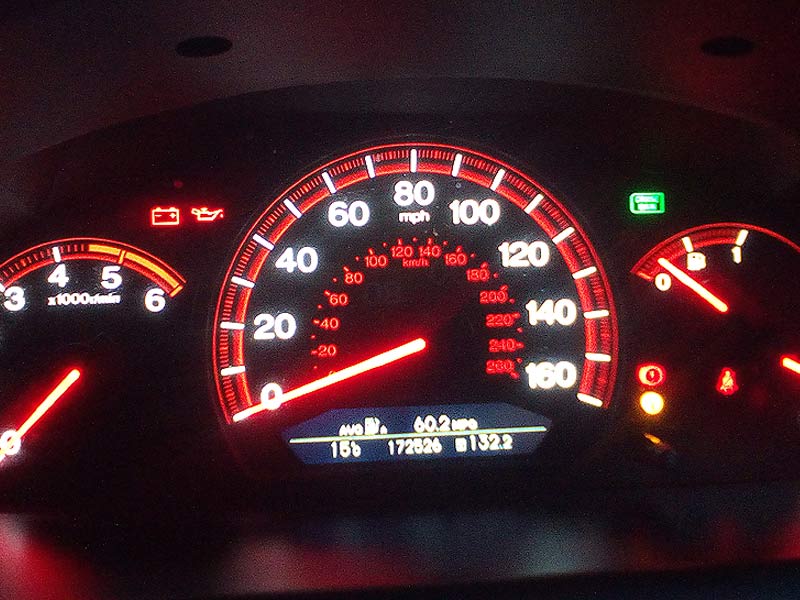
Its a 07 tourer running completely standard with 170,000+ miles.
This is my 5th Honda and 3rd Accord, so i'd be in the "Brand Loyal" camp.

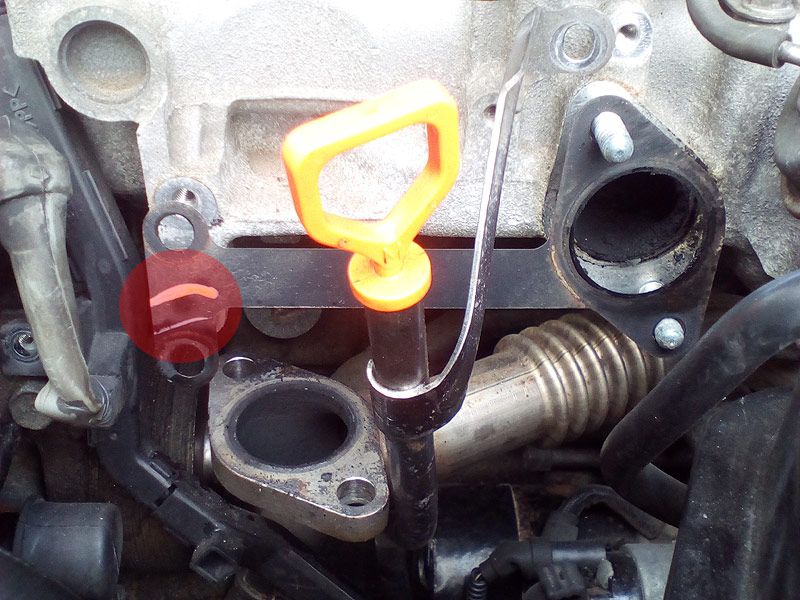
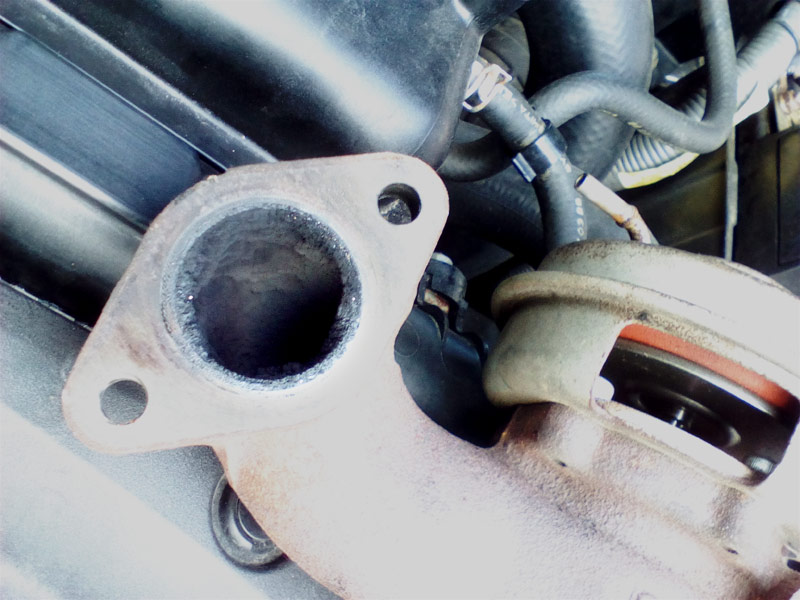
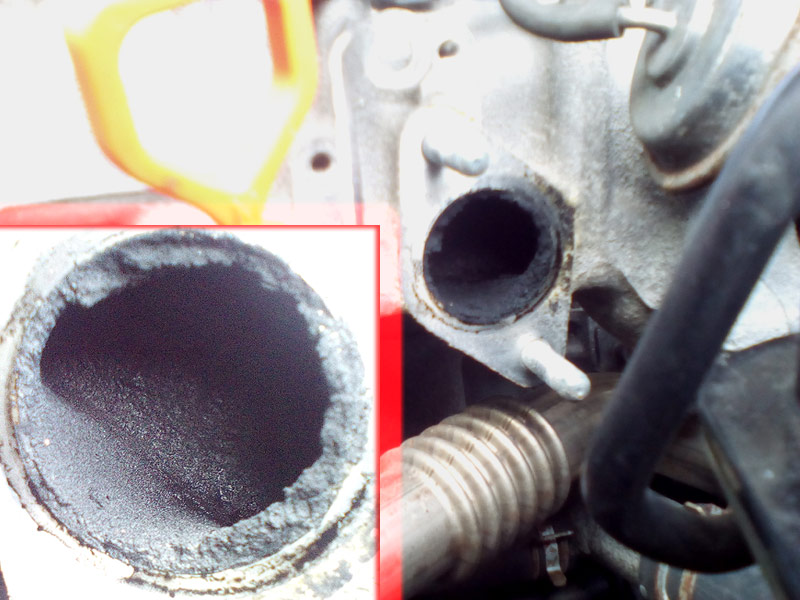
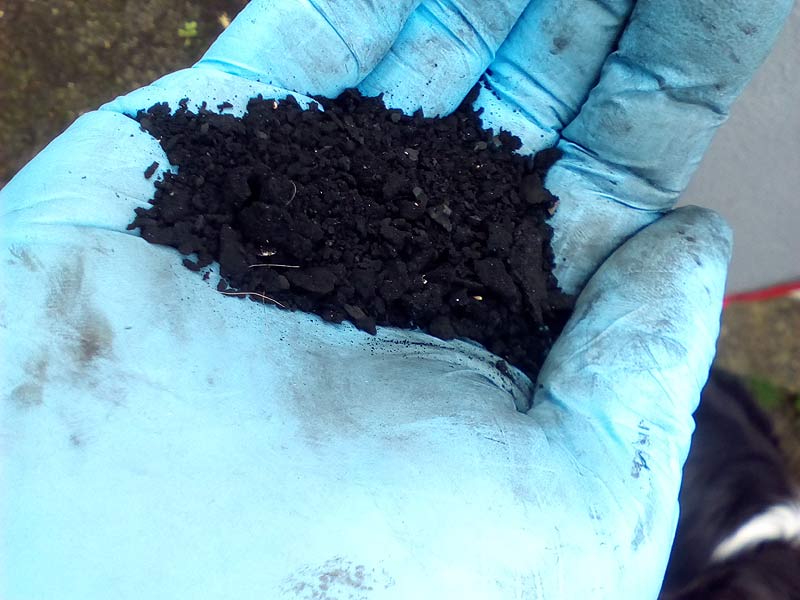
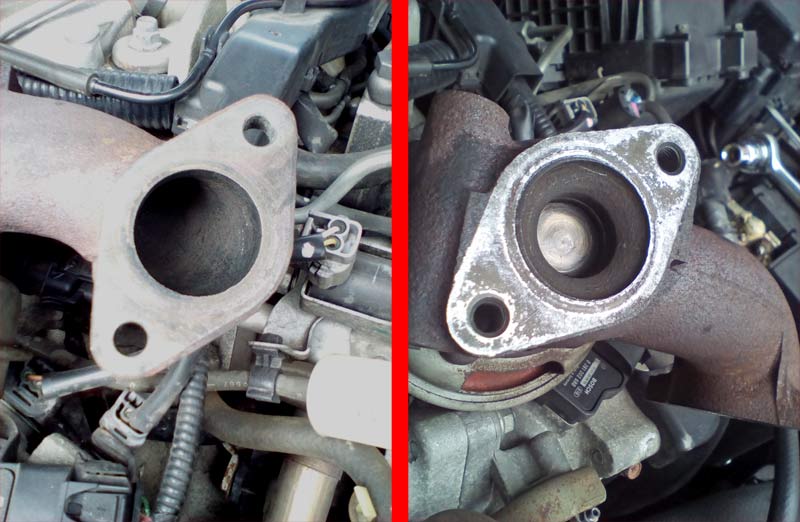
Early yesterday morning I attached the EGR Valve with the aim of cleaning
it and the port it attached to.

I have read through some other threads about removing so I thought
as I was going through the steps I would document it and add my own
experience to the database.

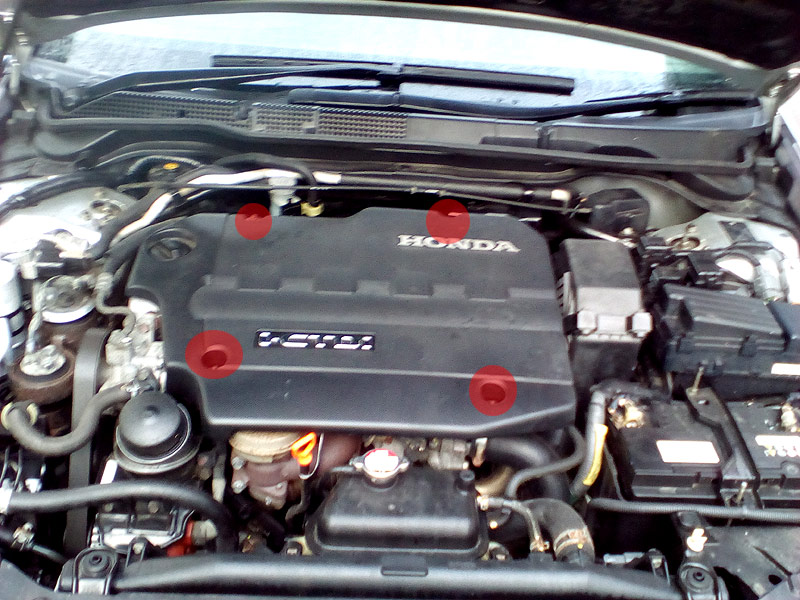
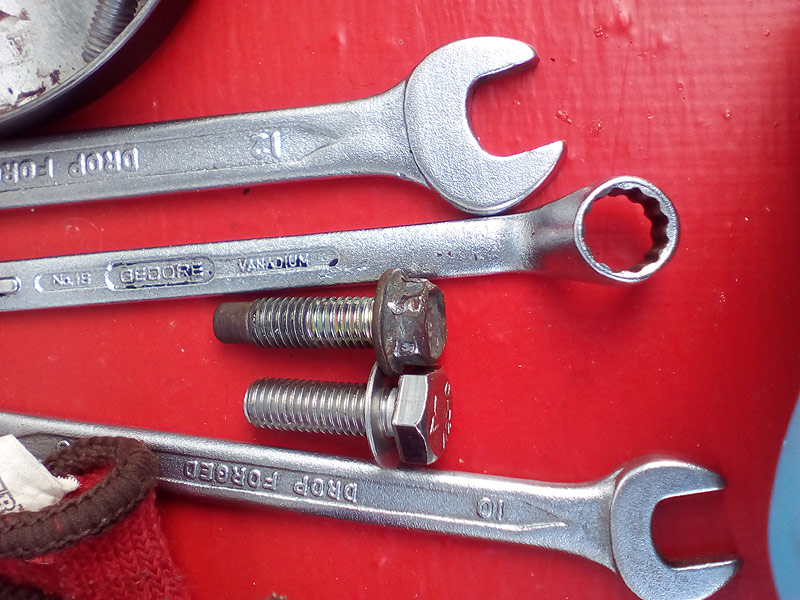
First is to obviously remove the engine cover after removing the 4 8mm dome nuts.

01-engine-cover.jpg


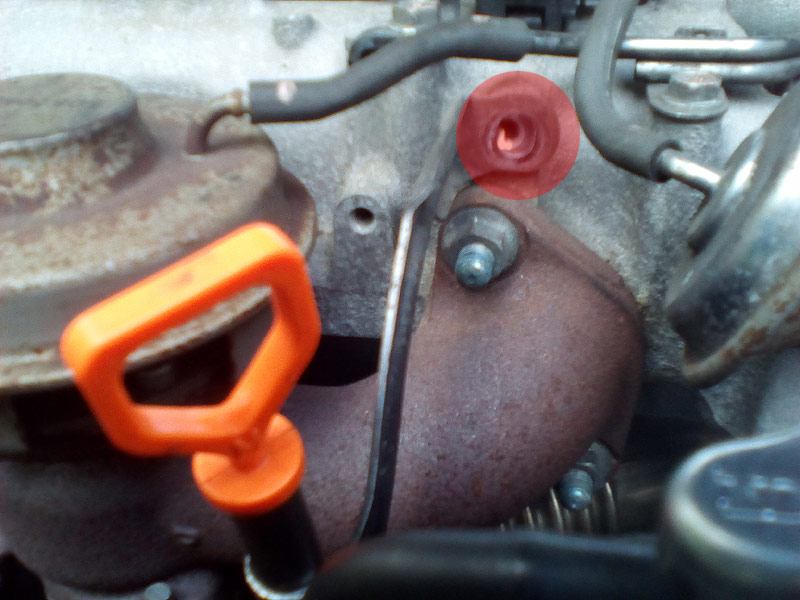
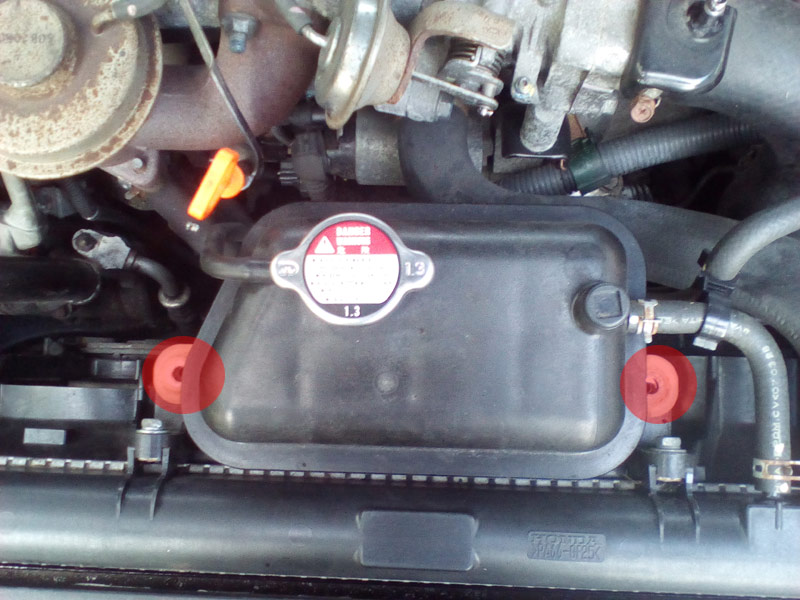
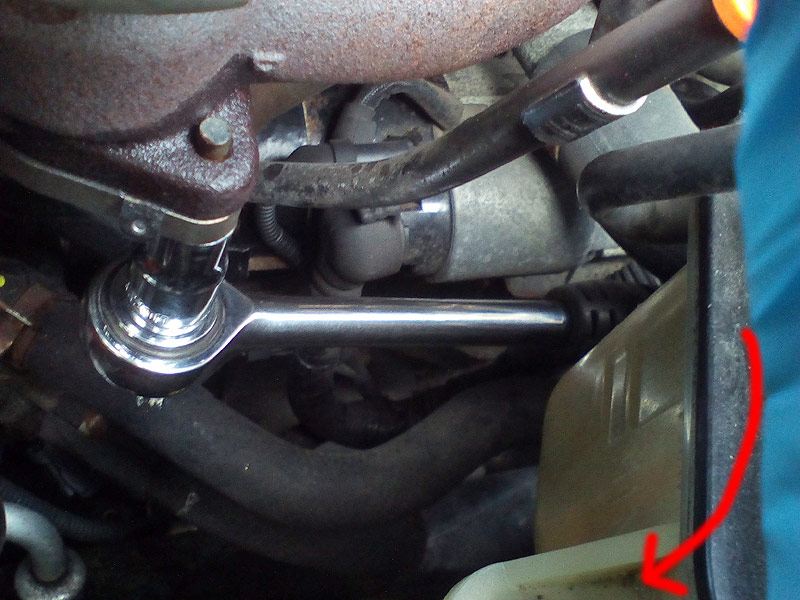
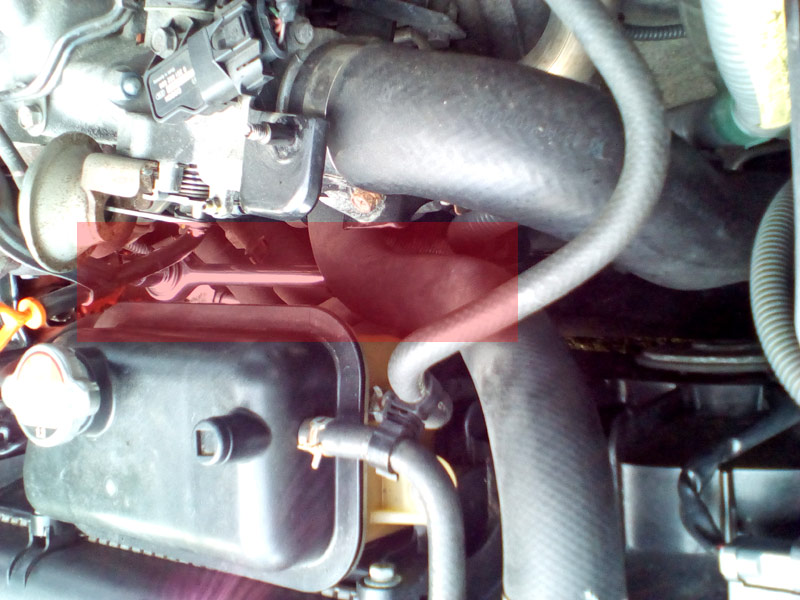
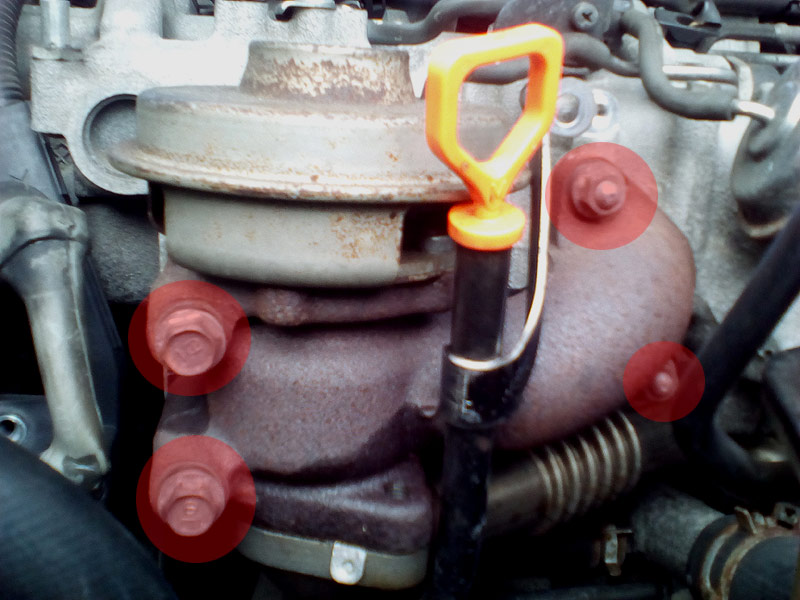
Next was to create some space to enable the removal of the 2 "bottom upside down"
12mm bolts by removing the 10mm bolts holding the radiator expansion tank and
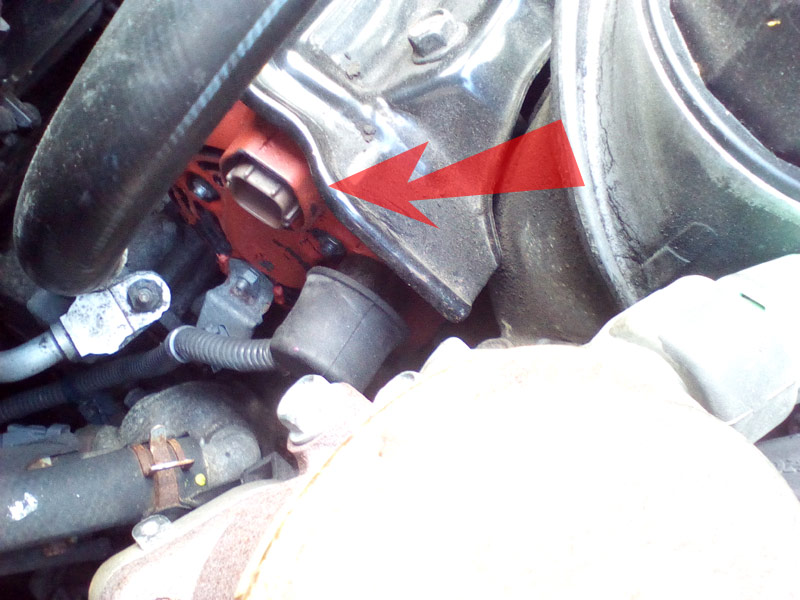
dip stick and by unplugging the electrical connector to the alternator.

.
02-dip-stick.jpg


03-altenator.jpg


04-resevoir.jpg
 
Like others have done I went straight after the rear bottom bolt which has the least amount
of access. I got the 12mm ring spanner in place with the angled head allowing the spanner
to angle upwards to clear the altenator. I left this in place before spraying both bolt ends
with some releasing spray and left them for about 10 to 15 minutes while I got some
other bits and bobs ready.

05-1st-under-bolt.jpg


This turned out to be quite easy to release with a good bit of elbow grease to break the torque.

The front bolt proved to be a bit of a nightmare with the spanner slipping off rounding the head
so to avoid using the vice-grip I turned to the 12mm socket with 1 arm each side of the expansion
tank, the left hand holding the socket on the bolt head the the right to lever open I was able to
break the torque - Result.

06-2nd-under-bolt.jpg


07-2nd-under-bolt.jpg
 
after those tow bolts removed it was plain sailing to remove the 2 long 12mm bolts on the left
and the 2 12mm flange nuts on the right.

09-4-front-bolts.jpg


Taking note that there are 2 metal gaskets that could go missing with the removal of the EGR it just came apart without
any issues. The front facing gasket had a pink mark to show which face went where!

10-gasket.jpg


With the EGR off I was able to view the amount of carbon build up, i was expecting a lot more to be honest!!

EGR
11-valve.jpg


Engine port
12-port.jpg
 
I attacked the engine port first as it was threatening to rain.
I used Motul Carb cleaner on this and removed quite a lot of residue,
some dry some like tar. Here is the engine port cleaned up and some of the
residue that came out. This reminds me of some o the 2 stroke motorcycle engines
I work on. its basically a De-Coke!!

14-port-clean-02.jpg


Next onto the EGR itself in the confines of the Garage. Essentials at the ready!!

15-egr-clean-01.jpg


And this is the stuff that came out after scraping. this was mostly built up right at the manifold.[the light coloured bits are from the
cardboard box used to catch everything that came out]

16-egr-clean-02.jpg


Here is both ends of the EGR after the clean up.

17-egr-clean-03.jpg


The refitting was extremely straight forward. I used a stainless bolt to replace the damaged one from the removal.
All nuts and bolts were refitted with some copper grease to prevent seizure.

08-damaged-bolt-head.jpg


I did a 132 mile round trip yesterday with a lot of accelerating, braking and gear changes. Lights on, Wipers on, Music on
and I recorded a healthy 60+ MPG although we didnt cross 60mph.

18-egr-clean-60mpg.jpg
 
to finalise the job took just over 2 hours to complete and the 2 front facing bolts and 2 front facing flange nuts were torqued to 30nm. Not sure what the correct setting should be and couldnt get the torque wrench on the down facing ones.
 
Great write up!

I'm a 2T man myself. Have always enjoyed racing them over the 4-strokes, even when they fell out of fashion.
 
I did the EGR soon after I got my Tourer there was a fair bit of carbon in mine the port was about 30% open.
Over the summer I pulled the manifold off to decoke that, it was a fair bit of work but worth it, the ports didn't look that obstructed at first glance but when I started scraping there was a lot of residue in there.
I found the best tool was a piece of flat metal that sits on the rubber wiper refill, about 3mm in width and 1mm thick, tape a section of that to a handle and bend the end in a shape with a flat edge, the flat blade resists flexing and you can get right into the corners of the port.
The amount of material removed would have filled a coffee mug easily although it didn't appear that blocked.
 
Really no point in going to all that trouble of removing and cleaning if you're not going to blank it after that and ensure your inlet stays clean.
 
With all the respect, before blanking EGR please read some books about how diesel engine works, how the combustion volume is controlled by EGR etc...
 
That's the whole point of having a remap with the EGR blank.

It's better that the car doesn't suck on its own exhaust due to the added particulates which contaminate the oil more rapidly.
This is one of the big contributors to premature pump and timing chain failure.

The static combustion ratio is a constant, and the dynamic ratio is effectively dictated by boost pressure. The introduction of a small amount of easy gas is negligible, especially when EGR is primarily used to reduce emissions at idle.
What you may probably referring to is the drop in combustion temperature effected by EGR.

Whilst there are positives to having an EGR system (reduced Nox emissions), the downsides are loss of performance, economy, and longevity.

Ultimately, it's your choice as to what you go for.

Personally my car has an EGR delete and a map, and it's now significantly better to drive.
 
Don't think they offer a map for a straight EGR turn-off.
You'd subsequently end up with a 'lean' condition in a turbodiesel.
 
I'd love to know how you figure that one out?
 
A professionally calibrated remap correctly closes the EGR loop and ensures only maf air is being requested.

And with respect, I know exactly how an EGR works I spend enough time working on them. There are certain vehicles where I actually advise against switching an EGR OFF such as the small turbo 1.9 PD (105bhp) vw engines as they need EGR to relieve excess turbo pressures and closing can reduce the life of the turbo.

However the honda benefits greatly from an EGR OFF if done correctly.

Anybody can read a wiki page and think they've got all the answers.
 
Goodluckmonkey said:
I'd love to know how you figure that one out?
Realy?? :D Well by not skipping physics class in school :D
If talking seriously - ALL thermostats are made to work for no longer than 60k miles, engine is not operating in proper temperatures with faulty thermostat. It's the half cold engine that produces too much soot and tar and clogs everything inside itself... On the other hand Honda's genuine thermostat is rated 78C degrees what is already bad thing. If you look into history - VW/Audi had the same problem with diesel engines in 80's - 90's, and miraculously all engines became much more reliable when they swapped thermostats from 80C to 87C.
 
So you're telling me that a 10 degree differential in temperature of the engine block has a greater effect on combustion temperature than the composition of fuel and the respective (EGR dependant) oxygen/nitrogen composition of the air?
 
Lol some of what's being posted here is the funniest stuff I've read in ages.

I'm not even getting into this.

Needless to say someone definitely needs to get their hands dirty and learn firsthand how modern Diesel engines work instead of referring to theory.
 
I'm sorry, no offence, but from your writings looks like my hands were already dirty when you were still soiling nappies... :blink:
 
Yes you're probably right, but age has nothing to do with experience.

Perhaps you should write to all the car manufacturers and tell them you have the magic solution to all their intake and dpf contamination problems, they simply need to raise engine temps.

Let me know how that works out for you.

I need to go and change my nappy.
 
Nice write up :)
But in my opinion you did nothing because you did not clean the intake manifold
I did it few months ago and all the deposits you see on the EGR's intake port, are the same in the whole manifold and around the cilynder head intake ports around the valves
But anyway...nice work ;-)


Poslano z mojega SM-N910C z uporabo Tapatalk
 
I set light to mine, and just let it burn as there was so much grot in there.
That was on a 148k mile car.

https://youtu.be/jQQgXa8KmHk

At 170k-odd, it would probably benefit from a de-coke by now.
 
9f58f96dd7689354dc6831387d65b65f.jpg


f419687fe5731040f901313259b896bf.jpg


This is mine after cleaning

Before was like :

9aa2aef5bbba788e86466e5e4b974926.jpg


And then decided to delete it

b76e98d1a5909cda4427c9b6ce7331e9.jpg


The flanges are from 10mm aluminium made on a water cutting machine
The fuel consumtion droped from 6,2-6,3 l/100 km to 5,6-5,7 l/100 km
Before this job i detected some cnocking when the engine was cold, but after that the engine runs like a dream

Doing this i reccomed to change all the gaskets


64e96555b28b70bb24eadf7e2e1194dc.jpg


This is the way i made it, so please do not consider it the only "right" way to do this job

Poslano z mojega SM-N910C z uporabo Tapatalk
 
Top