CJM
Dr. Diesel
I decided to clean the EGR Valve today, we already have some great DIY's on cleaning the EGR, but they are for the pre - facelift, there is not much difference but some of the pictures might be of use to those with the facelift model.
As there are already some DIY's on here I started the job not intending to do a DIY, therefore most pictures are after parts are removed, I re-used some from the DIY on MAF and MAP cleaning
I actually removed the EGR, the IMRC Valve and the EGR pipe, however you do not really need to remove the EGR pipe and it is a pain to remove!
I would however recommend removing the IMRC valve as it aids in cleaning the port on the inlet manifold.
The IMRC valve is relatively straight forward to remove apart from the top 12mm nut, which you need an open ended or ratchet spanner for,rather than a socket and the bolt that holds it onto the stabiliser bracket, which I used two extension bars and gained access via the opening underneath the car.
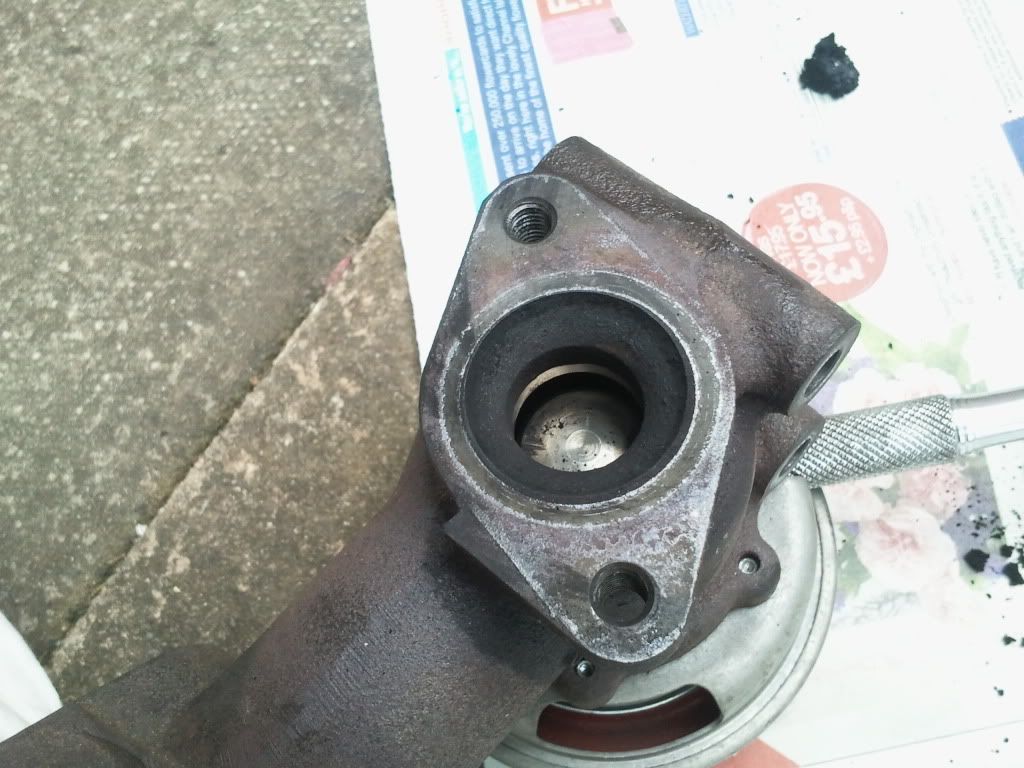
this is what the IMRC valve looks like this,

Whilst the IMRC valve is off you may as well give the port a good clean.
EGR Valve
The EGR valve looks like this,
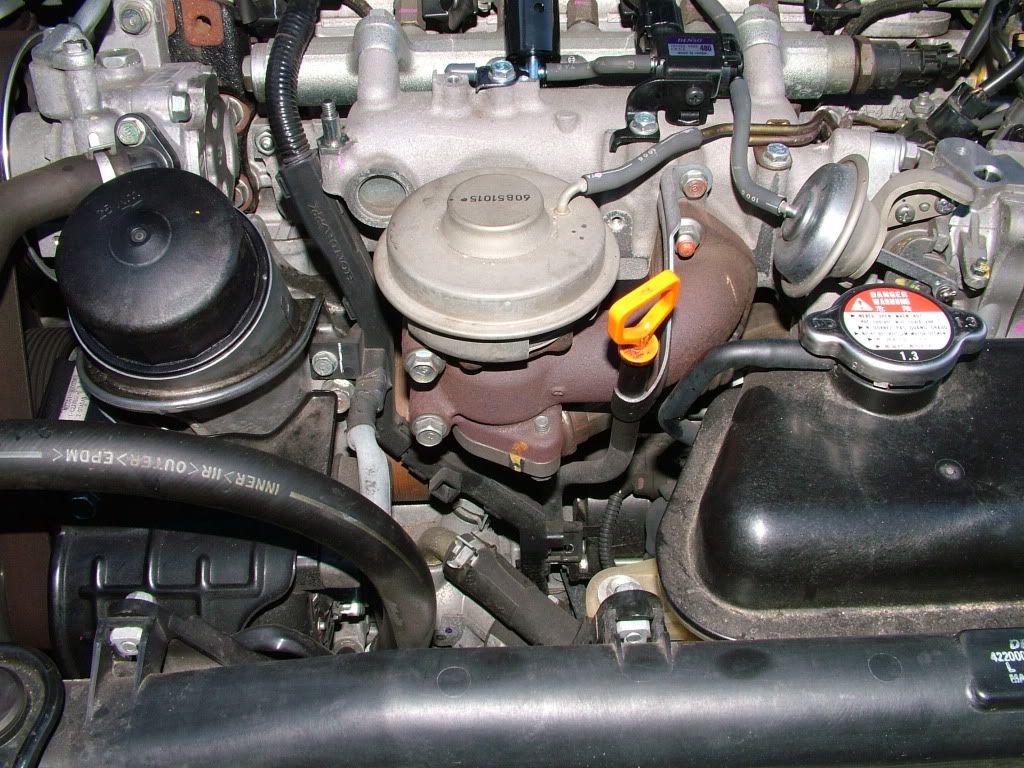
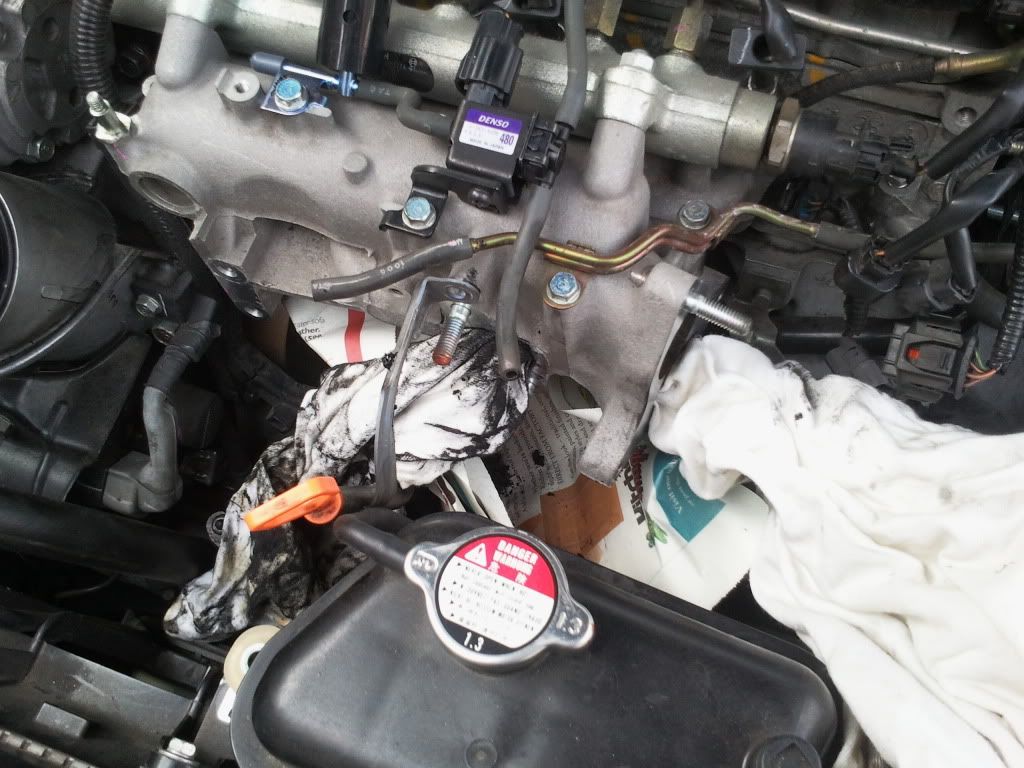
To remove the EGR firstly you may find it easier to undo the bolt that holds the dipstick to the block and also the two 10mm bolts that secure the the radiator expansion tank, this will enable you to move them slightly to gain better access.
Next bolts to do are the two 12mm bolts that secure the EGR valve to the EGR pipe ,you can see one in the picture above with the yellow blob of paint to the left of it, now there are various words that could describe these, but basically they are "show stoppers", if you cannot get them undone then the job cannot be done.
Spray some penetrating oil on each bolt from the top, now the access to these isn't great, ideally if you cannot get a socket wrench in, use a breaker bar, you may actually need to tighten the bolt slightly first, to help break the hold so to speak, then try again to loosen, just be careful as they will bite you otherwise!
***uming you have success on the two "show stoppers", the EGR is now only held on with two 12mm bolts and two 12mm nuts all accessible and that's it EGR Valve will come off , oops no, sorry it won't, you need to take the Vac pipe off the top as well!
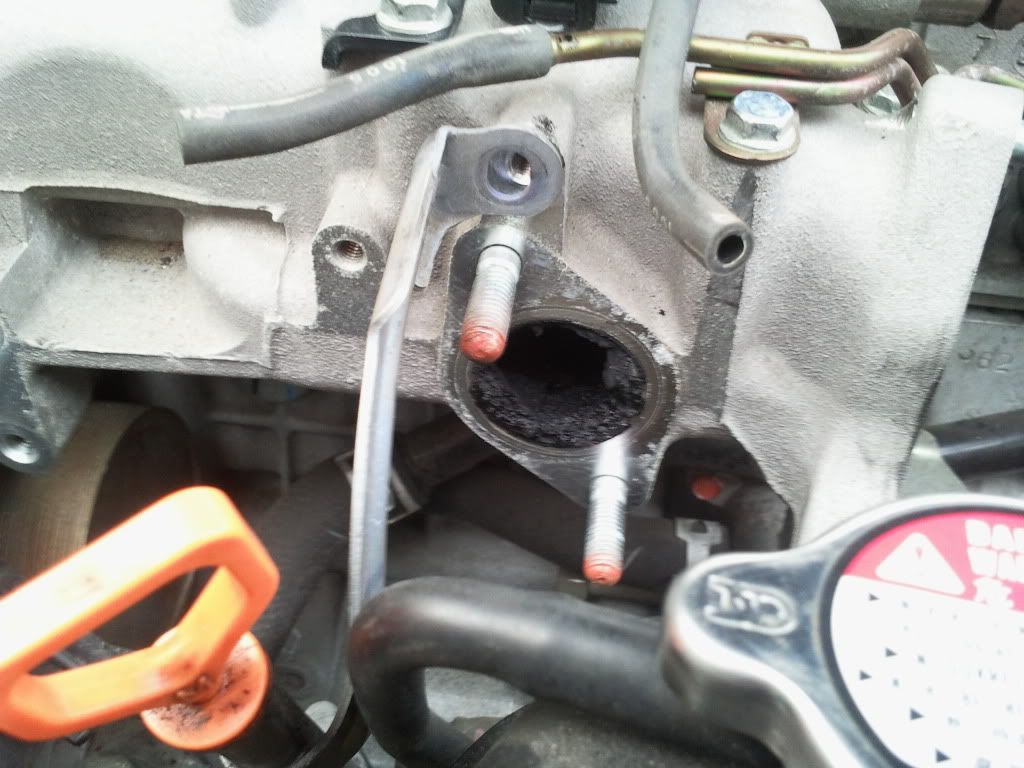
***uming you have taken the IMRC Valve and the EGR valve off you should see something like this, pretty gunked up
Here's a couple of the EGR valve itself
First off I found it best to clean the EGR Valve starting at the port to the inlet manifold, get as much of the gunk out as possible with either a screw driver or an old bicycle spoke
I then used an old rag, with brake cleaner sprayed on it to clean out the surface, I stuffed the rag in with the screwdriver, you want as much of the carbon out as possible.
Next step is to clean the underside i.e the valve port, my valve was completely closed, again clean as much of the carbon off then once that is clean you need to ensure that that the valve seat is clean, the way I did this was as follows, I used an extension bar to depress the valve open as the valve opens the gap at the diaphragm dish gets larger, I then used the handle of my 1/2" socket wrench to hold the valve open, keeping it as central as possible. With the valve open I was then able to clean the seat with a rag sprayed with brake cleaner wrapped around a thin screwdriver.
Next step is to get all the gunk out of the ports on the inlet manifold, personally I used an old bicycle spoke which seemed to be well suited to the job, to the left of the opening is a channel that also needs de-sludging. You can use the screwdriver to push the rag through the port from the IMRC Valve through to the port of the EGR as in this picture.
Don't forget to clean the sludge from the top of the port, I then went around the port with the rag again sprayed with brake cleaner, once your happy it is pretty much putting it all back together, making sure all electrics are connected and all vac pipes are connected to the EGR and the IMRC Valve.
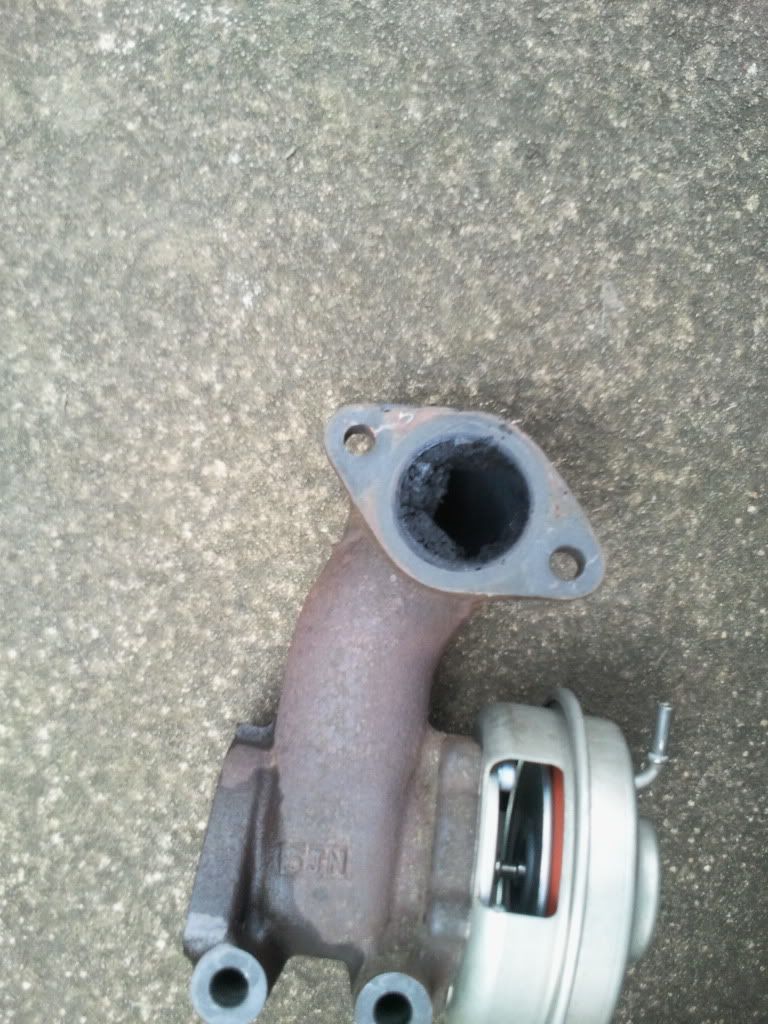
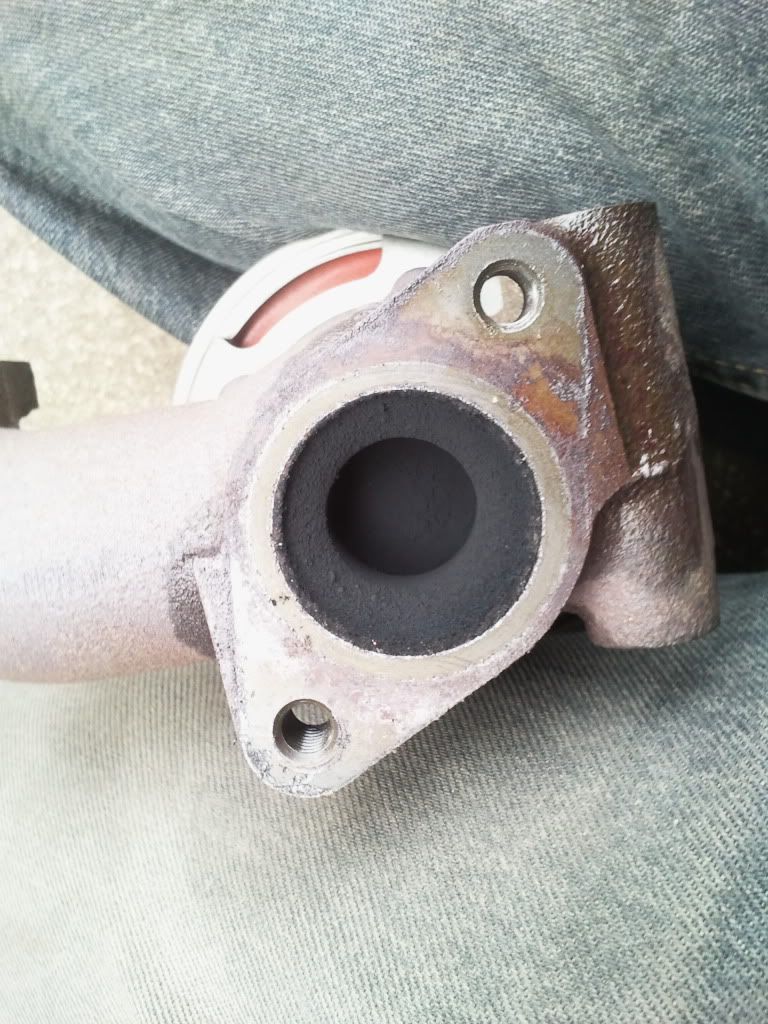
Here is a picture of the EGR pipe condition, just a basic soot deposit, so if it looks like this it really isn't worth the graft of taking it off as the other side will be the same.
Here are the links to the other EGR related DIY's should you require info for the pre-facelift.
By Gator (Dan)
By Danger Mouse (Ian)
In respect of how the car feels, seems quieter and more responsive, but early days.
As there are already some DIY's on here I started the job not intending to do a DIY, therefore most pictures are after parts are removed, I re-used some from the DIY on MAF and MAP cleaning
I actually removed the EGR, the IMRC Valve and the EGR pipe, however you do not really need to remove the EGR pipe and it is a pain to remove!
I would however recommend removing the IMRC valve as it aids in cleaning the port on the inlet manifold.
The IMRC valve is relatively straight forward to remove apart from the top 12mm nut, which you need an open ended or ratchet spanner for,rather than a socket and the bolt that holds it onto the stabiliser bracket, which I used two extension bars and gained access via the opening underneath the car.
this is what the IMRC valve looks like this,
Whilst the IMRC valve is off you may as well give the port a good clean.
EGR Valve
The EGR valve looks like this,
To remove the EGR firstly you may find it easier to undo the bolt that holds the dipstick to the block and also the two 10mm bolts that secure the the radiator expansion tank, this will enable you to move them slightly to gain better access.
Next bolts to do are the two 12mm bolts that secure the EGR valve to the EGR pipe ,you can see one in the picture above with the yellow blob of paint to the left of it, now there are various words that could describe these, but basically they are "show stoppers", if you cannot get them undone then the job cannot be done.
Spray some penetrating oil on each bolt from the top, now the access to these isn't great, ideally if you cannot get a socket wrench in, use a breaker bar, you may actually need to tighten the bolt slightly first, to help break the hold so to speak, then try again to loosen, just be careful as they will bite you otherwise!
***uming you have success on the two "show stoppers", the EGR is now only held on with two 12mm bolts and two 12mm nuts all accessible and that's it EGR Valve will come off , oops no, sorry it won't, you need to take the Vac pipe off the top as well!
***uming you have taken the IMRC Valve and the EGR valve off you should see something like this, pretty gunked up
Here's a couple of the EGR valve itself
First off I found it best to clean the EGR Valve starting at the port to the inlet manifold, get as much of the gunk out as possible with either a screw driver or an old bicycle spoke
I then used an old rag, with brake cleaner sprayed on it to clean out the surface, I stuffed the rag in with the screwdriver, you want as much of the carbon out as possible.
Next step is to clean the underside i.e the valve port, my valve was completely closed, again clean as much of the carbon off then once that is clean you need to ensure that that the valve seat is clean, the way I did this was as follows, I used an extension bar to depress the valve open as the valve opens the gap at the diaphragm dish gets larger, I then used the handle of my 1/2" socket wrench to hold the valve open, keeping it as central as possible. With the valve open I was then able to clean the seat with a rag sprayed with brake cleaner wrapped around a thin screwdriver.
Next step is to get all the gunk out of the ports on the inlet manifold, personally I used an old bicycle spoke which seemed to be well suited to the job, to the left of the opening is a channel that also needs de-sludging. You can use the screwdriver to push the rag through the port from the IMRC Valve through to the port of the EGR as in this picture.
Don't forget to clean the sludge from the top of the port, I then went around the port with the rag again sprayed with brake cleaner, once your happy it is pretty much putting it all back together, making sure all electrics are connected and all vac pipes are connected to the EGR and the IMRC Valve.
Here is a picture of the EGR pipe condition, just a basic soot deposit, so if it looks like this it really isn't worth the graft of taking it off as the other side will be the same.
Here are the links to the other EGR related DIY's should you require info for the pre-facelift.
By Gator (Dan)
By Danger Mouse (Ian)
In respect of how the car feels, seems quieter and more responsive, but early days.
") Give me two ticks
Give me two ticks


