6th Gen SOHC F18B2 Howto
This is my 6th Gen SOHC F18B2(f18b3,f20b6) Spark Plug Howto.
One of the easier jobs on the 6th Gen, it just needs a few tools and preferably a Torque Wrench. You could strip the aluminium head if you over tighten the spark plugs, therefore a semi-decent middle size torque wrench will save you a world of grief and cost. You can use this wrench on most of the service and most brake work on this car so its not necessarily a one-time use tool.
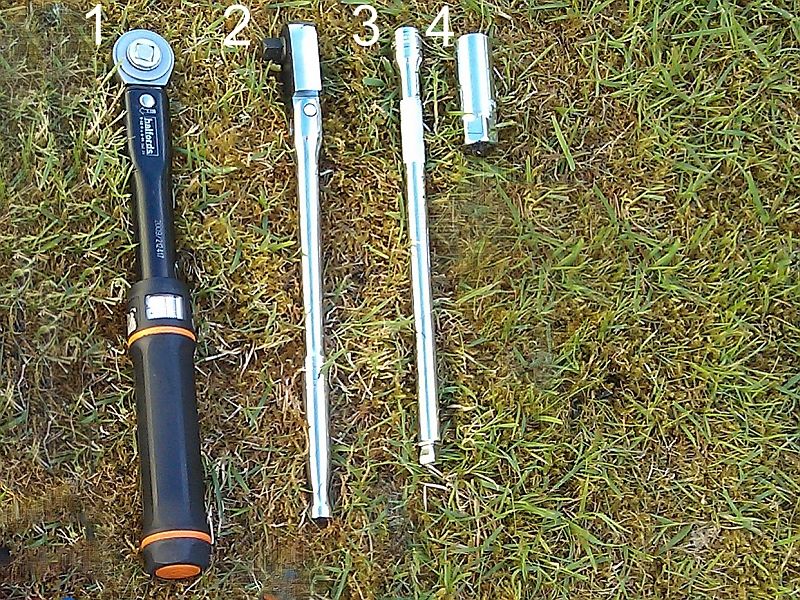
Tool List
1. Torque Wrench (Halfords 8-60Nm)
2. Ratchet 3/8ths (Halfords Flexi)
3. 250mm Wobble Extension Bar (Halfords)
4. Spark Plug Socket 16mm (Stanley)
I am not brand endorsing anything here, you may like to know what is being used and where to buy it or you may already have access to the tools or equivalents.
With the bonnet up and secure you want to identify where the spark plugs are. Well they are down in the engine. The black wires you can see (HT Leads) take you down to the spark plug.
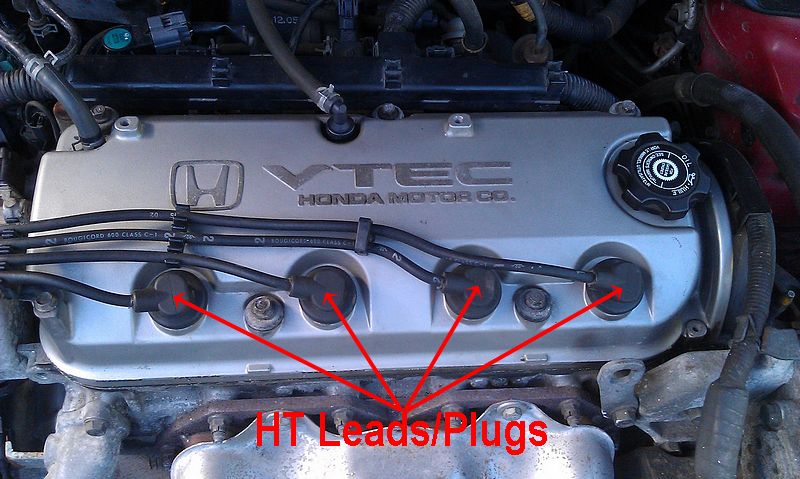
One thing to note is these leads are specific to the hole (or cylinder) they go down into. Often they are number 4,3,2,1 as you look at the engine or the length of the wire should just reach the cylinder. If you are unsure you need number/tag the leads before you start so that you don't mix them up.
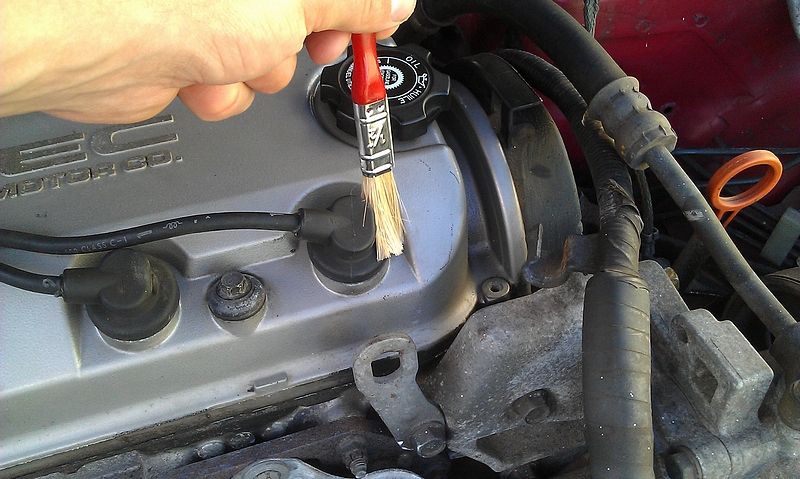
I usually start by cleaning around the leads and rocker. Might seem unnecessary but I want to reduce any debris falling down the Spark Plug channel then into the cylinder.
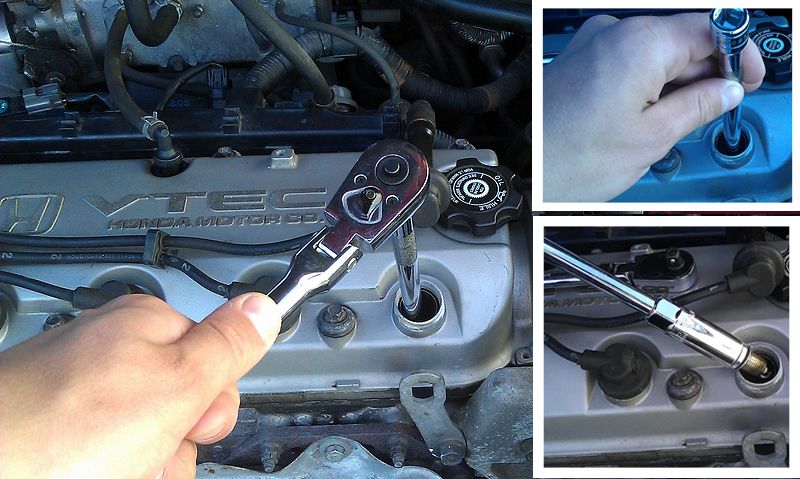
Once you are happy its clean you can grab the around the middle and twist it back n forth then pull it up and out. Apparently they can split if you just try and drag it straight out therefore try and break it free by twisting it.
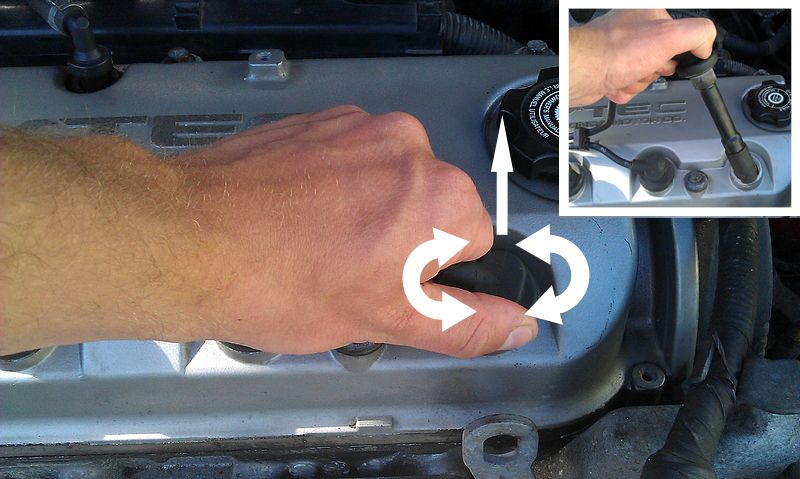
Now the HT lead is out, the top of the Spark Plug will be visible down inside the sleeve.
I use a 250mm extension bar and spark plug socket. This socket has a rubber sleeve/retainer inside which will hold the Spark Plug Insulator. You will feel some resistance as this slips over it, but keep on going and eventually the socket will seat on the hex collar with a positive action. Once seated, I'll just crack it with the ratchet then spin it out by hand then lift it up. The plug needs quite a few revolutions before it is free, maybe about 20 full turns.
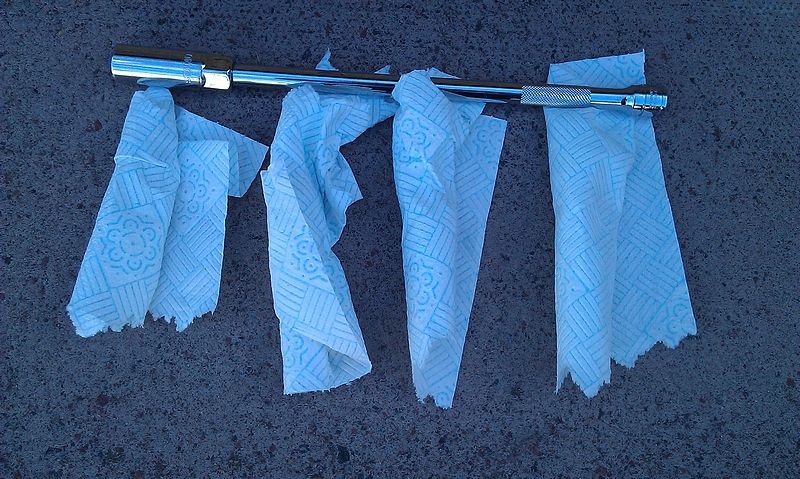
Once the plugs are out I'll wrap them in paper roll. I can give them a quick inspection prior to re-installing the new plugs. Its worth having a good look at your plugs free from external contaminants so the paper roll just keeps them clean. I also keep them in the order they come out the cylinder - no point discovering a potential problem then you can't remember what plug came from what cylinder.
You can find spark plug condition guides online, here is an example to compare with.
http://www.ngksparkplugs.com/tech_support/spark_plugs/faqs/faqread.asp
Reinstall Spark Plugs.
Should you apply anti-seize?
I've posed this question elsewhere and have also seen it asked by other folk. The consensus was pretty much split. There is an argument the plugs could seize in the head without it, the counter argument is that the plugs should be 'dry torqued'. A lubricated thread (a wet torque) would in effect cause the plug to the over torqued, possibly even stripping the thread.
The Honda manual instructs your to apply a small amount of anti-seize to the threads, yet NGK themselves recommend to leave dry. I have always dry torqued the plugs personally.
http://www.ngksparkplugs.com/pdf/TB-0630111antisieze.pdf
Slip the plug inside the spark plug socket. Slowly lower it down on the extension bar and slowly tighten it, finger tight. You should get about 20 revolutions until the plug begins to seat. If you feel you can't turn these in after a couple of turns back it out and try again. Do not try and force these plugs in with the ratchet – you could strip the head and end up in a world of grief.
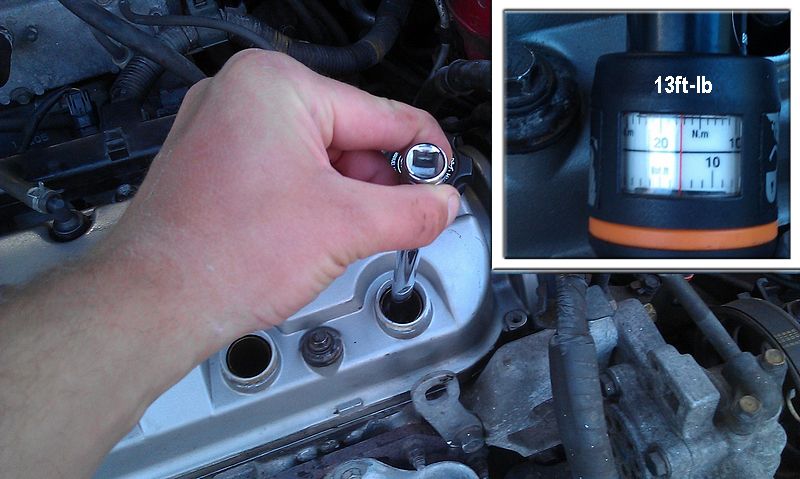
When happy that they have seated,torque them to 13ft-lbs. Now put your HT Leads back in and you have completed your Spark Plug service.
__________________
edit - incorrect url
")