What's new

DIY 6th Gen Valve Clearance Howto

AndyB1976

Members
Messages
980
Reaction score
82
Location
Glasgow
Car
2002 F18B2 CG8
SOHC F18B2(f18b3,f20b6) Valve Clearance Howto

This is my 6th Generation SOHC F18B2(f18b3,f20b6) Valve Clearance Check and Adjust including Spark Plug Inspection.

This guide is quite image heavy and has a seemingly extensive tool selection, although you could get away with a few less than I have listed in order to complete the job. Some tools are duplicated like the feeler gauges and 10mm spanner/socket. I was going to separate the Spark Plug section onto a separate Howto but decided to leave them in as a complete procedure.

I was able to complete the job without the need for raising the vehicle by using a long 500mm wobble extension bar. If you don't have this or can't stack a few wobble extensions together you will need to get the jack and axle stands out and nearside (passenger-side) wheel off.

Remember to securely support any lifted vehicle.
http://www.hse.gov.uk/pubns/indg434.pdf

The adjustment must bedone on a cold engine 38°C or less so before you proceed ensure the engine is preferably stone cold.

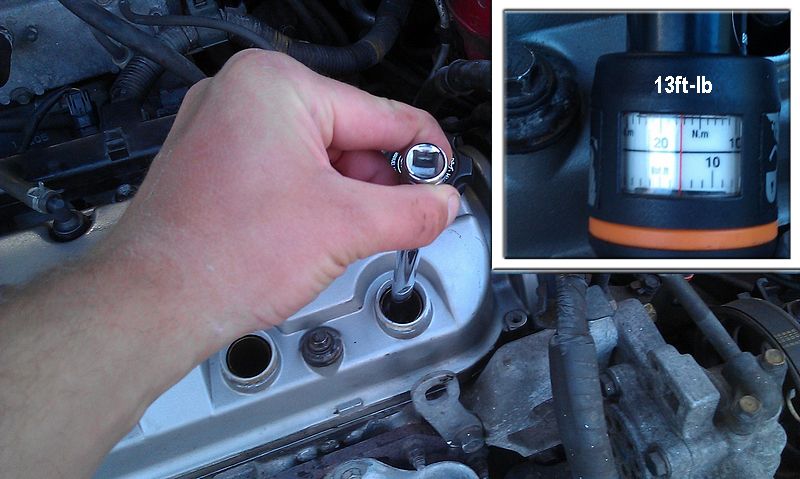
Another crucial point to be aware of is the official recommendation to re-torque the crank bolt to 181ft-lbs after the procedure is complete.

I have two of the three Halfords Pro Torque wrenches but not the larger one to cover this torque spec. Having watched and read howtos on cracking Honda Crank Bolts,requiring acetylene or the pulley holding tool and breaker/cheater bars up to 5feet in length with mechanics swinging or jumping from the end of them I formed the opinion that my 10inch ratchet would cause no problems.

Tool List.

1.Feeler Gauge Straight (Amazon.co.uk Laser)
2.Feeler Gauge Offset (Amazon.com CTATools)
3.Long Bent Nose pliers (Amazon.com Tekton 3491)
4.Honda Liquid Gasket(davidsilverspares.co.uk{excellent price at the time})
5.Draper ½” 500mm Wobble ExtensionBar (Amazon.co.uk)
6.Halfords ½” 19mm Impact Socket
7.Stanley ½” Ratchet (Screwfix)
8.Penetrating Spray (unused)
9.Halfords Professional Torque Wrench 8-60Nm
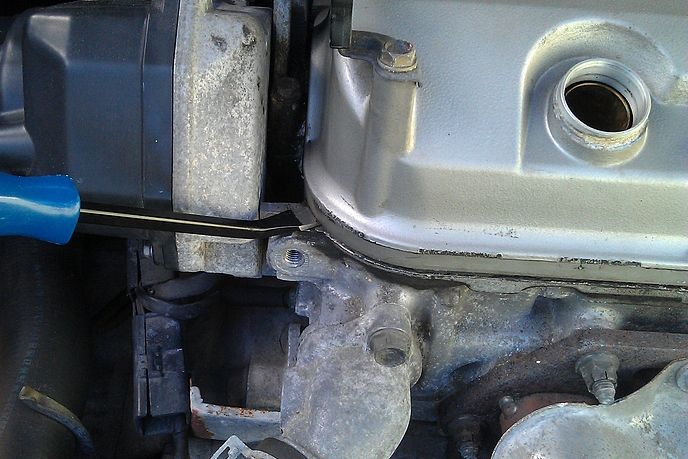
10.Draper Pry Bar (Amazon.co.uk)
11.Halfords 3/8” FlexiRatchet
12.Gearwrench 10mm Long Pattern offset/ratchet spanner (Amazon.com)
13.Halfords 3/8” 250mm Wobble Extension Bar
14.Stanley Spark Plug Socket 16mm
15.Halfords 3/8” 10mm socket
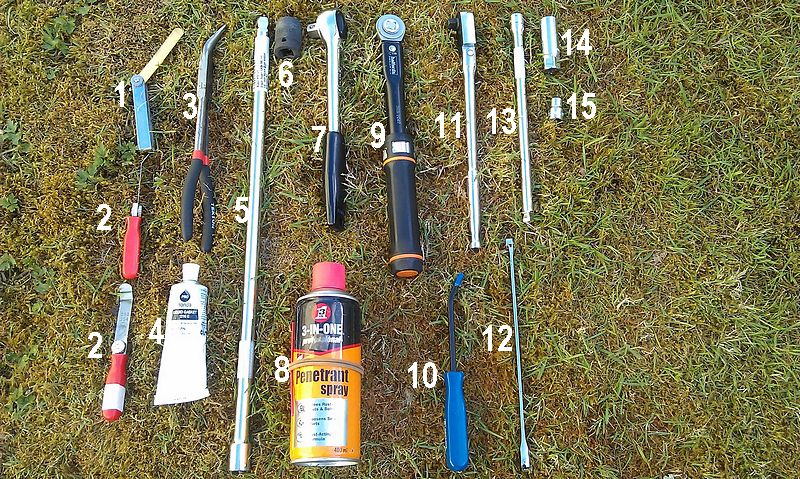
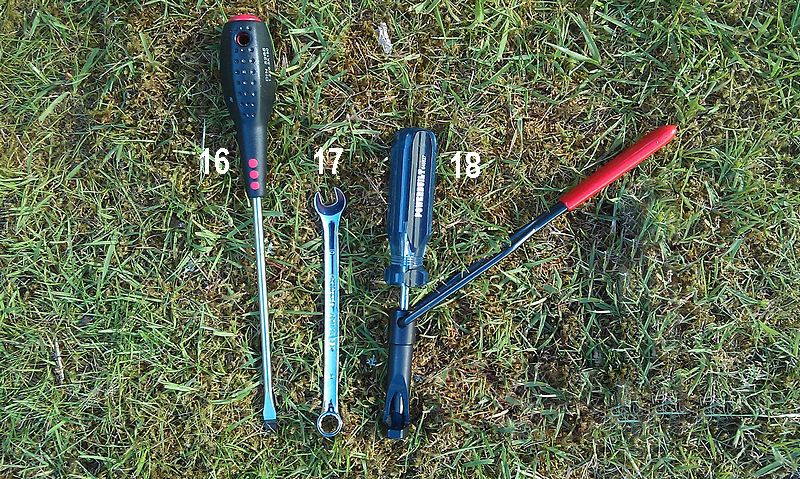
1_toolist_tn1copy_zpsc2fd8920.jpg


cont' Valve Tools

16.Flat Screwdriver
17.10mm ring spanner
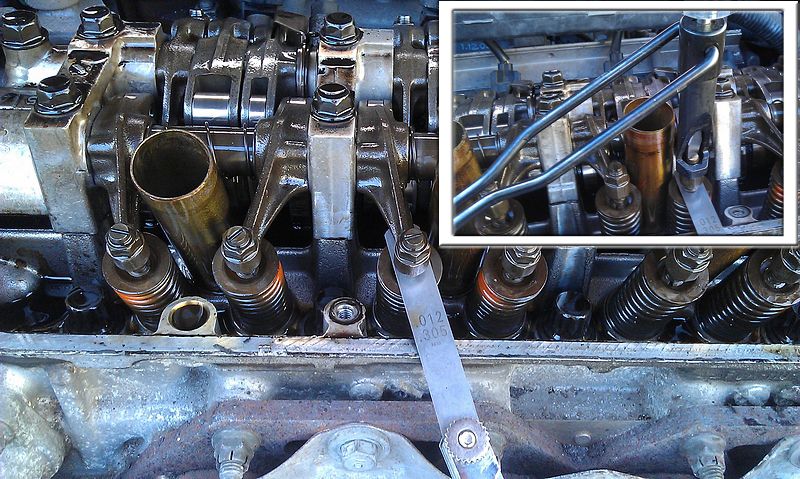
18.Powerbuilt Jam Nut Adjustment Tool 10mm (Amazon.com Alltrade 648827)

2_valvetools_tn1copy_zps2e29c59c.jpg


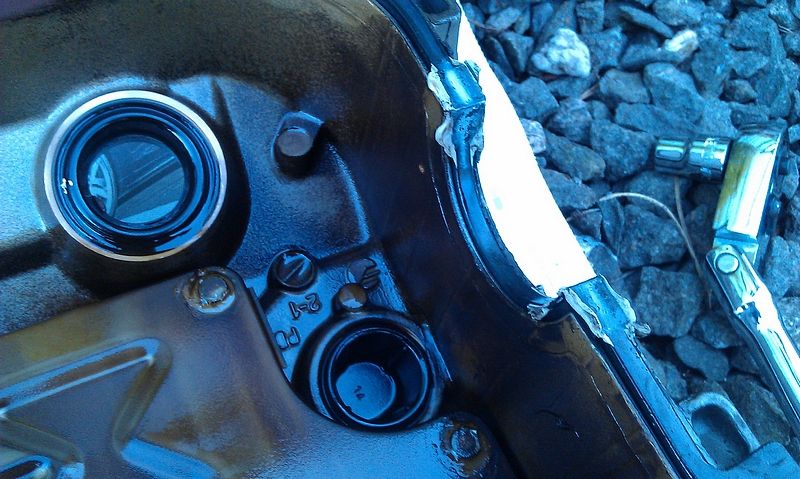
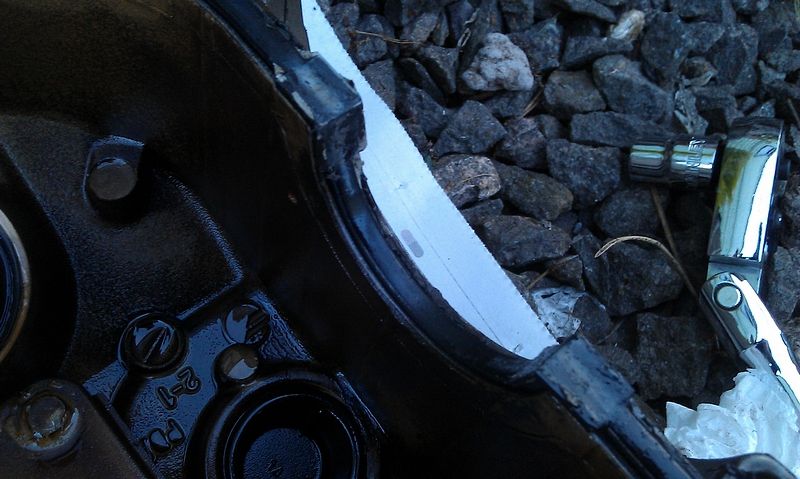
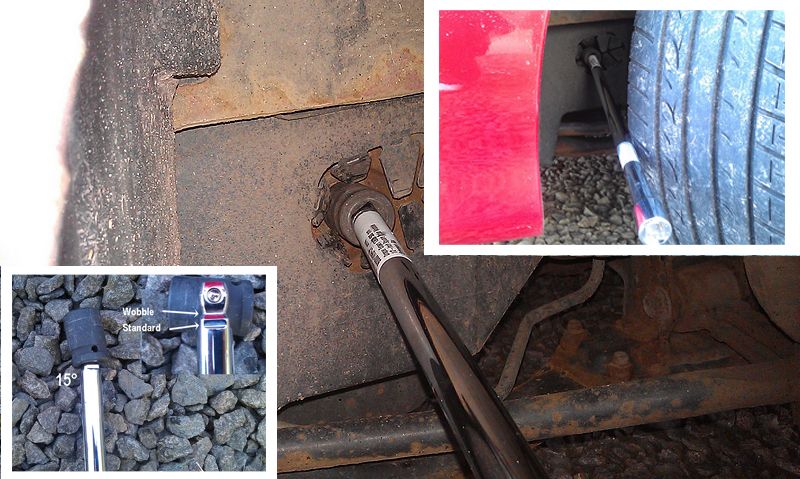
Accessing The CrankBolt.

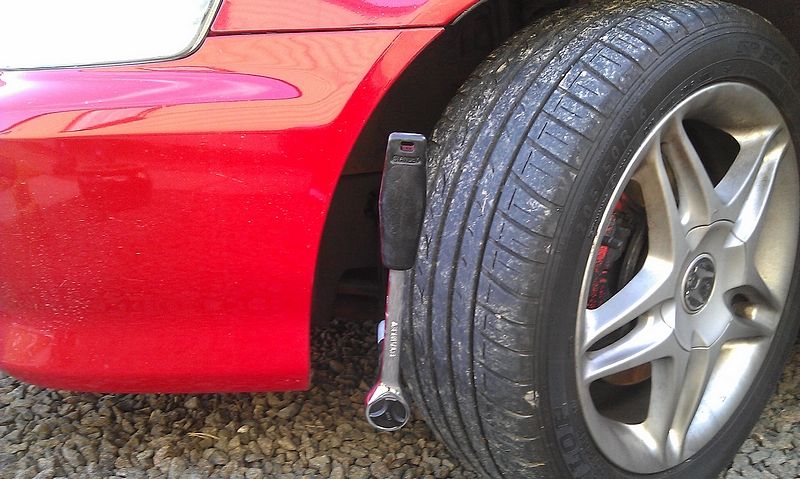
It might be wise to test that your extension bar(s) and socket fit eliminating the need to follow the raising and securing the vehicle procedure.

I found it easier to place the socket on the crank bolt by hand, then inserted the extension bar into the socket. With the 15degree off-axis rotational capability it allows you to turn the crank even with the wheel still on the car. The wobble feature is effectively acting as a small UV/CV joint.
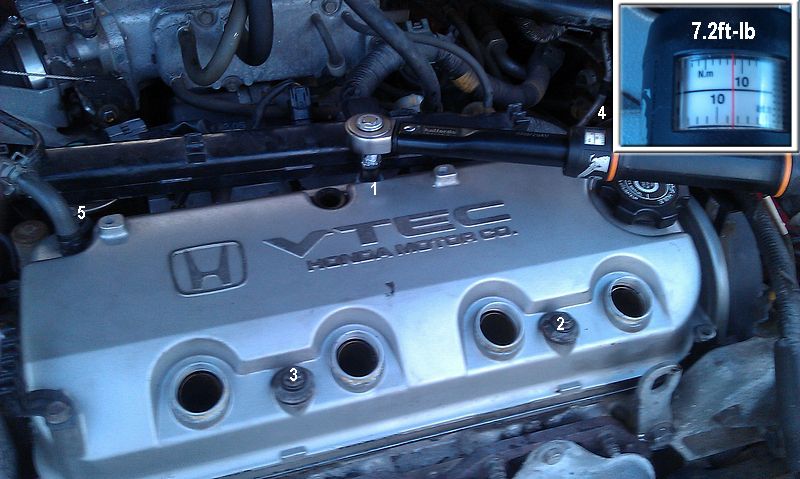
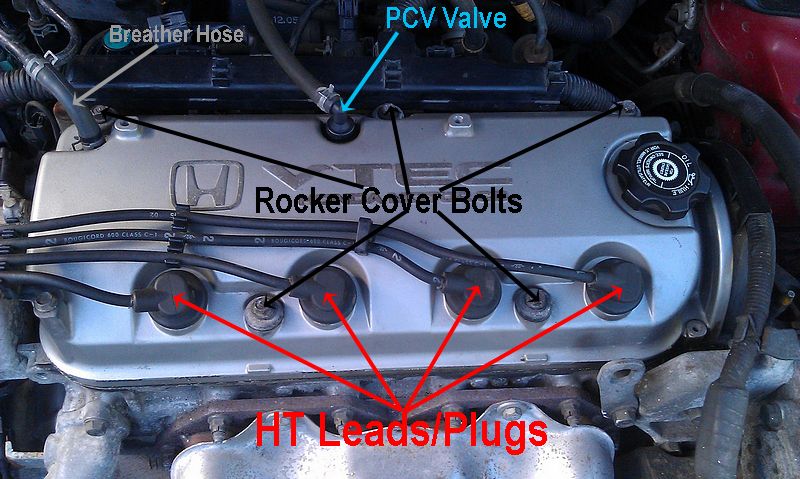


Engine Bay.

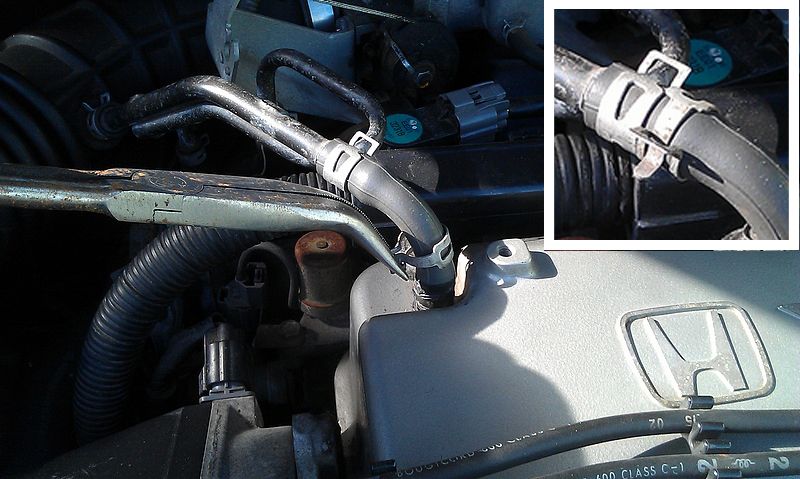
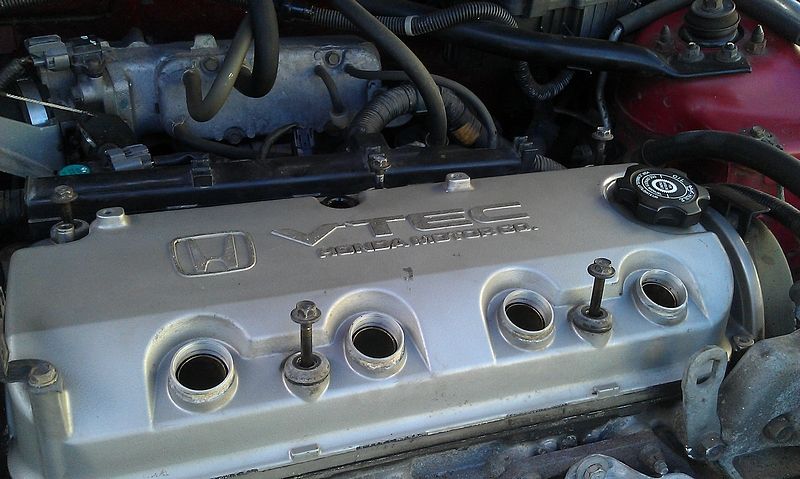
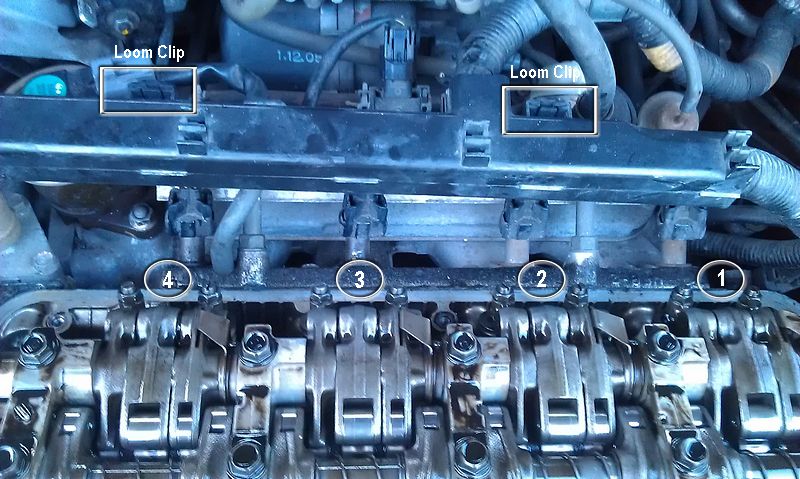
The primary ancillaries of the rocker cover in this howto are highlighted below. I usually unclip a couple of the HT Leads from the plastic clips/guides just for a bit more freedom of movement when removing them.

You will be undoing 5 bolts and removing 4 HT Leads and two breather hoses then the rocker cover itself. The bolts once fully unscrewed from the head, can be left in the rocker cover. The rubber washers/seals will hold onto them whilst you lift it away.


Spark Plug removal.

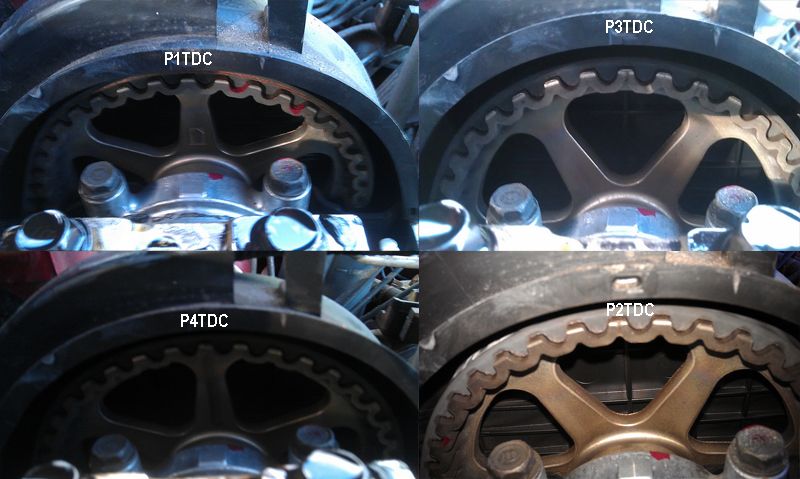
I decided to remove the spark plugs in order to make the crank shaft rotation easier. With the plugs removed the compression stroke is negated as the air will escape through the opening left by the plug allowing the engine to freely rotate.

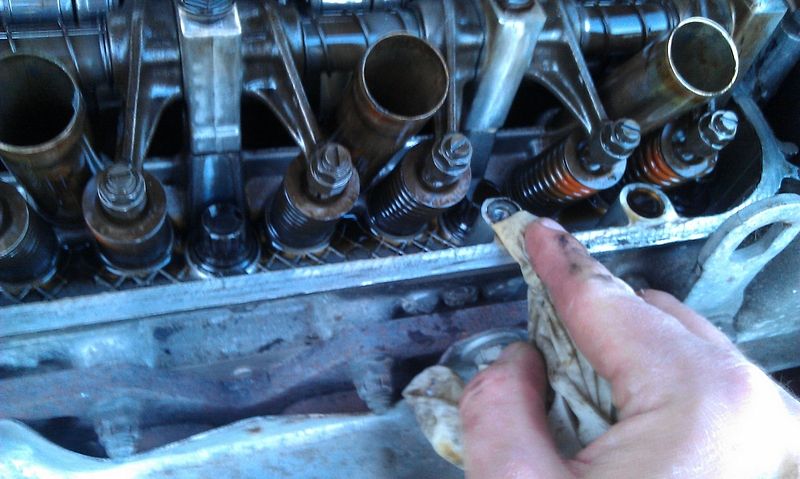
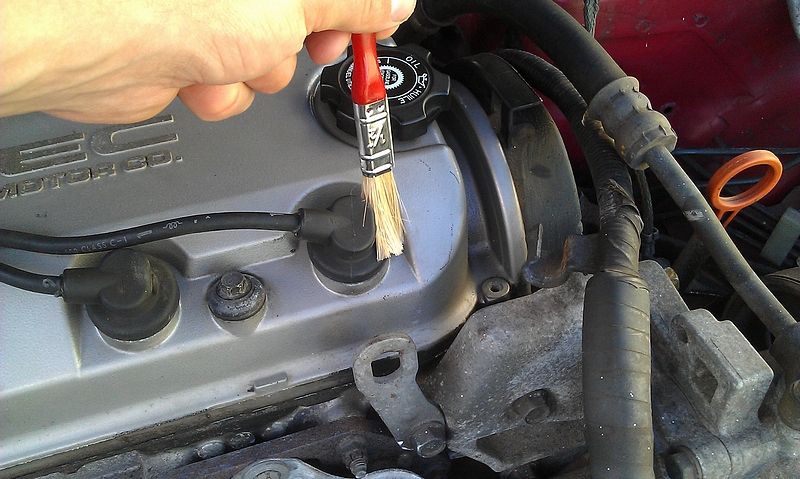
I usually start by cleaning around the leads and rocker. Might seem unnecessary but I want to reduce any debris falling down the Spark Plug channel then into the cylinder.


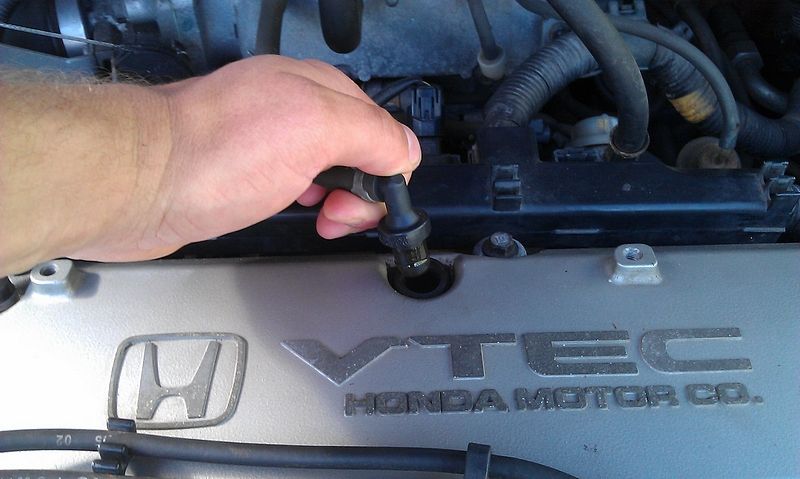
Once you are happy its clean you can grab the around the middle and twist it back n forth then pull it up and out.


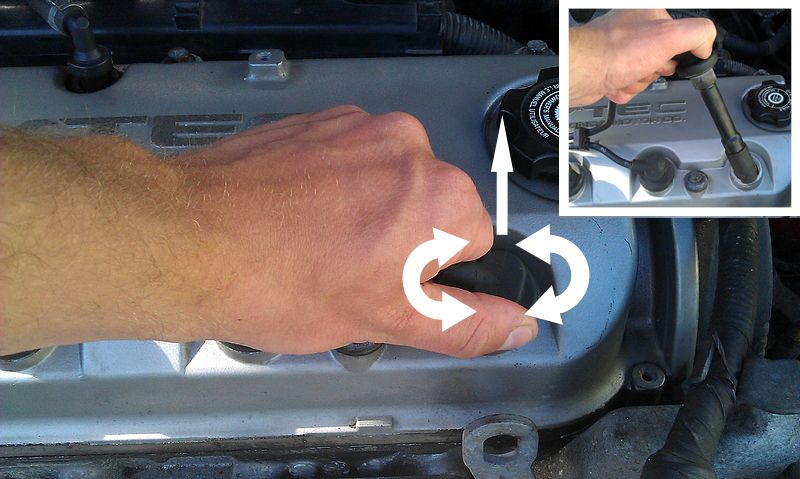
Now the HT lead is out, the top of the Spark Plug will be visible down inside the sleeve.


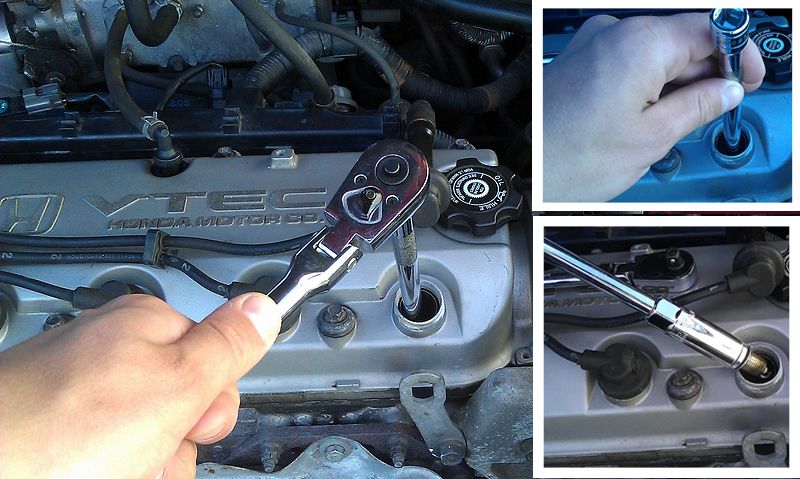
I use a 250mm extension bar and spark plug socket. This socket has a rubber sleeve/retainer inside which will hold the Spark Plug Insulator. You will feel some resistance as this slips over it, but keep on going and eventually the socket will seat on the hex collar with a positive action. Once seated, I'll just crack it with the ratchet then spin it out by hand then lift it up. The plug needs quite a few revolutions before it is free, maybe about 10 full turns.


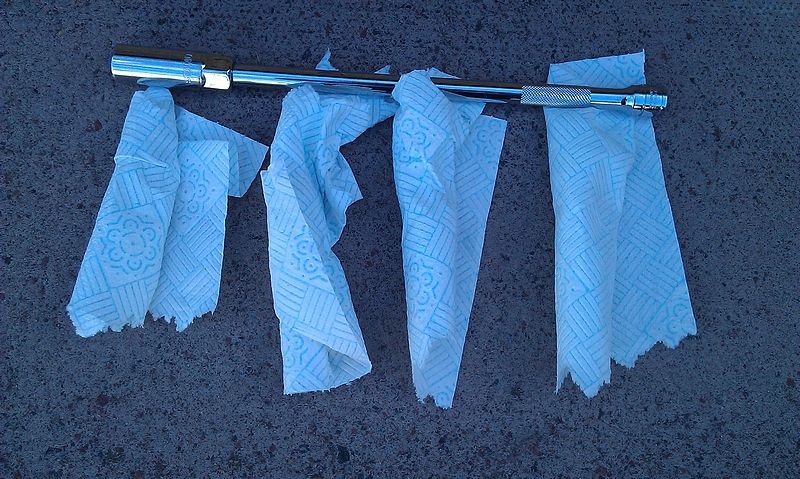
Once the plugs are out I'll wrap them in paper roll as they will be going back into the engine. I like to keep the plugs from contaminants and also in cylinder order so I can give them a quick inspection prior to re-installing them.


Condition Guide NGK Spark Plugs USA
 
Removing the Rocker Cover.

Now the HT Leads are clear pullout the PCV Valve

8pulloutPCV_tn1_zps9819aa91.jpg


Release the breather hose clip, you might lose the spring clip as you pull the hose away so 'park it'back up at the upper clip then pull the hose up and off.

9breather_tn1copy_zps4169c9de.jpg


Undo the 5 10mm bolts

19rcoverboltsout_tn1_zpse9406148.jpg


Ease the cover off, pry gently here if needed..

20pryeasyrocker_tn1copy_zps3338cf57.jpg


Cover off reveals valve train. I've highlighted the intake valves, the exhaust valves are just below out of shot. There are sixteen valves but they might not all need adjustment, use the feeler gauges. I think I adjusted 6 valves some exhaust and some intake. I had to unclip the loom harness for clearance in order to use the Jam Nut Tool on the intake side.

23avavletrain_tn1copy_zps310e28da.jpg


Turn the crank until Cylinder 1 is at Top Dead Centre (TDC). I never took the upper timing belt cover,however you can identify this from the other side of the camgear. Cylinder 1 (Piston1-TopDeadCentre) has an designated arrow and two indicator grooves that should align to the head. You need to rotate the crank 180degrees which rotates the cam shaft (gear) 90 degrees. These indicator grooves will be used to determine the remaining piston positions.

22turncrank_tn1_zpsb39f724f.jpg


Now you must be aware to move across the valve train in the correct order once you have determined TDC for the relevant cylinder.


This sequence is 1 3 4 2 (refer to valve train image)


21c1tdc_tn1copy_zps3c60009a.jpg


One you are sure you have the correct cylinder set, then insert the correct feeler gauge. The exhaust and intake have different gaps so be sure to use the right feeler. I put white tape on the handle of the intake feeler to quickly identify it.


There should be slight drag when it is set correctly. Unless you have experience this could be quite ambiguous; just how much drag is slight drag? You might be lucky and find that some valves are within spec – not too tight, not too loose. Use these ones as a guide. Don't be ashamed to go around all the valves a second time to ensure you are happy with the job.


The Jam Nut Tool makes this job a bit easier. There is enough leverage on the handle to crack the locknut, the blade can rest in the adjustment screw. The tool does not need to be removed, insert the feeler , adjust until you are within spec then turn the handle back to the starting position which should be close to the torque spec on the lock nut.

24c3exhaust12_tn1copy_zpsbb396468.jpg

Intake: 0.26 mm (0.010 in)+ 0.02 mm (0.0008 in)
Exhaust: 0.30 mm (0.012 in) + 0.02 mm(0.0008 in)
 
Reassembly.


Clean up the mating surface.

28cleangasketsurface_tn1_zps67c6733b.jpg


I had replaced my rocker cover gasket a few months ago. If it looks ok then just reuse it but you still need to apply some liquid gasket on the corners. I took a few minutes to clean up the remnants of the old liquid gasket then reapplied the new. It is recommend to install this in under 5 minutes before it starts to cure.

29oldbond_tn1_zps16a7ee6c.jpg


30removelodbond_tn1_zpsbae979fa.jpg


31rebond_tn1_zpse76a90c3.jpg


Torque the cover back down at 7.2ft-lb. I usually work from the centre bolt, outward. Attach your PCV and breather hose.


32atorquerocketbolt_tn1copy_zps3f873b55.jpg


Reinstall Spark Plugs.

Should you apply anti-seize?

I've posed this question elsewhere and have also seen it asked by other folk. The consensus was pretty much split. There is an argument the plugs could seize in the head without it, the counter argument is that the plugs should be 'dry torqued'. A lubricated thread (a wet torque) would in effect cause the plug to the over torqued, possibly even stripping the thread.

The Honda manual instructs your to apply a small amount of anti-seize to the threads, yet NGK themselves recommend to leave dry. I have always dry torqued the plugs personally.

http://www.ngksparkplugs.com/pdf/TB-0630111antisieze.pdf

Slip the plug inside the spark plug socket. Slowly lower it down on the extension bar and slowly tighten it, finger tight. You should get about 10 revolutions until the plug begins to seat. If you feel you can't turn these in after a couple of turns back it out and try again. Do not try and force these plugs in with the ratchet – you could strip the head and end up in a world of grief.


When happy that they have seated,torque them to 13ft-lbs. Now put your HT Leads back in.

33reinsertbyhand_tn1copy_zps495d488b.jpg


Recheck your hoses are firmly in position, your wires and loom are all clipped back into position.

You have now completed your Valve Clearances and Spark Plug inspection.
 
Sterling work buddy! Sterling work!

citizen-kane-clapping.jpg


This is both a "How To on 6th Gen Valve Clearance" and a "How to" on "How To, How To" :lol:

:D
 
Absolutely awesome job as usual! I don't think even Honda could of come up with a guide as good as that! :D

Thanks for taking the time to write this up and upload all those images, really appreciated by all!
 
I would imagine the method would be exactly the same, but the valve clearance size might be different so might the not size you need fo the adjuster tool, hopefully there should be guides on the H22 engine around the internet as its a popular engine.
 
Top