Guys I cant take credit for this one as Al (Ken Hom) did this diy and asked me to post it up.
Great work Al and keep the DIY's coming
don’t know whether anyone may be able to make use of this thread hope it helps....
Shortly after purchasing "Mr Chow" from Andy (Monks) edit Monks no warranty was provided or implied at point of purchase lol :blush: I experienced a VSA warning light and subsequent engine cut out (thankfully on one of Maldon’s country lanes and not at any great speed!) After managing to restart the engine and nursing her back the 70+ miles home I feared that it may well be the dreaded curse of the VSA unit - but found this to have been replaced under warranty by Andy not long ago...unsure of any other probs and with the engine block light still on I deduced the following...
I took the car to the crown garage - soham, Suffolk near to Ely for a diagnostic and they were very helpful in practise and didn’t even charge me to plug her in and diagnose! So kudos to them! (Incidentally speak to Matt or Steve if you need to contact very in the know blokes).
They rightly diagnosed the tps at fault and quoted a £215 quid plus vat figure for the part and a further £65 quid to fit it! The time to fit the part on the job sheet came to 0.20 - i.e. 20 mins, so rightfully appalled at this I decided to give Honda a miss and have a go myself. Hopefully the following will be of use to anyone having the same problem or experiencing the same issues any questions please ask!
(Incidentally this part is not covered under warranty - I asked and was told it was a "perishable" - sure that only applied to things like brakes and tyres but anyhow...)
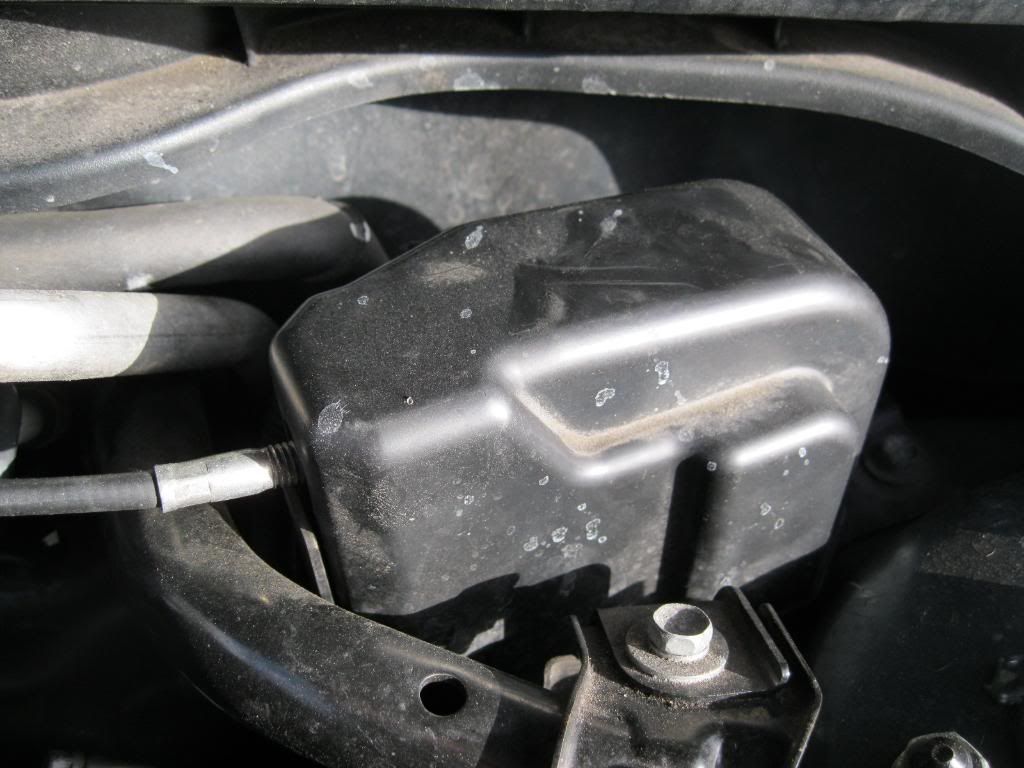
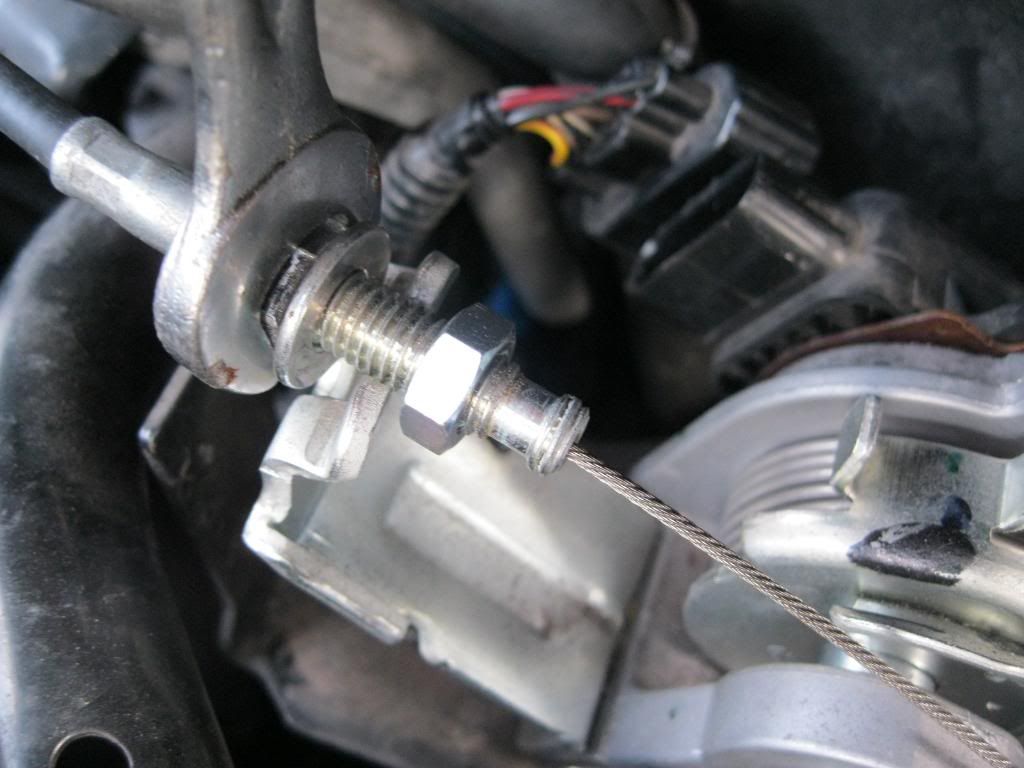
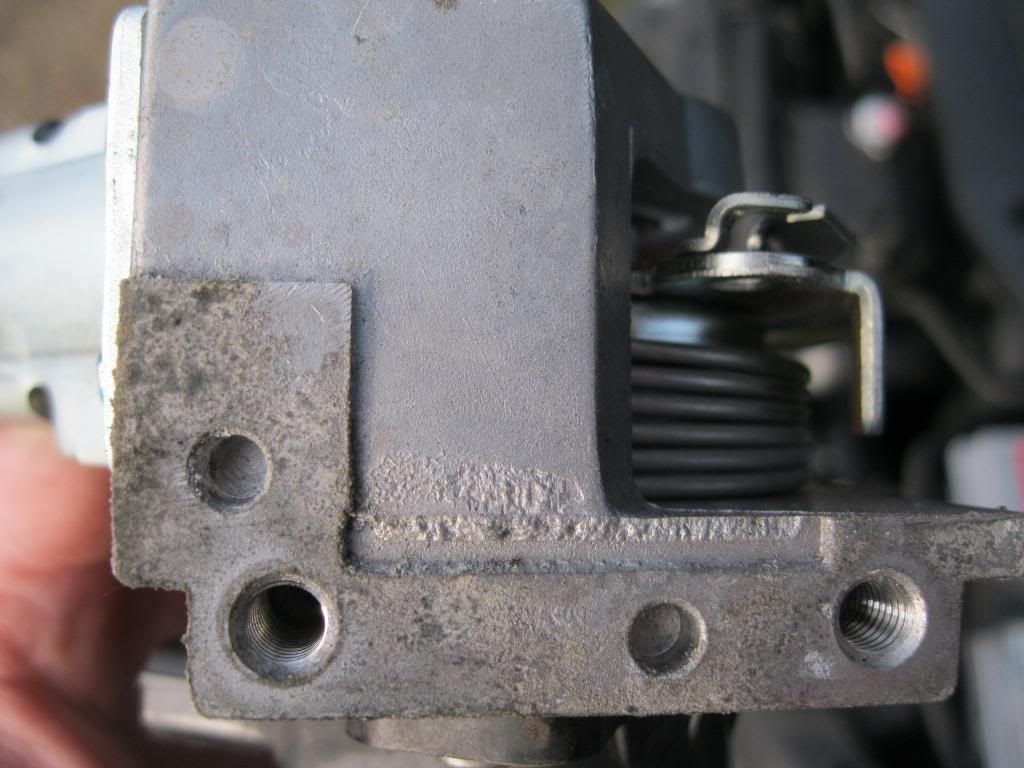
First picture is obviously the TPS (throttle position sensor). This threw up a VSA warning light and effectively stalled the car.
The sensor itself - to my understanding continuously monitors - as you may think, the position of the throttle pedal and talks to the air/fuel mass sensor to maintain the right mixture - as with a petrol car. It is a mechanical set-up with a sensor attached and is not known to fail.
I managed to source a replacement part from a '05 car - which must incidentally only come from a diesel for a much more reasonable £46 posted which was tested prior to dispatch.
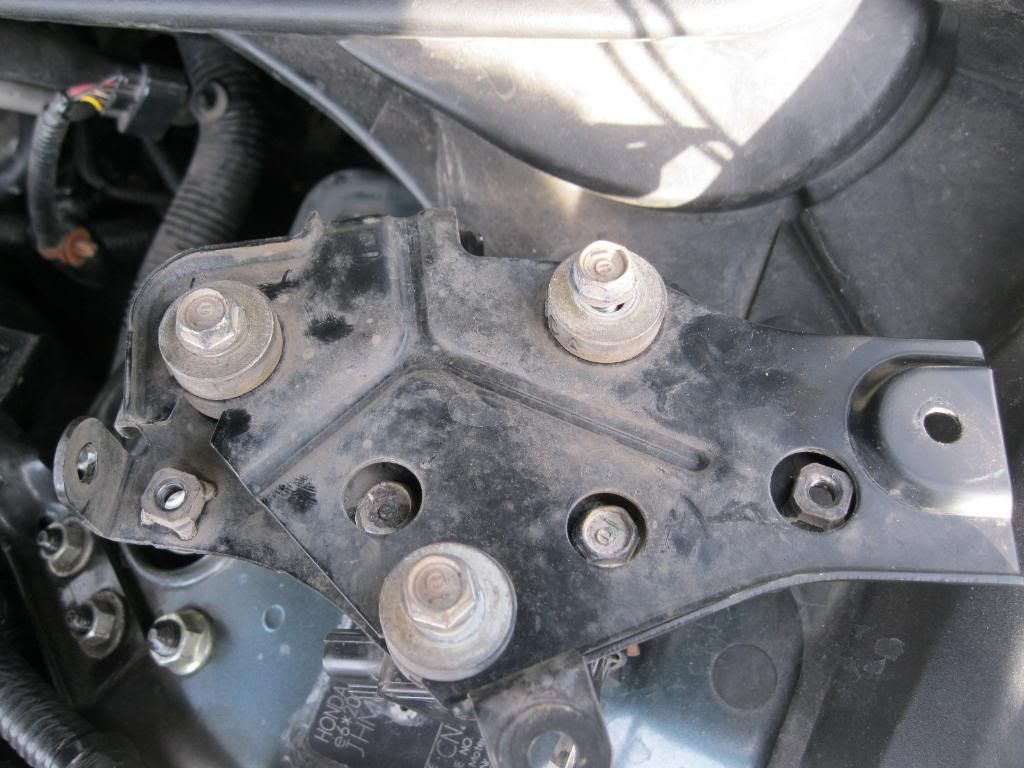
The picture shows the cowling/shroud over the TPS and relevant linkage.
you will need a selection of the following tools to replace the sensor which comes as separate unit.
10mm, 14mm socket
ratchet (obviously")
long extension bar for said ratchet
set of long nose pliers as per picture
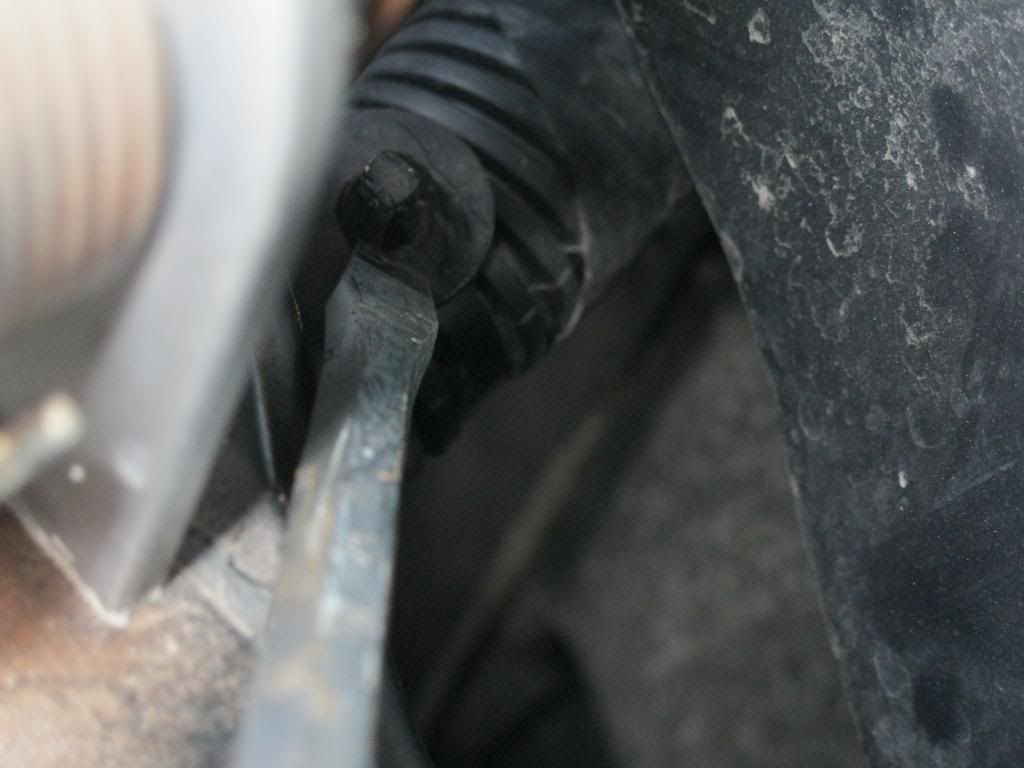
open ended spanner - 14 mm (if memory serves)
a brew - preferably coffee but not mandatory
cheeky cigar or equiv. - (optional)
contact cleaner
Other half to come out in the cold to help start her up
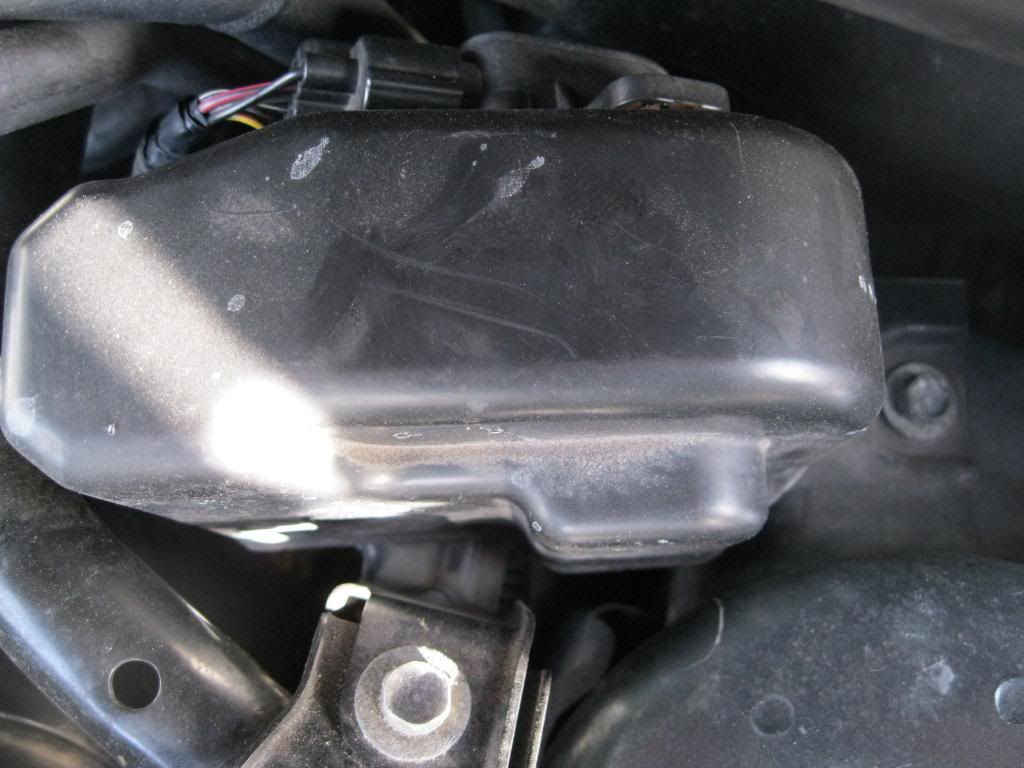
Right! quick sip of the brew and on to removing the cover - three bolts all told - two easily accessible and one to rear which will require the extension
cowling removed you should see to the back of the unit (bulkhead) the linkage and sensor
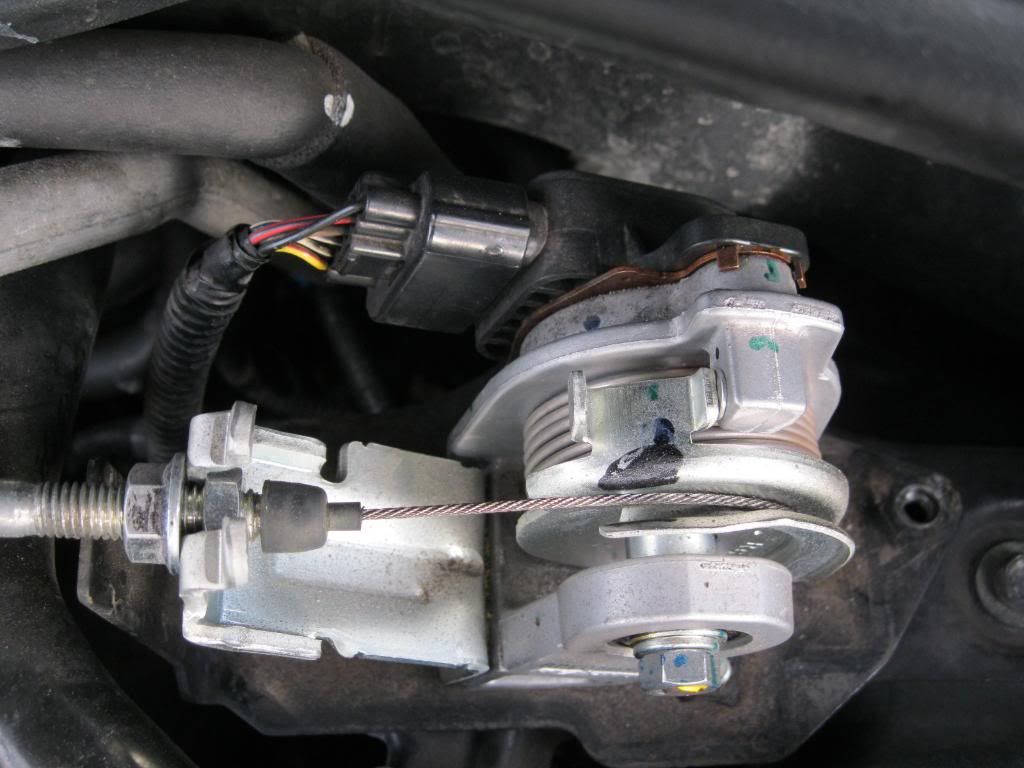
Next step is unclip the sensor - be careful as with all Honda clips irrespective of age they love to snap so go steady!
You’re then left with the throttle linkage itself to detach. Pull the throttle linkage to its maximum to release tension on the cable and remove by gently twisting - this should be easy enough to remove but three hands would be handy lol
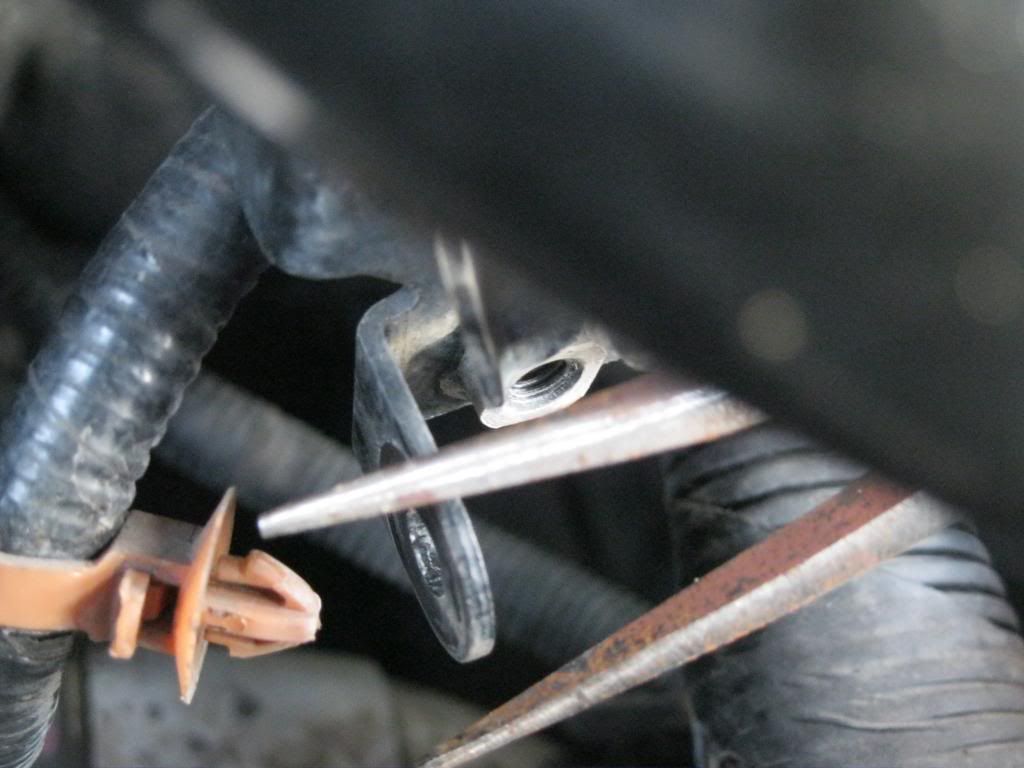
Now that has been released you will need to undo tension on the cable the other end, N.B there is an adjuster as shown in the pic for tension - it helped me to make a note of how many threads this was wound to for reassembly - although is purely mechanical and will not affect the sensor, I wanted to keep this a simple as possible.
Using an open ended spanner release the nut and the whole mechanism should now be free to unbolt.
Behind the sensor - following the wire you will see a black clip to remove do that now with the long nose pliers - being careful not to damage the clip as you will need to replace later.
You will now need to also remove the orange clip off the main pipework and it’s a bugger to get to but don’t damage it as it needs to be reattached later.
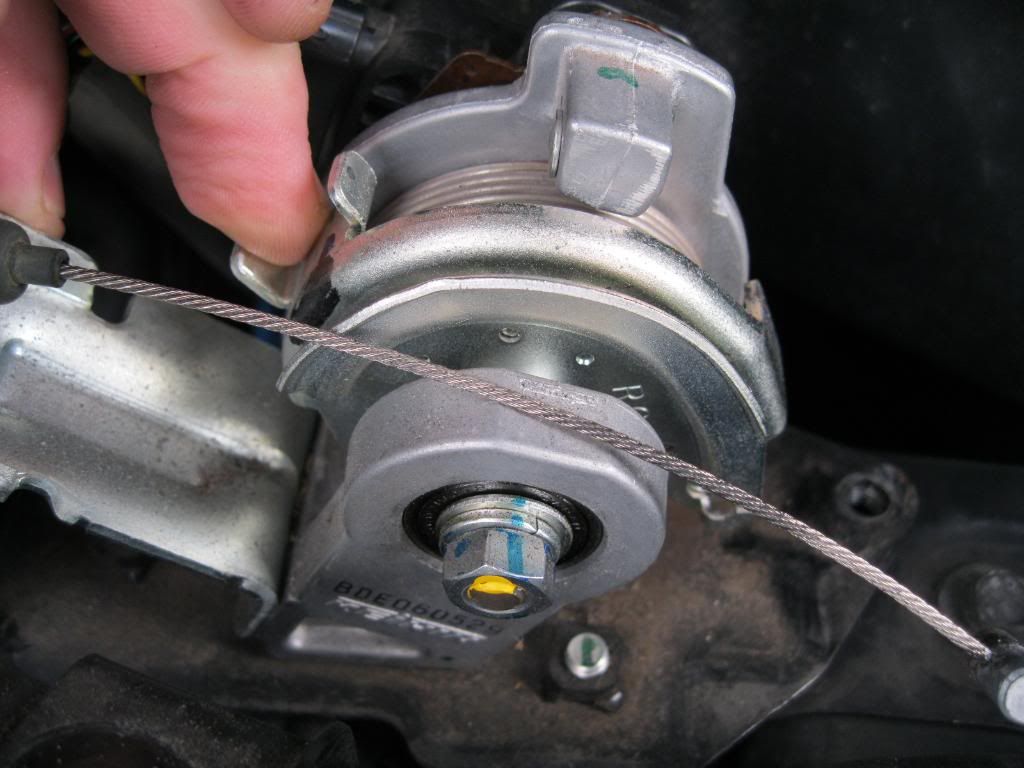
You now need to access the unit from beneath the retaining plate held on as shown with a couple more bolts remove those now and you should be able to now remove the unit and turn upside down.
There will be a further 3 captive nuts to remove under the 3 larger ones securing the plate - n.b you will not be able to access these without removal of the plate to save time so just do it - trust me, I tried lol - with the ratchet fully remove the unit from the plate and undo other nuts accordingly.
Replace the new unit in reverse order and it should now be fairly straight forward having done the disassembly. Remember the orange and black clip for the pipework, and when it comes to the tension of the throttle cable having made a mental note of its position there should be no difference in "response" from the pedal side.
When reassembled - but before replacing the cowling, get a begrudging other half or mate to sit inside and start the engine. Let her tick over and check for any lights - or hopefully lack of after diagnostic is done by the ecu.
Being aware that the engine will probably be cold at this point don’t boot her but accelerate to normal running speed in neutral up to 2k or so as if to change gear and ask to check if any lights come on again. The system should have reset itself as a matter of course.
Whilst they are doing this you will be able to ascertain that the linkage is correctly reassembled and that when the pedal is in the "open position" the linkage moves with it.
When happy ensure all bolts are tightened correctly and replace cowling.
If like me your lucky enough to have a bit of a drive to run her up and down a couple times then do so before you go on open road to ensure all is now well - just me being **** I guess but for peace of mind...
That’s it and you’ve now saved a princely sum and like me learnt a bit too!
Hope this helps any probs give me a shout cheers Al
Great work Al and keep the DIY's coming
don’t know whether anyone may be able to make use of this thread hope it helps....
Shortly after purchasing "Mr Chow" from Andy (Monks) edit Monks no warranty was provided or implied at point of purchase lol :blush: I experienced a VSA warning light and subsequent engine cut out (thankfully on one of Maldon’s country lanes and not at any great speed!) After managing to restart the engine and nursing her back the 70+ miles home I feared that it may well be the dreaded curse of the VSA unit - but found this to have been replaced under warranty by Andy not long ago...unsure of any other probs and with the engine block light still on I deduced the following...
I took the car to the crown garage - soham, Suffolk near to Ely for a diagnostic and they were very helpful in practise and didn’t even charge me to plug her in and diagnose! So kudos to them! (Incidentally speak to Matt or Steve if you need to contact very in the know blokes).
They rightly diagnosed the tps at fault and quoted a £215 quid plus vat figure for the part and a further £65 quid to fit it! The time to fit the part on the job sheet came to 0.20 - i.e. 20 mins, so rightfully appalled at this I decided to give Honda a miss and have a go myself. Hopefully the following will be of use to anyone having the same problem or experiencing the same issues any questions please ask!
(Incidentally this part is not covered under warranty - I asked and was told it was a "perishable" - sure that only applied to things like brakes and tyres but anyhow...)
First picture is obviously the TPS (throttle position sensor). This threw up a VSA warning light and effectively stalled the car.
The sensor itself - to my understanding continuously monitors - as you may think, the position of the throttle pedal and talks to the air/fuel mass sensor to maintain the right mixture - as with a petrol car. It is a mechanical set-up with a sensor attached and is not known to fail.
I managed to source a replacement part from a '05 car - which must incidentally only come from a diesel for a much more reasonable £46 posted which was tested prior to dispatch.
The picture shows the cowling/shroud over the TPS and relevant linkage.
you will need a selection of the following tools to replace the sensor which comes as separate unit.
10mm, 14mm socket
ratchet (obviously
long extension bar for said ratchet
set of long nose pliers as per picture
open ended spanner - 14 mm (if memory serves)
a brew - preferably coffee but not mandatory
cheeky cigar or equiv. - (optional)
contact cleaner
Other half to come out in the cold to help start her up
Right! quick sip of the brew and on to removing the cover - three bolts all told - two easily accessible and one to rear which will require the extension
cowling removed you should see to the back of the unit (bulkhead) the linkage and sensor
Next step is unclip the sensor - be careful as with all Honda clips irrespective of age they love to snap so go steady!
You’re then left with the throttle linkage itself to detach. Pull the throttle linkage to its maximum to release tension on the cable and remove by gently twisting - this should be easy enough to remove but three hands would be handy lol
Now that has been released you will need to undo tension on the cable the other end, N.B there is an adjuster as shown in the pic for tension - it helped me to make a note of how many threads this was wound to for reassembly - although is purely mechanical and will not affect the sensor, I wanted to keep this a simple as possible.
Using an open ended spanner release the nut and the whole mechanism should now be free to unbolt.
Behind the sensor - following the wire you will see a black clip to remove do that now with the long nose pliers - being careful not to damage the clip as you will need to replace later.
You will now need to also remove the orange clip off the main pipework and it’s a bugger to get to but don’t damage it as it needs to be reattached later.
You now need to access the unit from beneath the retaining plate held on as shown with a couple more bolts remove those now and you should be able to now remove the unit and turn upside down.
There will be a further 3 captive nuts to remove under the 3 larger ones securing the plate - n.b you will not be able to access these without removal of the plate to save time so just do it - trust me, I tried lol - with the ratchet fully remove the unit from the plate and undo other nuts accordingly.
Replace the new unit in reverse order and it should now be fairly straight forward having done the disassembly. Remember the orange and black clip for the pipework, and when it comes to the tension of the throttle cable having made a mental note of its position there should be no difference in "response" from the pedal side.
When reassembled - but before replacing the cowling, get a begrudging other half or mate to sit inside and start the engine. Let her tick over and check for any lights - or hopefully lack of after diagnostic is done by the ecu.
Being aware that the engine will probably be cold at this point don’t boot her but accelerate to normal running speed in neutral up to 2k or so as if to change gear and ask to check if any lights come on again. The system should have reset itself as a matter of course.
Whilst they are doing this you will be able to ascertain that the linkage is correctly reassembled and that when the pedal is in the "open position" the linkage moves with it.
When happy ensure all bolts are tightened correctly and replace cowling.
If like me your lucky enough to have a bit of a drive to run her up and down a couple times then do so before you go on open road to ensure all is now well - just me being **** I guess but for peace of mind...
That’s it and you’ve now saved a princely sum and like me learnt a bit too!
Hope this helps any probs give me a shout cheers Al