What's new

DIY Cold Air Intake for 7th Gen Petrol

Stevearcade

TA Friend
Staff member
Messages
6,891
Reaction score
448
Location
Eastbourne
Car
2003 Accord CM2
Hi Guys,

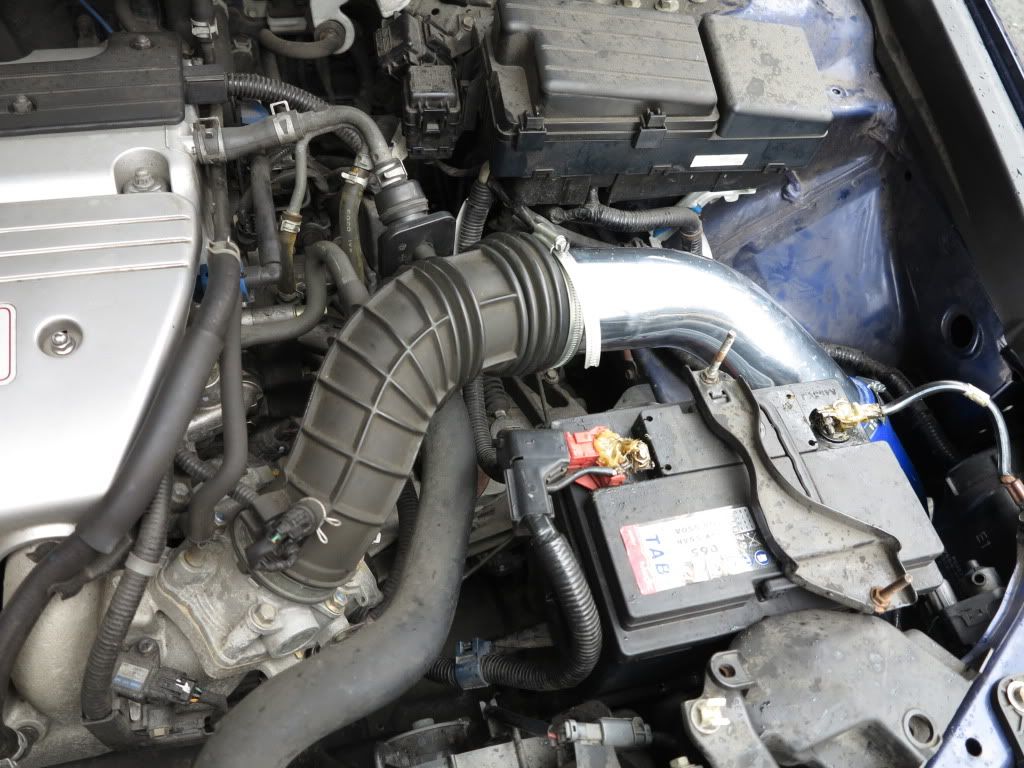
Well you may have seen my DIY Short Ram Intake, but after some reading around and general itchiness to do more DIY modding, I thought I'd go the whole hog and make it a proper Cold Air Intake. Driving this decision was partly how cheaply I could do and partly that I felt there was more to be gained from moving the intake out of the engine bay and away from potential heat saturation. Also I read the typhoon purchase and fitment thread of F6had's brother's car and was very inspired.

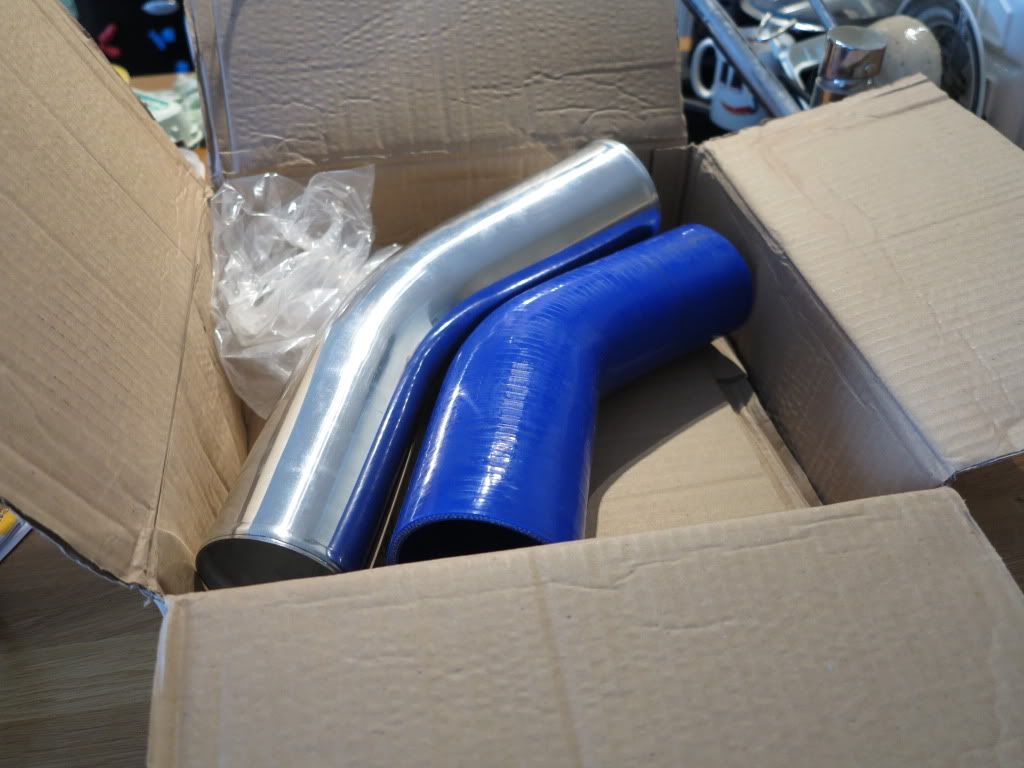
So I already had a K&N filter, I just needed the pipe work. So I logged onto APMotorstore and bought a couple of 45 degree bits of pipe, 1 alloy, 1 silicone. (I actually bought from their eBay store as you can often save a couple of £ as their eBay prices are a tiny bit less on some items for some reason)

AirIntake13.jpg


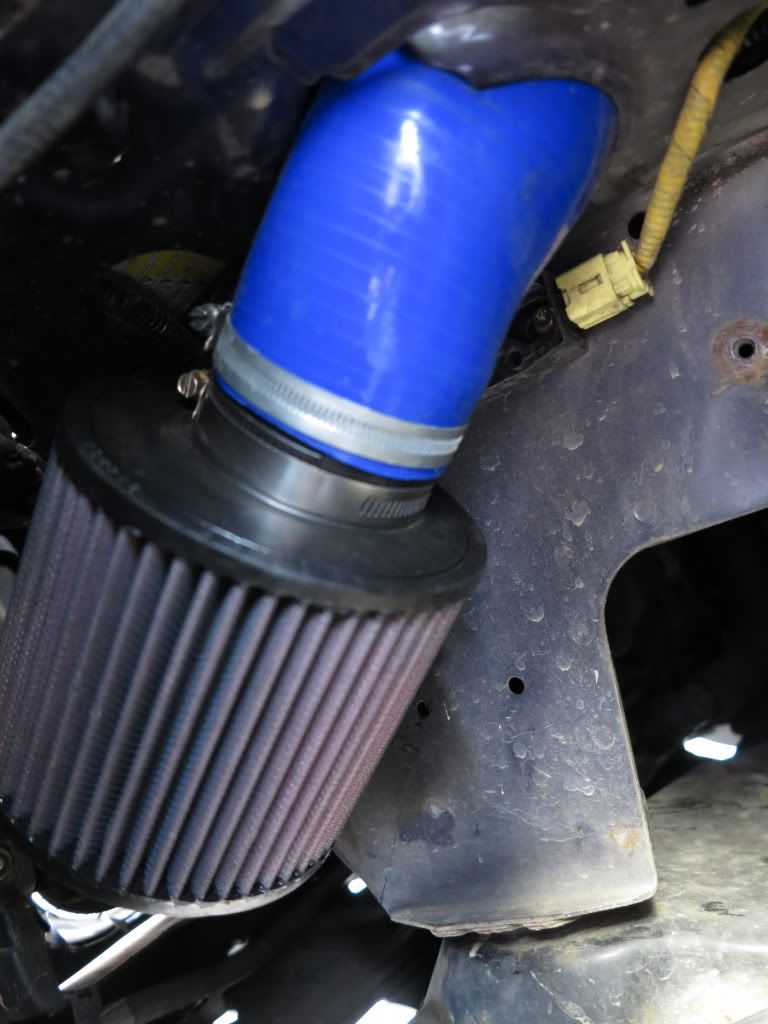
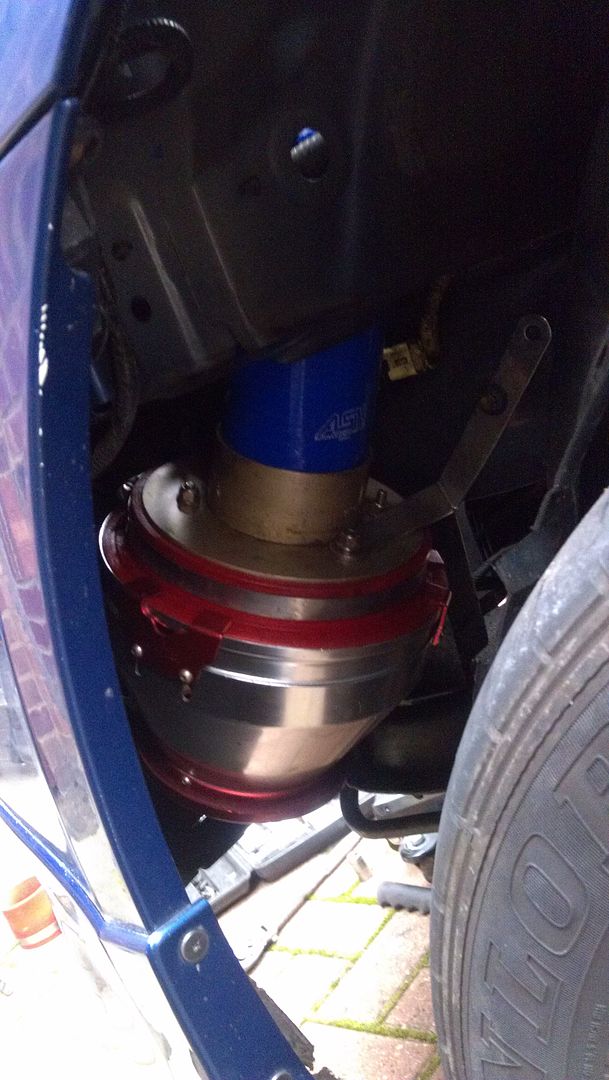
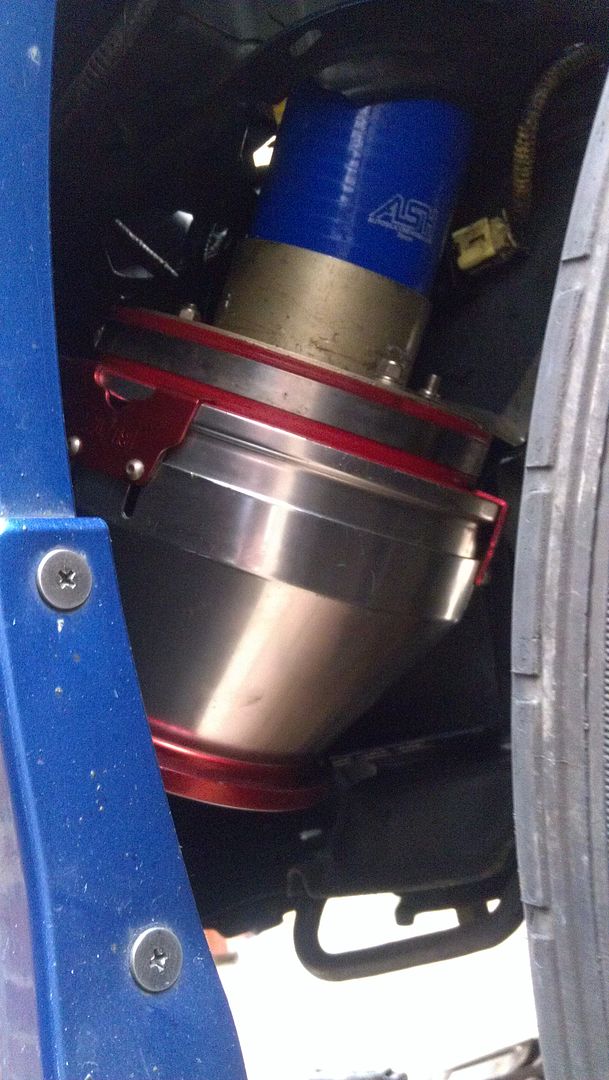
I then set about fitting them. The usual stuff of Bumper off (the resonator was already removed from my previous ventures) and run the pipes through the hole for the original inlet pipe from the resonator.

Put the hose clamps on and tighten it all up.

AirIntake14.jpg


AirIntake15.jpg


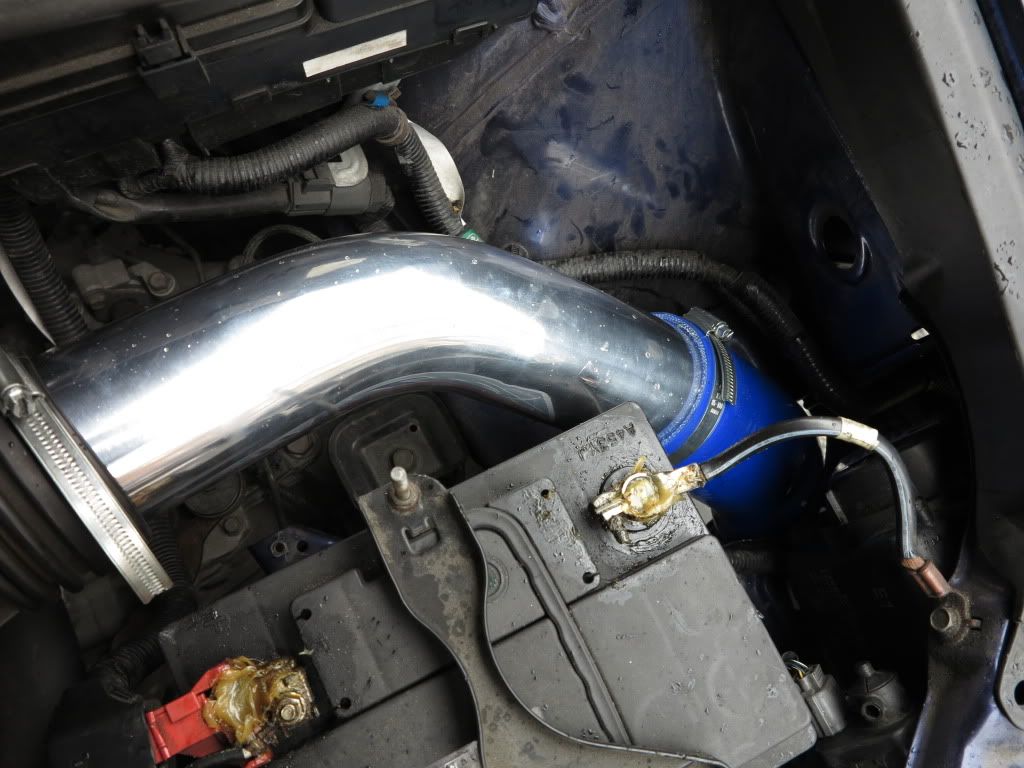
In the cavity where the filter goes, I had to trim a little off the silicone pipe, pop a piece of pipe I already had in there as a go-between the silicone pipe and the rubber mounting of the filter. Fit the hose clamps and tighten everything up.

AirIntake16.jpg


AirIntake17.jpg


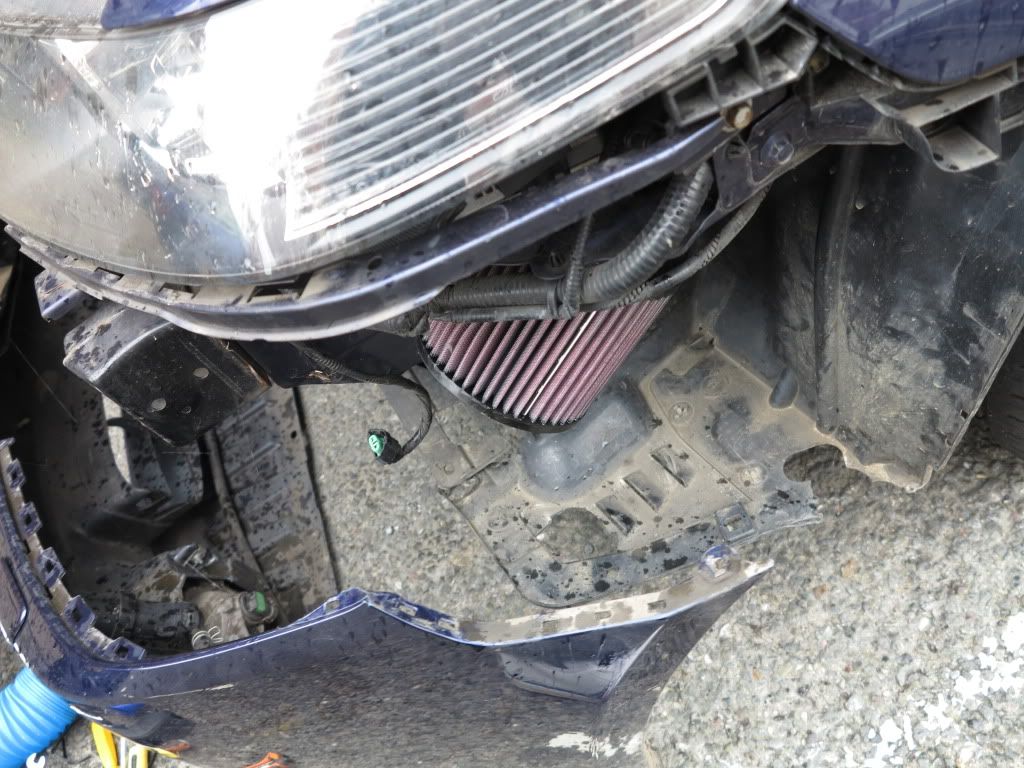
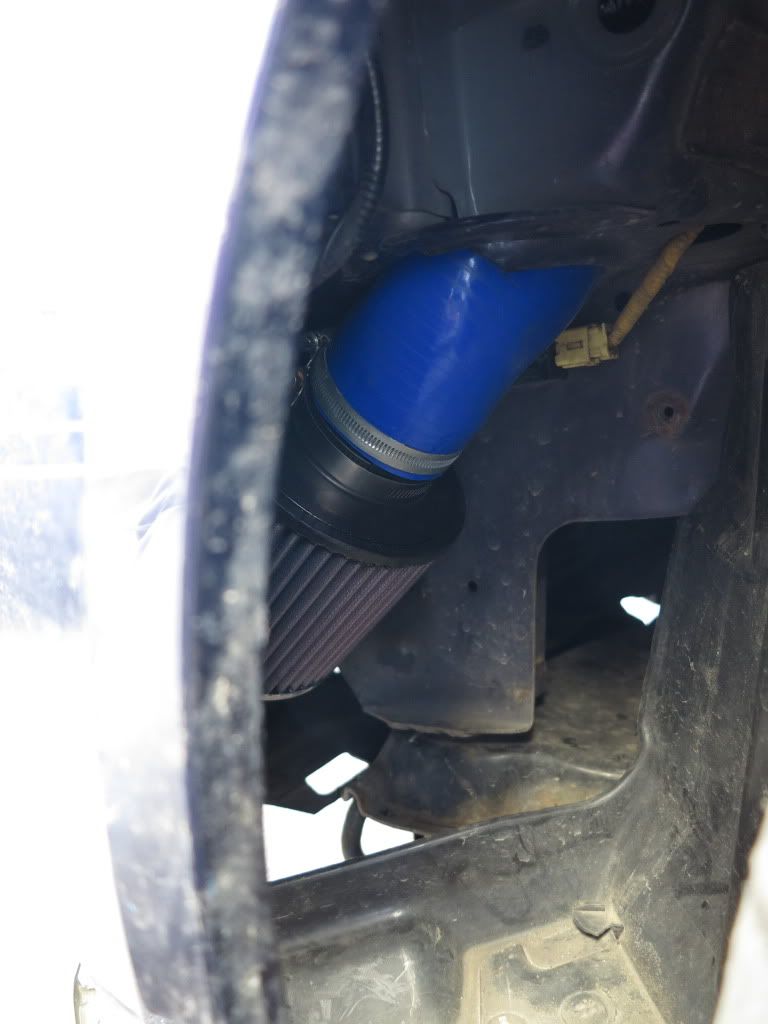
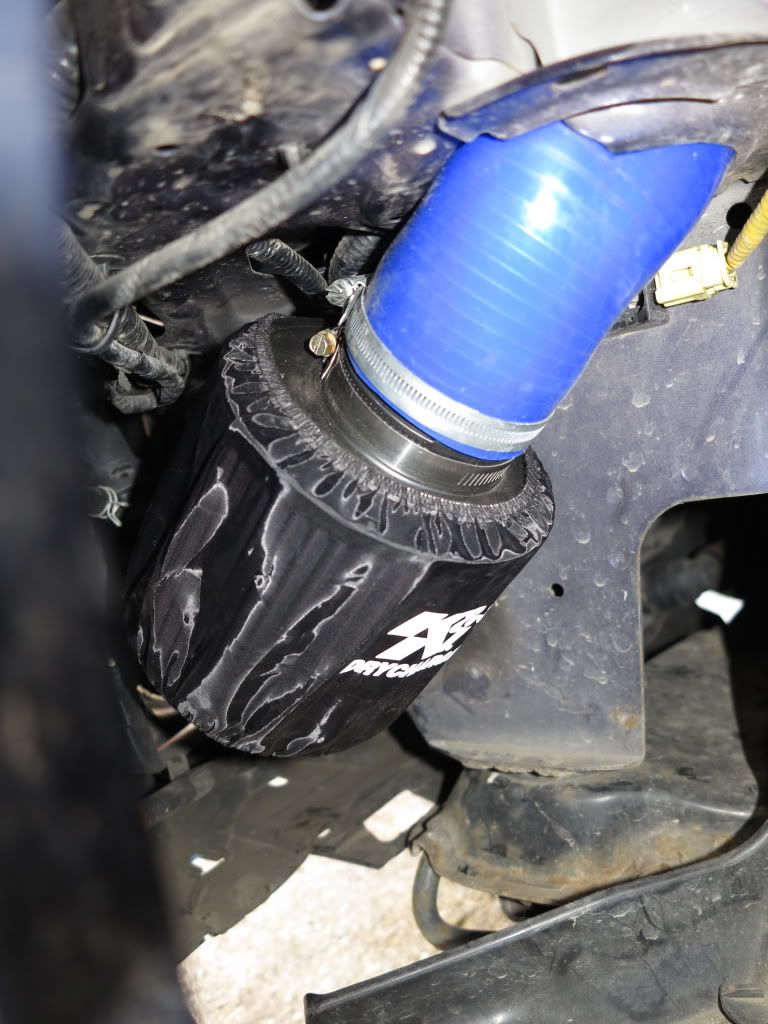
Put the bumper back on and it's done. It's that easy. Sorry my pictures aren't better, but it was starting to rain and I was keen to get it all done before the heavens opened. Sod's law the rain stopped the moment I was finished putting the bumper back on :rolleyes: .

Anyway, with the parts bought, imagining you still have the stock air box in and so need to remove the air box and resonator, it could probably be done within an hour. As it was half way done already for me, it took only about 30 minutes.

I've yet to take it for a test drive, but will go out shortly and spank it on some A roads, see how it is. I imagine it will be just as loud, but I'm hoping for a slightly more responsive acceleration as the air should be colder than it would have been with the previous setup of the short ram.

Just in case anyone wonders, the stock pipe from the throttle body is 80mm inside diameter (a fraction larger, but with the hose clamps on it's fine). So that's your pipework diameter starting point. I accidentally bought a 70mm K&N originally :rolleyes: so my silicone pipe is also a reducer from 80mm to 70mm. But I think there's just enough space to squeeze an 80mm pipe through the hole to the resonator cavity. So 80mm is you measurement of choice for pipes and K&N fitting.

Anyway, I hope this is straight forward to follow should anyone else fancy having a go. Any questions just ask.

Thanks for reading.
 
Very impressive Steve, pictures are fine, I'm starting to get tempted.
To the nearest tenner, how much do you reckon the whole lot would cost from scratch (DIY of course) ?
 
Great stuff steve and at a fraction of the cost as well.
One thing though mate i would buy a K&N water prove cover for the filter there about £10 I think just for piece if mind.
 
Yeah the water thing had crossed my mind, Brett. Might sort that out in the coming days.

Brian, I think the K&N was about £45 and the piping and hose clamps probably came to about £45. So throw in one of Brett's waterproof K&N filters and you're looking at a ton mate. Less than half the price of the Typhoon :) .

As for performance:

- Car seems happier on start up than with the short ram (like to do with below point about low rev feel of the car)
- Sound is slightly different from the short ram, not louder or quieter, but the note is different - I prefer it
- Pulls more smoothly through the revs than it did before, mainly because of the next point
- Low rev response is improved over both short ram and stock (from what I can remember). There's more urgency about the car and it makes me realise now that I was perhaps suffering from heat saturation more than I realised

To sum up, if you don't mind the increased volume and are happy with spending £100, it's well worth doing in my view. Changes the feel of the throttle and makes the car feel a bit more ballsy.

Edit: K&N list the DryCharger at £22.77 before VAT :huh: ! Off to eBay ;)
 
That's a bit pricey steve I'm sure if you shop around you will find a better deal .
 
Well done steve, this is a great DIY performance upgrade. Now my work troubles are all over, I can seriously think about again doing this mod, So you think the long ram is the better choice?
 
Well done steve, this is a great DIY performance upgrade. Now my work troubles are all over, I can seriously think about again doing this mod, So you think the long ram is the better choice?

Without a doubt man. The whole feel of the car is better. It's subtle, but I realise I was suffering heat saturation with the short ram. No surprise really considering my £12 hear shield :lol: .
 
lol, no expense spared! :lol: you have convinced me and Fahad bhp figures were great on our cars, So it makes sense to get the best out of them............


any one got any tips how to stop brakes from squeaking or humming as they brake, they are newish but its starting to bug me now
 
Yeah I mean, obviously the typhoon is from the throttle body and mandrel bent, so is as good as it gets. My method... well... isn't. But you get what you pay for and there is still an improvement in performance. A Shell garage is finally opening in my area. Might have to fill her up with the good stuff soon and she how she compares :D .
 
Just ordered a Drycharger splash cover, got confirmation of the size before I ordered too, very rapid communications from seller. £14.90 in total (free postage) much better value than from the K&N site itself.

eBay K&N Drycharger

Will fit it this coming week. Hopefully I can just pull the wheel arch out and get to it without having to take the whole bumper off again :rolleyes: .
 
^ wheel arch (inner fender they call it) does come away without having to remove front bumper, IIRC nearside is a bit easier than offside

.
 
Good stuff Steve and yes you can just get to the filter without removing the bumper.On mine i can unclip just the corner to make it easier to get at.
 
Awesome. I shall have a go when it arrives and try and get more snaps.

Just for the record drove a 125 miles today and the car felt very good. It was a cold (about 10 degrees), sunny day and bone dry, so not paranoid about puddles. Ideal driving conditions really. She's pulling more efficiently through the revs. Low rev response is improved, but it's between 2K and 4K where you really notice the difference. For example, pull away gently and shift into 2nd, then gradually speed up until the revs are at 2500, then boot it... the kick back is fantastic and it just pulls evenly from there on in to the rev limiter. The kid in the back sit there laughing, loving the noise shouting "go faster" and thinks it's brilliant, the Mrs shouts at you to stop being naughty and wasting petrol :lol: . The upper range is what it always was (7000RPM of 2.4 VTEC... ;) ). On the whole it's a subtle improvement on the previous short ram and the stock airbox too, but it is noticeable and nicer. Can't put my finger on it, but the engine certainly sounds and feels more lively. It's asking me to give it more in my driving style if you know what I mean. It says "go shift up at 4.5K not 2K ;) .

Also, I think that under low to medium revs the sound is slightly quieter than the short ram, but the roar when you go above 4K is better then the short ram. It's not louder but the tone is different from the short ram (sounds a bit like there are some mid-range harmonics from the bass tones, ***umably coming from the resonance of the piping) and you can hear the air being sucked up more somehow :unsure: . Whatever it is, it's great :D .

Anyone who want their car to feel instantly more sporty (even though some of it is just placebo caused by the sound ;) ) sort yourselves a Cold Air Intake. It's well worth it in my books.
 
Good feedback steve I might go for this myself lol
 
Do it Brett, I promise you'll feel a difference from having the filter in the engine bay.
 
This mod will prove much better in hot weather so I will do this before the summer I think.
 
Found this the other day

http://www.hondata.com/techkseriesairboxmod.html

Not sure if the boxes are similar or not,done the version of this to my ATR airbox when i first got it as only cost £30 for a k&n panel filter. Made more noise than my typhoon in some ways and was very good for low down throtle response.
I removed all the resonator boxes in the front bumper and ran a cold air feed up to the front of the box.
 
Put the DryCharger on today. Managed to get a couple of better pictures of the filter fitment.

AirIntake18.jpg


AirIntake19.jpg


AirIntake20.jpg


I put this filter on last weekend and since then we've had borderline torrential rain all week, and I've been out driving in a lot of it. I was super paranoid and concerned about the fact I didn't have the rain cover on the filter. But I have to say not only was it bone dry in the cavity behind the bumper, there was no sign of water marks or anything to suggest water ever really gets up there :unsure: , which is nice and comforting thought. But I put the DryCharger on anyway as it can't hurt to have a little extra protection against water in the engine.

A note to anyone thinking of doing this, put the DryCharger on when you first fit the CAI. It's proper fiddly trying to get the cover on the filter with the bumper fitted. I had pulled away the wheel arch lining, removed one of the under panels, removed the screw that holds the bumper on on that side and popped the bumper off around the light fitment just to give me enough room to work. Had one arm going in under the car and the other arm going in through the wheel arch. My body and face was pressed against the bumper and I must have looked like was giving my car a big hug, with my hand up its top copping a feel :lol: .
 
For what it's worth, the chances of you taking on water through a filter down there from driving through puddles, or down a motorway in the pouring rain are slim to none.

You would have to actually submerge the entire filter by crossing a river to get water sucked up into your intake to cause hydro-lock. We've been running CAI's right down there on CRXs for years and no one has ever even come close to taking on water

That dryjacket thing is simply designed to prevent the filter getting wet from spray and then getting clogged with dirt sticking to the wet filter. It would do nothing to help if fording a river. :lol:
 
Oh I know it's just a splash prevention thing and like I say, it's a precaution. I've spent all week driving in torrid rain and the filter was clean as a whistle, so I've no problem having it down there now. Mind is at ease on the matter.
 
Cool. It sounded like you were worried you were going to kill your engine by driving through a puddle!! :)
 
:lol: Nah, this is just the first time I've ever done this, so I wanted to be on the side of caution.
 
:lol: Cheers Rob. So when you getting yours done? ;)
 
I will be building a monster soon! ;)
Go for it Rob if you fancy a meet up ill give you a hand mate iv got all the tools to do this bud.
 
Steve! So I finally got round to doing something with that pipework I bought off you...and the end result? A blitz sonic boom air filter down in the 'cold air chamber' :D instead of the K&N as per your DIY. As mentioned to you when buying the pipework, I had this filter left over from my B-Series engines and always loved it as it is HUGE, but have never tried it on a CAI install before..! It does sound rather epic, more noise than I remember! I think having it down under the bumper resonates the boom (this one is pretty loud anyway as it has a heatshield cone on it!) so double resonation!! The result...I now floor it whenever I get the chance to hear that almighty roar! I came from a stock airbox box with K&N drop in and resonator box removed...this is only ever so more noticeable when driving around normally...but when you accelerate hard you get a lot of noise. Put your foot to the floor and it literally sounds like a helicopter/jet plane boom kinda noise combined! Performance wise, when pootling around town I noticed the low end (upto 3k) deffo has more pull and is smoother. When giving it the beans, the vtec kick has smoothed out so I am ***uming the mid range power has increased/power is less restricted on cam switchover. Noise is scrambling my brain so im unsure if the car is actually going any faster when booting it lol! Anyway here are some pics of the filter installed, the filter is mounted using the existing bracket and the silicone pipe is currently just slotted into the filter opening (it was perfect size) but I plan to sort out some form of clamping later:

The Blitz filter:
IMAG0569_zps1d9be4ce.jpg


An angled shot:
IMAG0573_zpsda2c348e.jpg


A side shot:
IMAG0576_zpse4f41997.jpg


The top view is exactly as yours is Steve, as I used the same pipework as you ;) Thanks again for sorting me out the pipe and this DIY as I wouldnt have done it without you!
 
Wicked man! Glad it got you sorted. The sound of an unleashed (un-****led) intake on a K24 is flipping awesome isn't it!
 
Top