RussellS
Members
Hi, I have just finished fitting a DAB radio into my 8th gen Accord tourer and this is how I went about it. I will have to break this down into two posts as I don't think the forum software will allow all the pictures I want in one post.
I had this DAB radio in my 7th gen for about 3 years prior to this and I really wouldn't be without it.
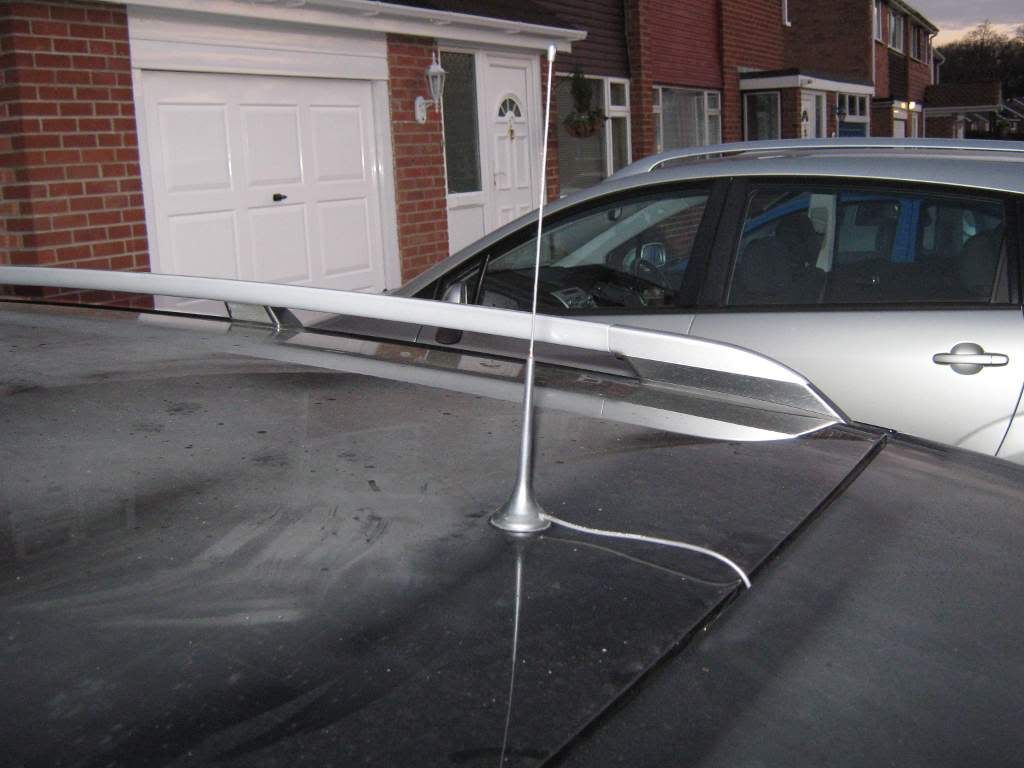
The DAB radio itself is this one which I purchased from DabOnWheels.co.uk along with an upgraded mag mount aerial. Although it is one of the cheaper ones it has been absolutely faultless with virtually no signal dropout at all. In the 3 years I've used it on my 7th gen I can count on one hand the number of times it has lost the signal, and even then it was only momentary.
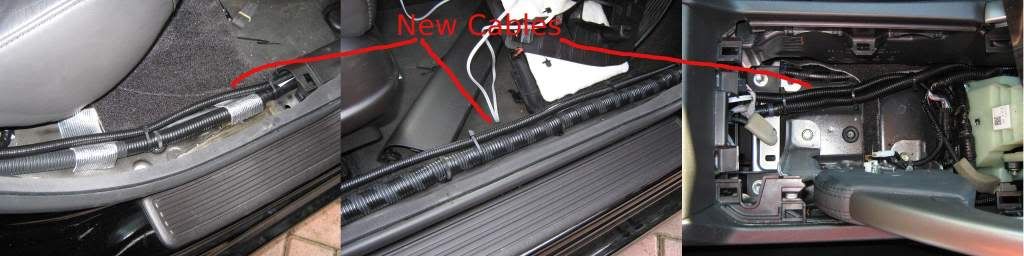
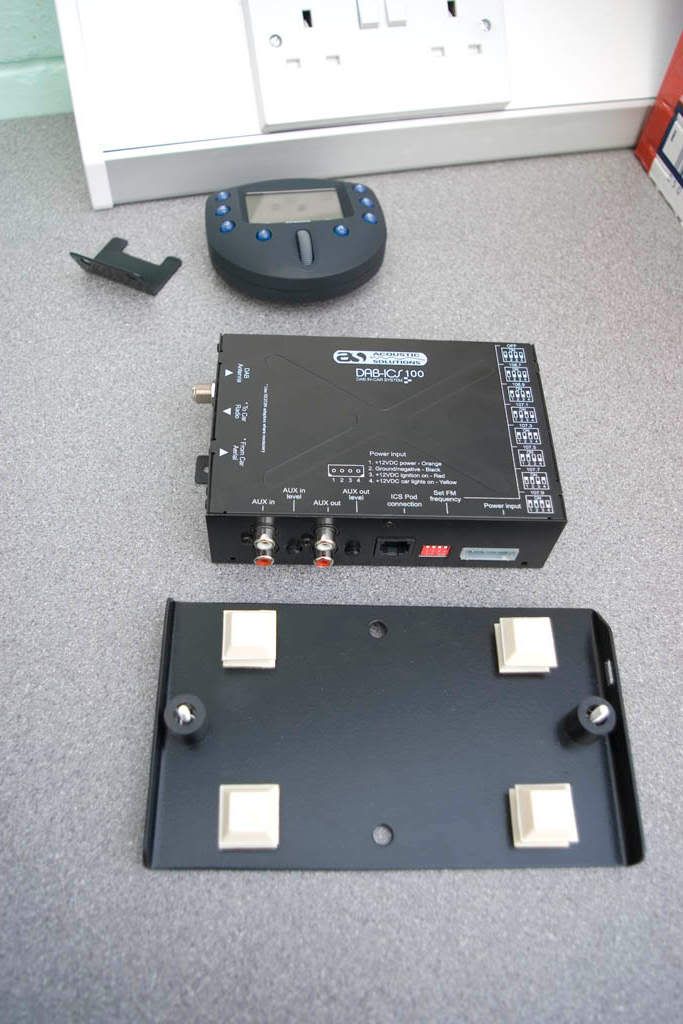
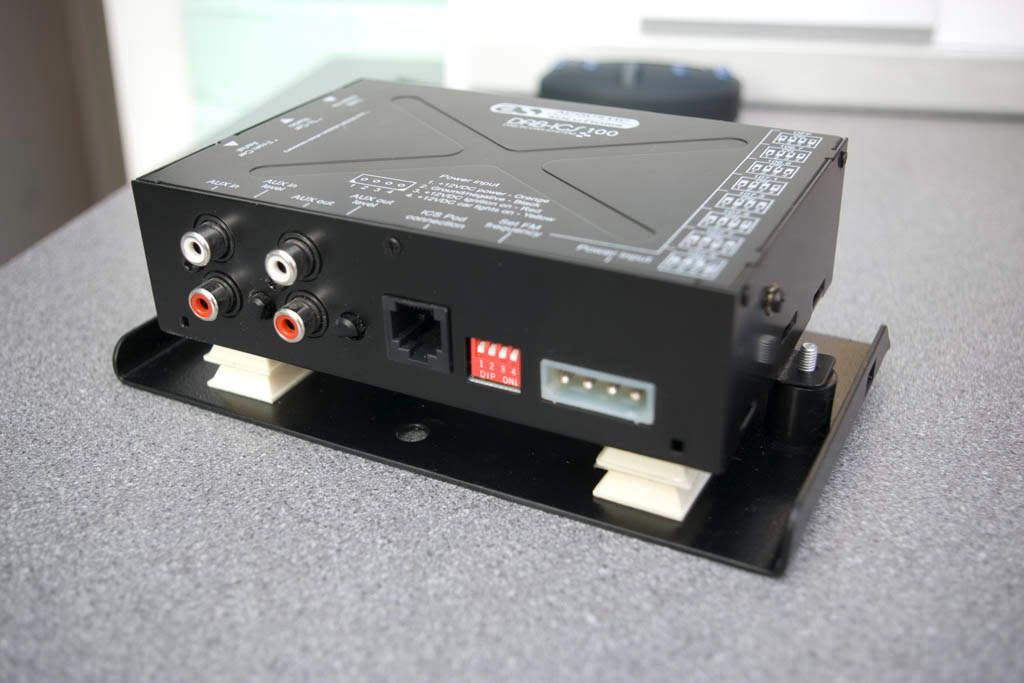
The unit itself consists of a base unit that can be mounted virtually anywhere in the car out of sight and a control unit which they call a pod which obviously requires mounting within easy reach of the driving position. The two units are linked by a flat 8 way cable with an RJ45 connector each end. This cable can be replaced with a standard computer network cable which is what I have done to get the correct length.
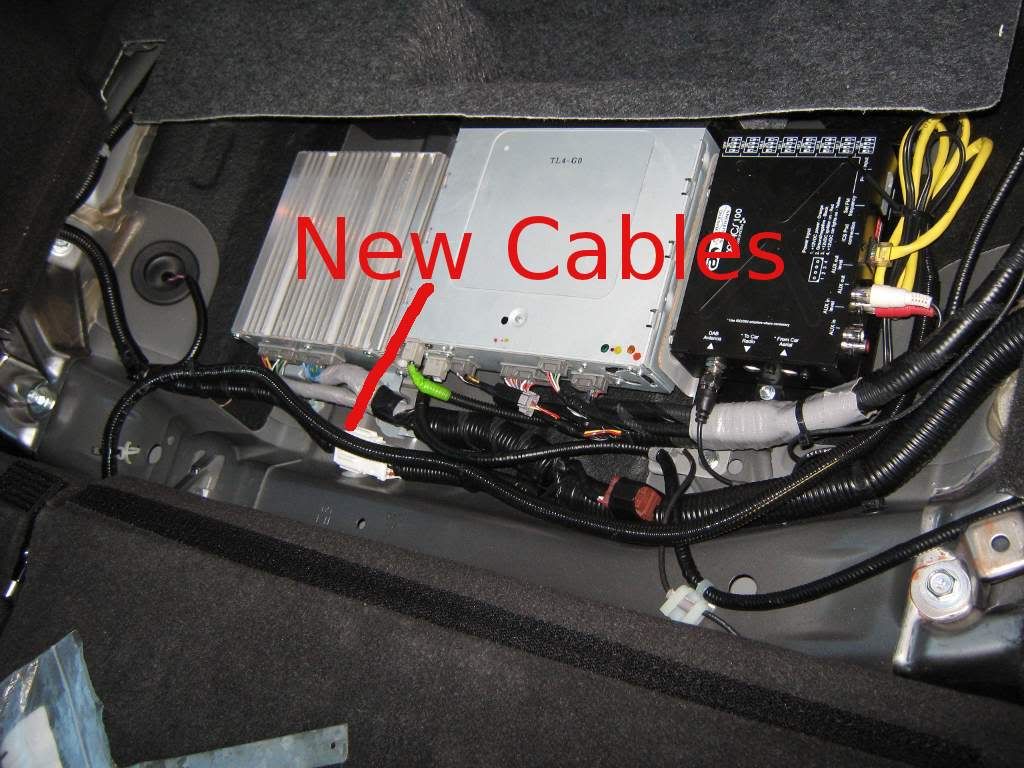
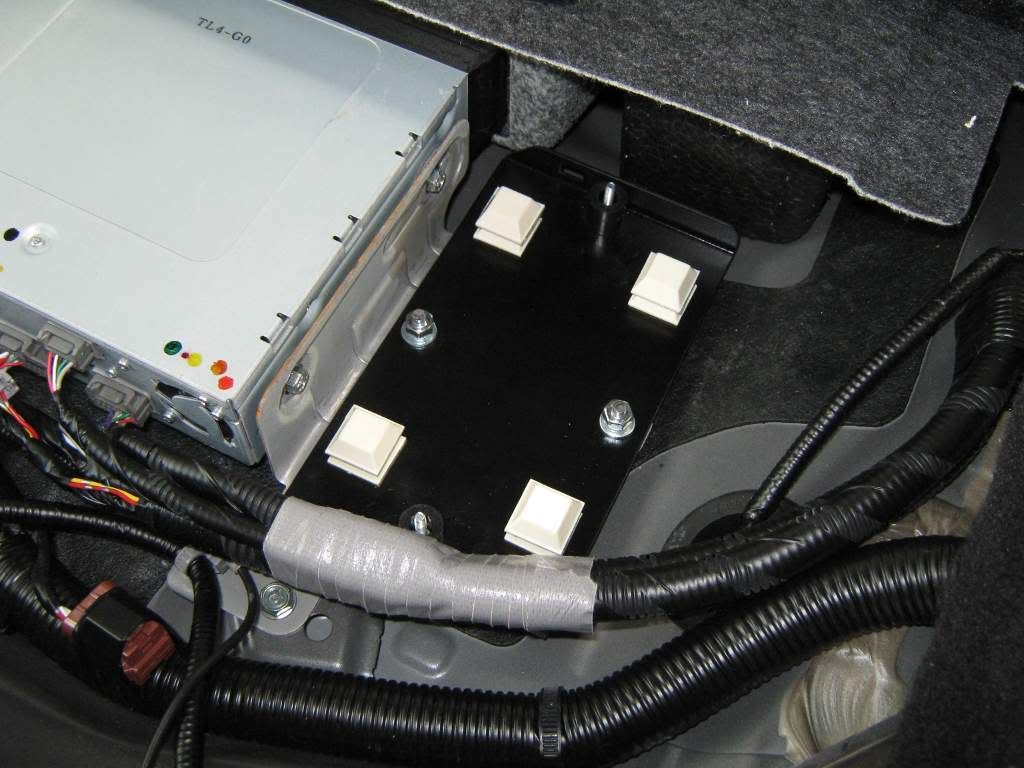
Firstly I needed to find a convenient location for the two units. For the base unit I found a perfect location next to the sat nav DVD drive under the rear loadspace floor:
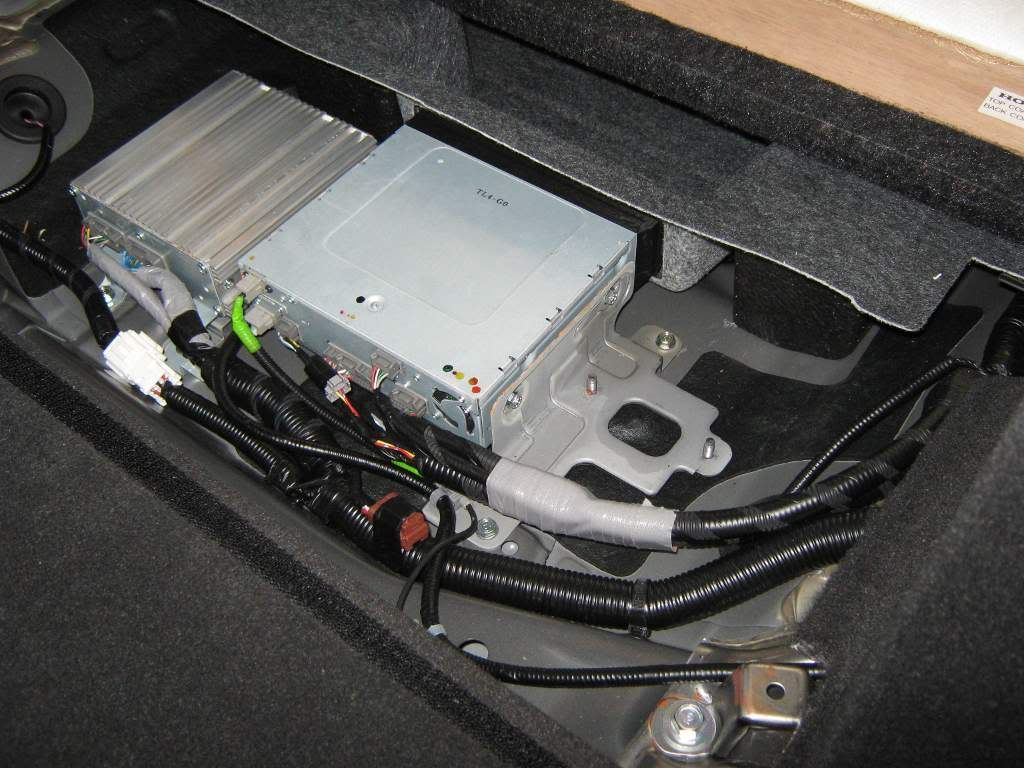
As you can see there is provision already for something to be mounted there (perhaps for a foreign market) so I just needed to make an adapter plate to mount onto those two bolts with fixings for the DAB base unit.
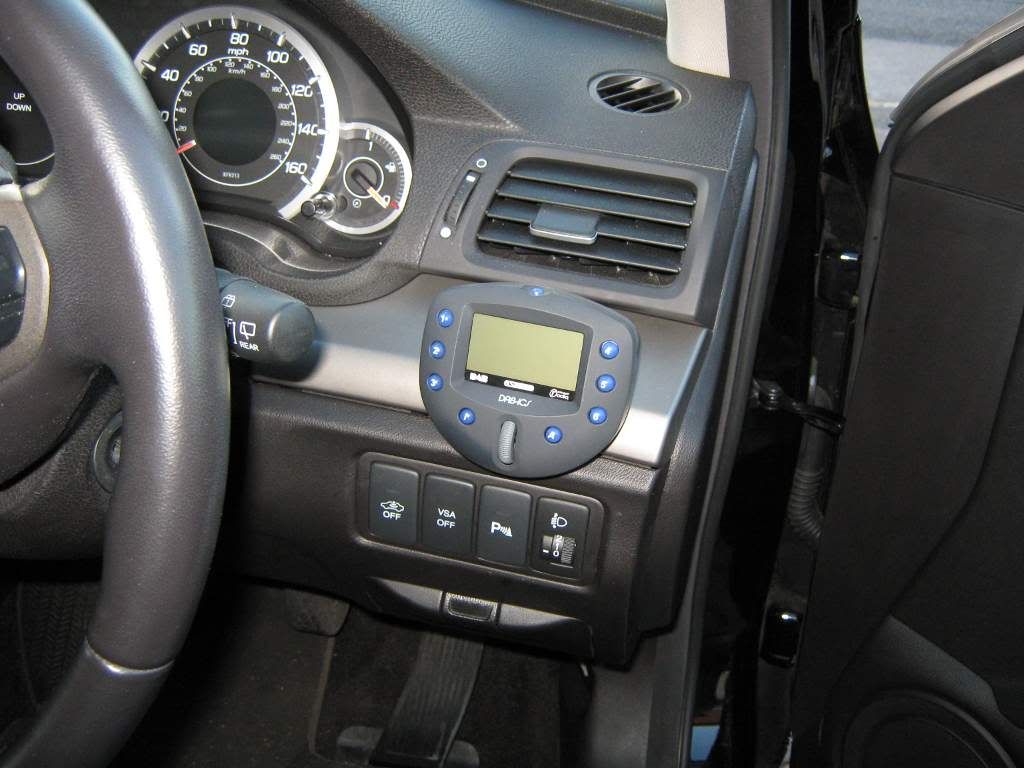
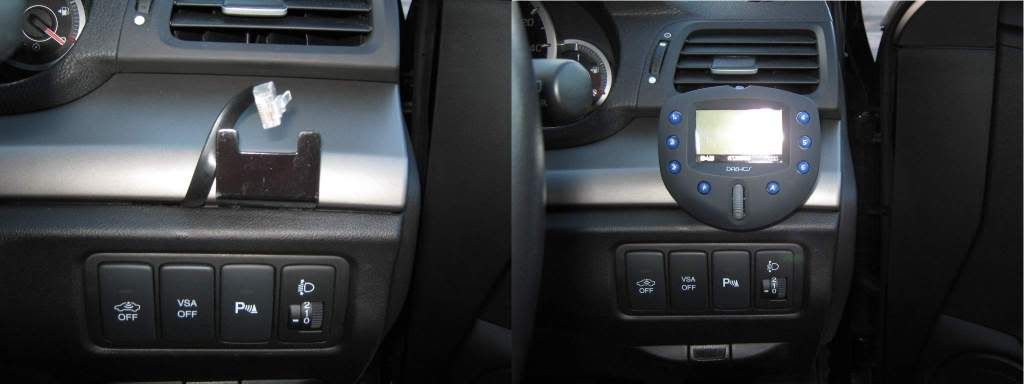
For the control unit I decided to mount it onto the silver trim below the right hand air vent next to the drivers door. The mounting bracket that comes with the unit wasn't suitable for this position so I manufactured a new bracket myself.
Here is a picture of the base unit, the control unit and the adapter plate which I made.
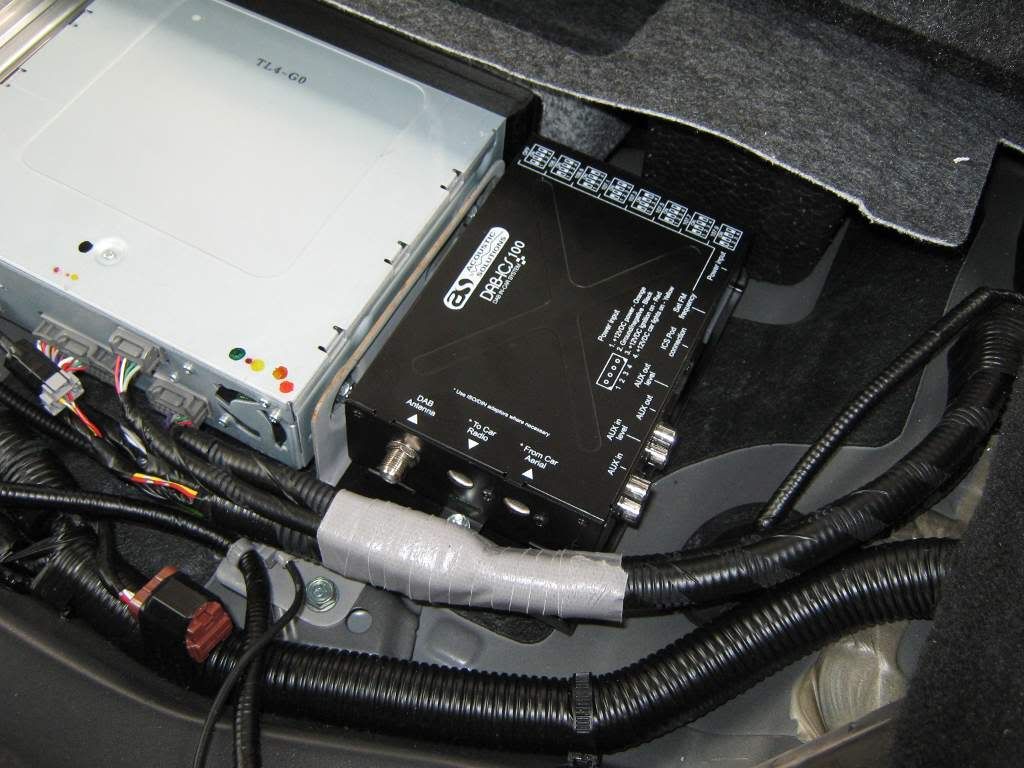
This is the final result of the base unit mounted onto the adapter plate:
I had a piece of scrap steel laying around which was ideal. I cut it down to size & smoothed all the edges and rounded corners etc so that cables wouldn't get snagged and then sprayed it to make it look nice and also to stop it rusting.
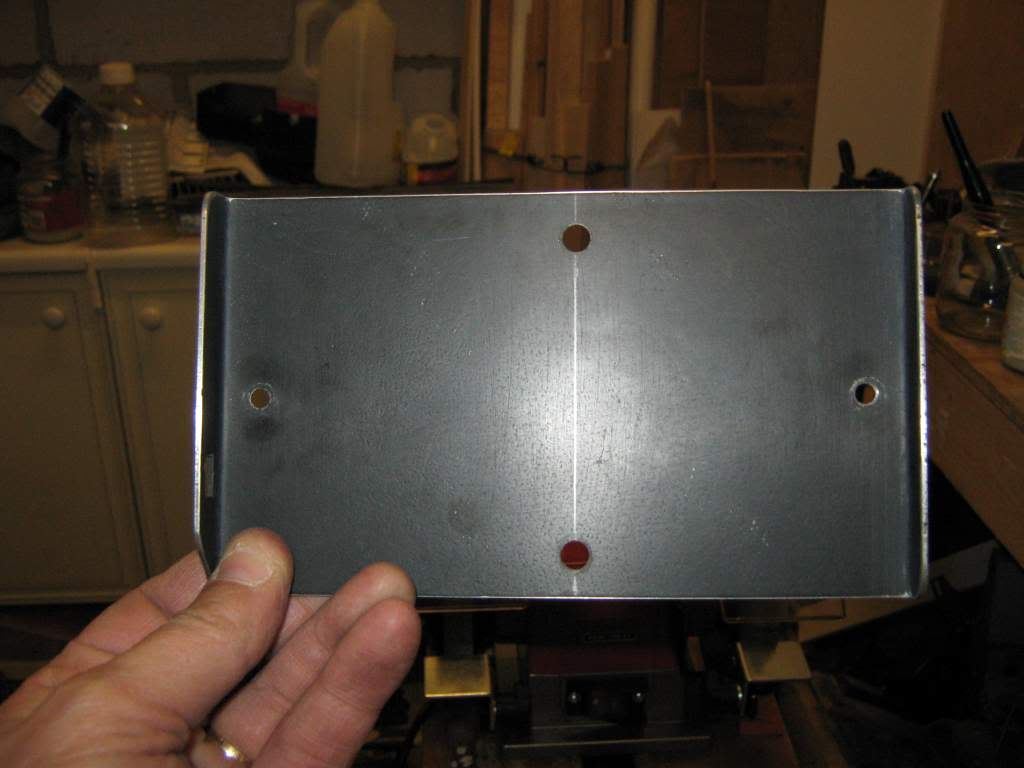
Firstly, here is the plate cut, filed, smoothed and drilled ready for spraying:
....and here it is after a couple of coats of primer and a few coats of mat black spray paint:

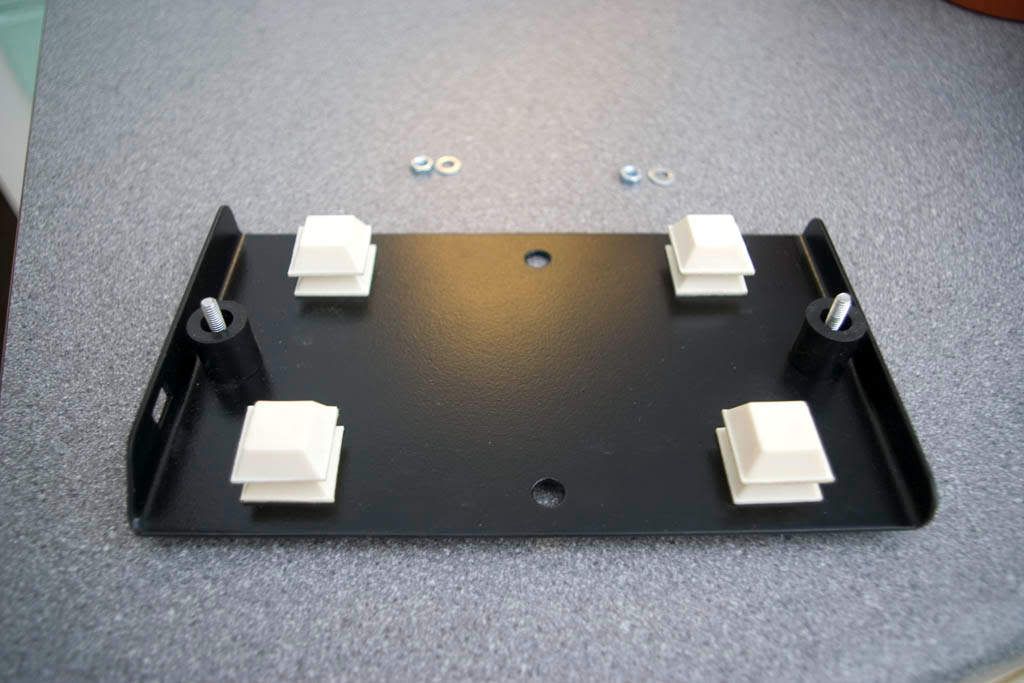
...and then with the mounting hardware to keep the unit clear of the bolts already in the car:
This was then fitted into the car and bolted down onto the already present mounting bolts......
....followed by the unit itself bolted down onto the plate:
Now the control unit:
This is the final result required:
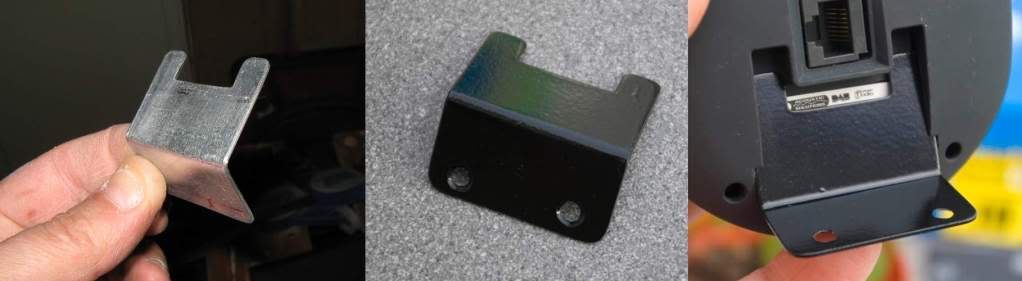
...and here is the bracket itself initially manufactured and then drilled and sprayed. The last picture shows why it is the shape it is and how the unit slides down onto the bracket:
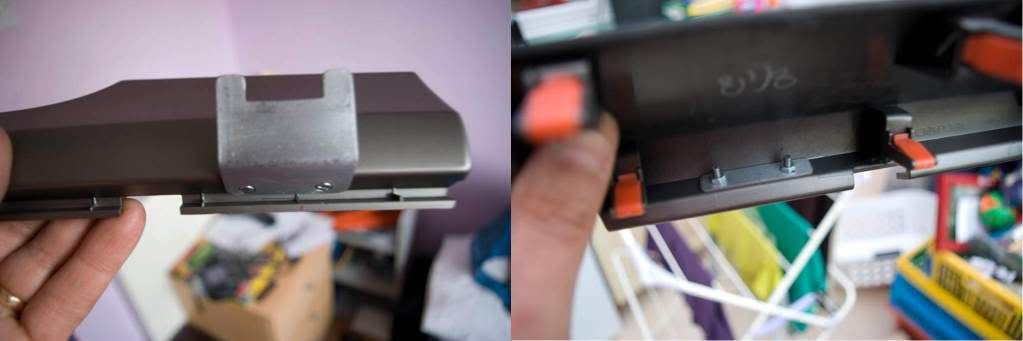
Here is the bracket screwed to the trim piece and also the strengthening plate fitted to the back (obviously a test run before it was sprayed):
I had this DAB radio in my 7th gen for about 3 years prior to this and I really wouldn't be without it.
The DAB radio itself is this one which I purchased from DabOnWheels.co.uk along with an upgraded mag mount aerial. Although it is one of the cheaper ones it has been absolutely faultless with virtually no signal dropout at all. In the 3 years I've used it on my 7th gen I can count on one hand the number of times it has lost the signal, and even then it was only momentary.
The unit itself consists of a base unit that can be mounted virtually anywhere in the car out of sight and a control unit which they call a pod which obviously requires mounting within easy reach of the driving position. The two units are linked by a flat 8 way cable with an RJ45 connector each end. This cable can be replaced with a standard computer network cable which is what I have done to get the correct length.
Firstly I needed to find a convenient location for the two units. For the base unit I found a perfect location next to the sat nav DVD drive under the rear loadspace floor:
As you can see there is provision already for something to be mounted there (perhaps for a foreign market) so I just needed to make an adapter plate to mount onto those two bolts with fixings for the DAB base unit.
For the control unit I decided to mount it onto the silver trim below the right hand air vent next to the drivers door. The mounting bracket that comes with the unit wasn't suitable for this position so I manufactured a new bracket myself.
Here is a picture of the base unit, the control unit and the adapter plate which I made.
This is the final result of the base unit mounted onto the adapter plate:
I had a piece of scrap steel laying around which was ideal. I cut it down to size & smoothed all the edges and rounded corners etc so that cables wouldn't get snagged and then sprayed it to make it look nice and also to stop it rusting.
Firstly, here is the plate cut, filed, smoothed and drilled ready for spraying:
....and here it is after a couple of coats of primer and a few coats of mat black spray paint:
...and then with the mounting hardware to keep the unit clear of the bolts already in the car:
This was then fitted into the car and bolted down onto the already present mounting bolts......
....followed by the unit itself bolted down onto the plate:
Now the control unit:
This is the final result required:
...and here is the bracket itself initially manufactured and then drilled and sprayed. The last picture shows why it is the shape it is and how the unit slides down onto the bracket:
Here is the bracket screwed to the trim piece and also the strengthening plate fitted to the back (obviously a test run before it was sprayed):