CJM
Dr. Diesel
Tools needed:
8mm socket / ring key
10mm socket
Screwdriver
Optional tools:
Torch
Mini Vac / Car Vac
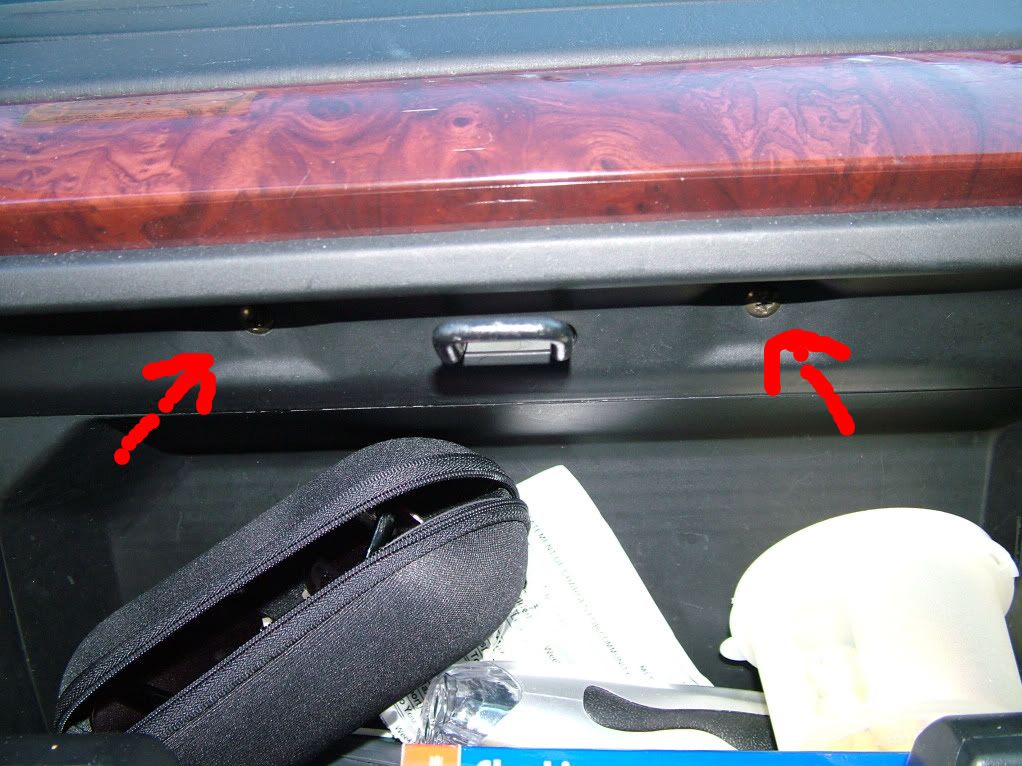
1 ) Open glove box and remove the two screws near the catch
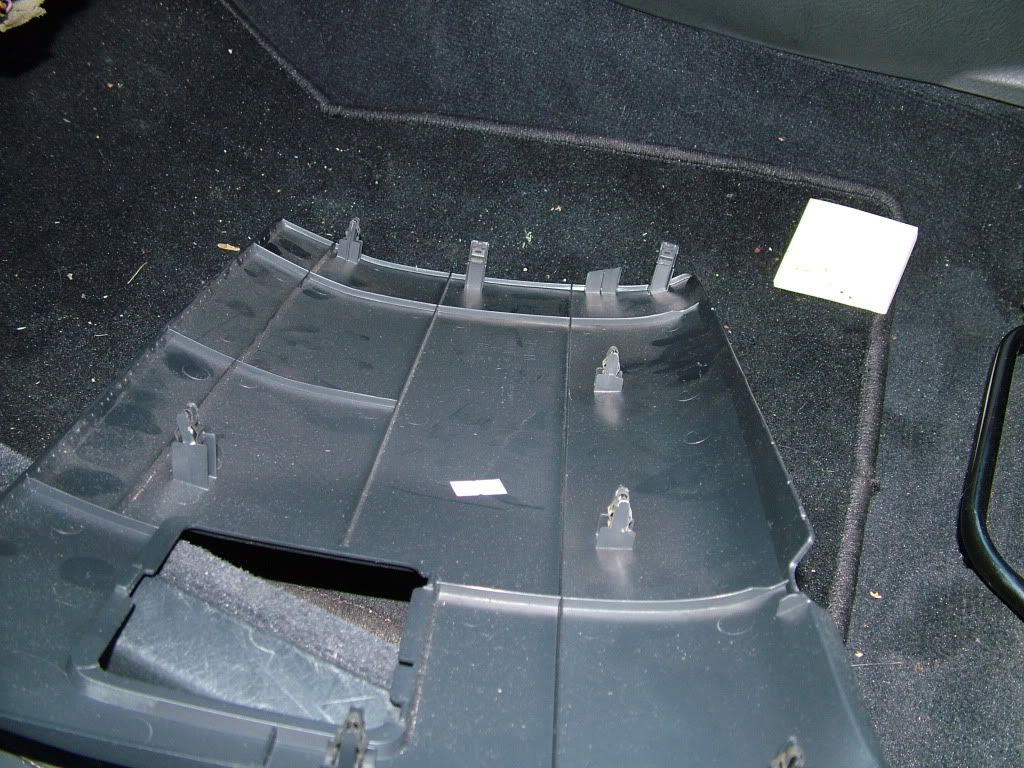
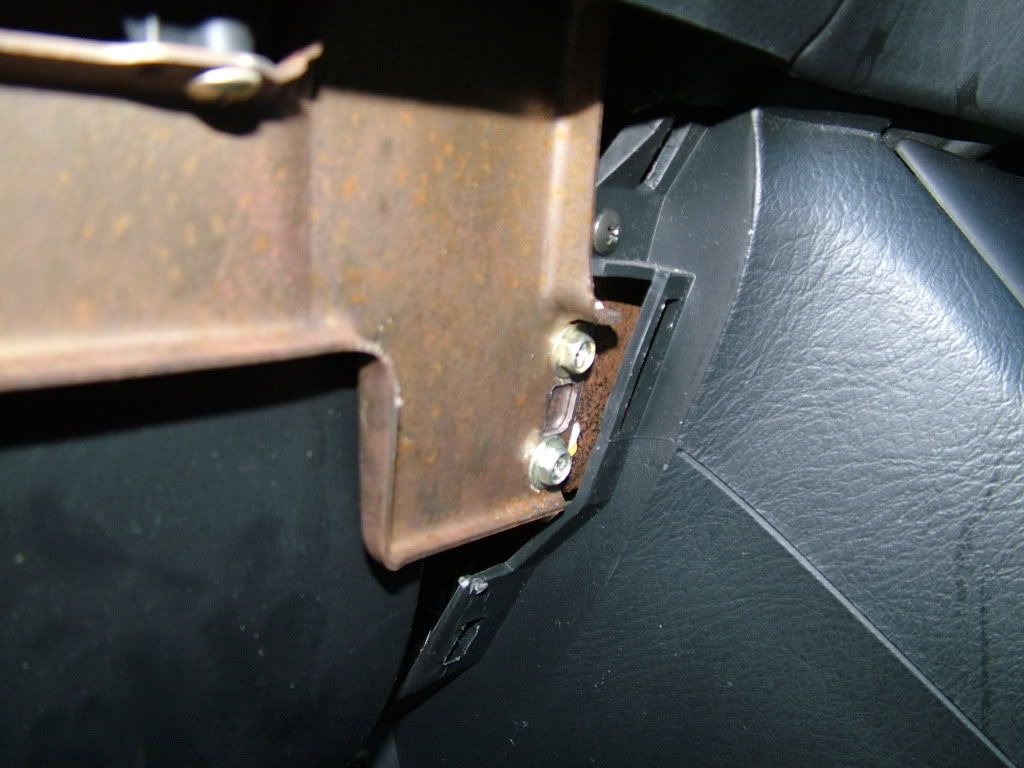
2 ) Go to the bottom of the plastic fascia and pull outwards as indicated in the photo, the fascia is held on with clips.
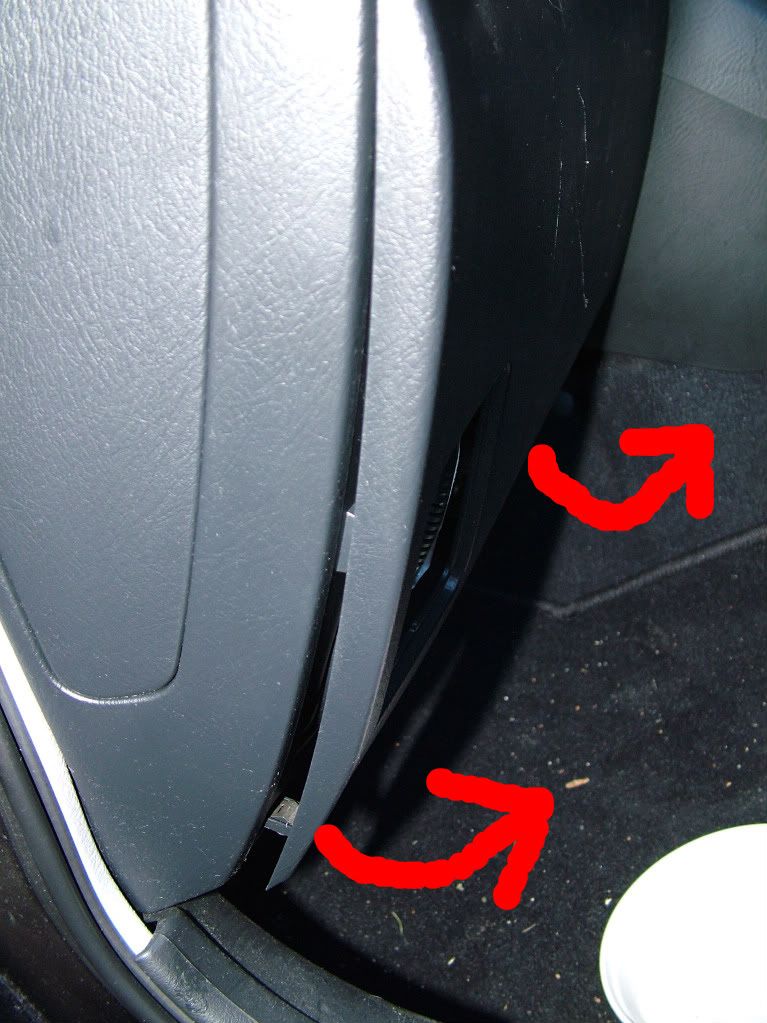
Plastic fascia
3 ) Remove two 8mm bolts on left-hand side of metal bar supporting glove box
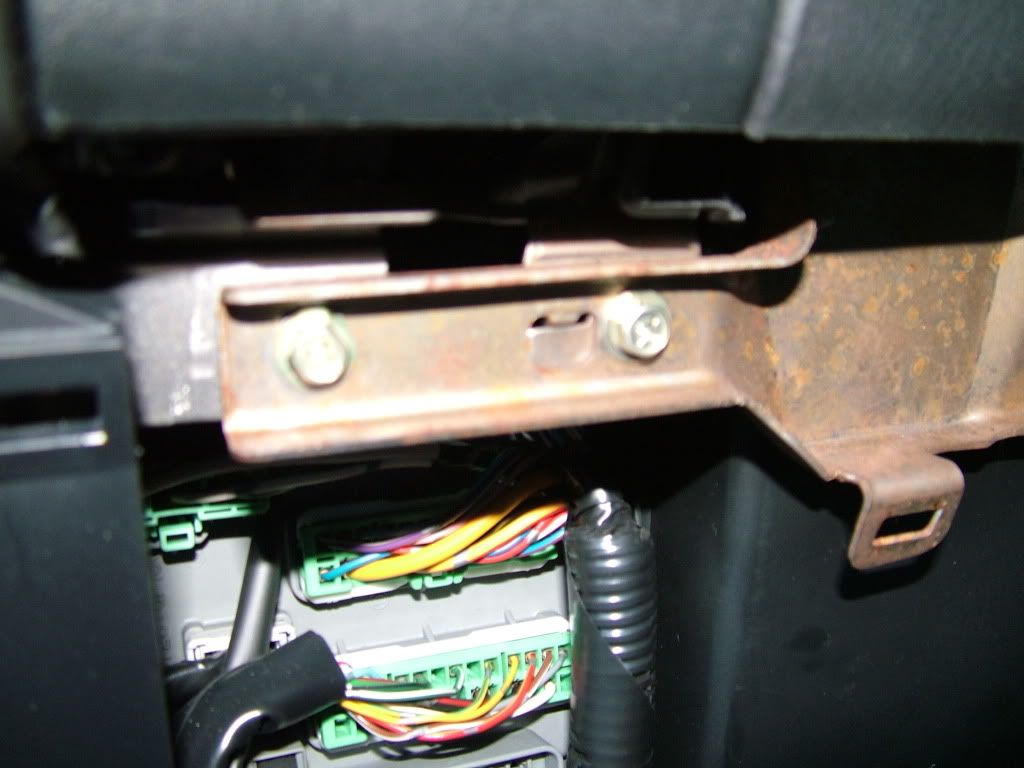
4 ) Remove the two 8mm bolts on the right-hand side of the metal bar supporting glove box
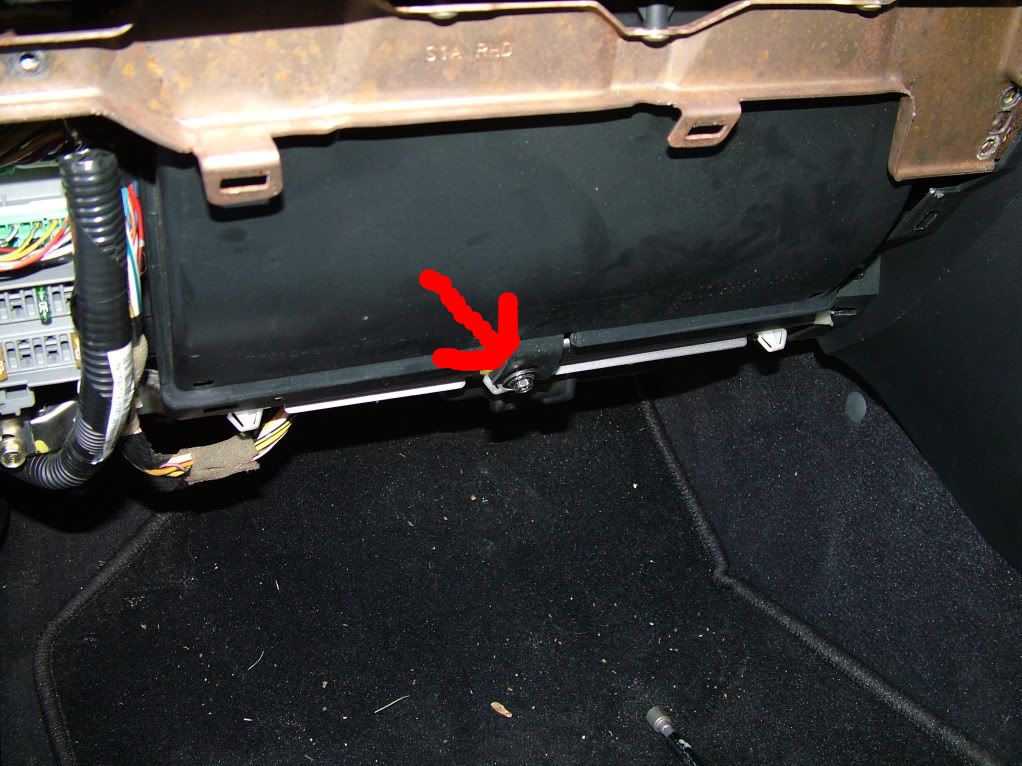
5 ) Remove 8mm bolt at bottom of glove box housing and lift glove box out
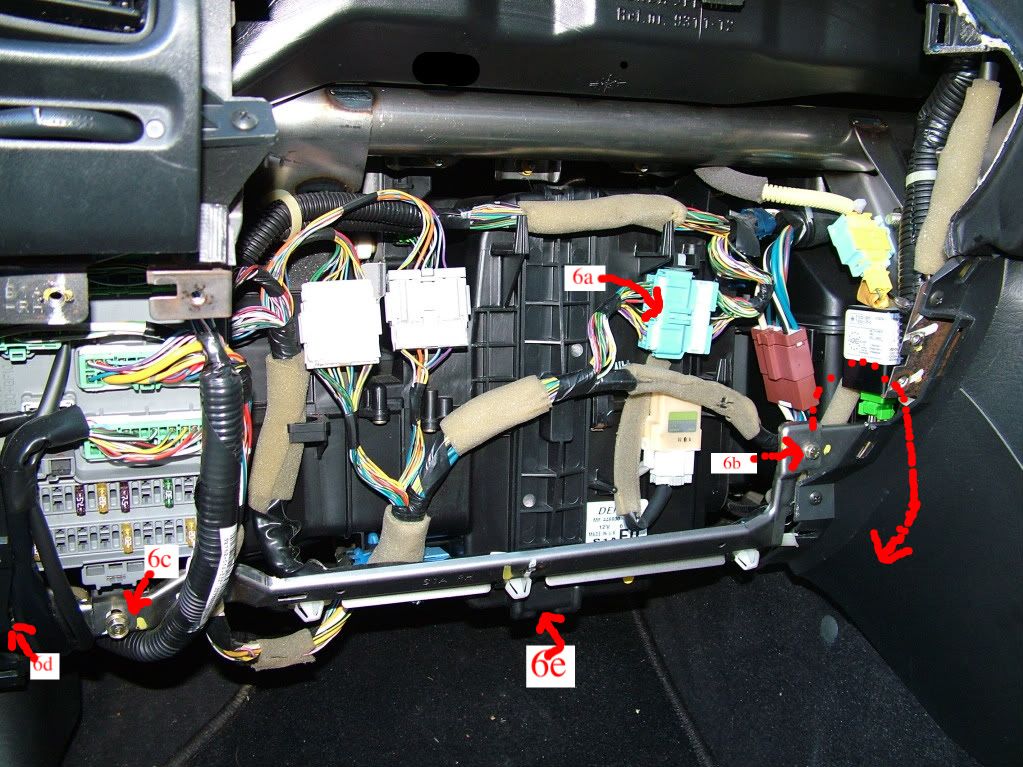
6a ) Un-connect loom connector (indicated) you may need to un-connect other loom connectors, depending on individual layout
6b ) Remove 8mm bolt holding bottom bracing bar on right hand side
6c ) Remove 10mm bolt holding bottom bracing bar on left hand side
6d ) There are two other 8mm bolts to the left out of shot of the picture, remove the top one and loosen the bottom one, the idea is to manoeuvre the mental bracing bar upwards until you can get it clear of the plastic lip to the right, then bring it back down.
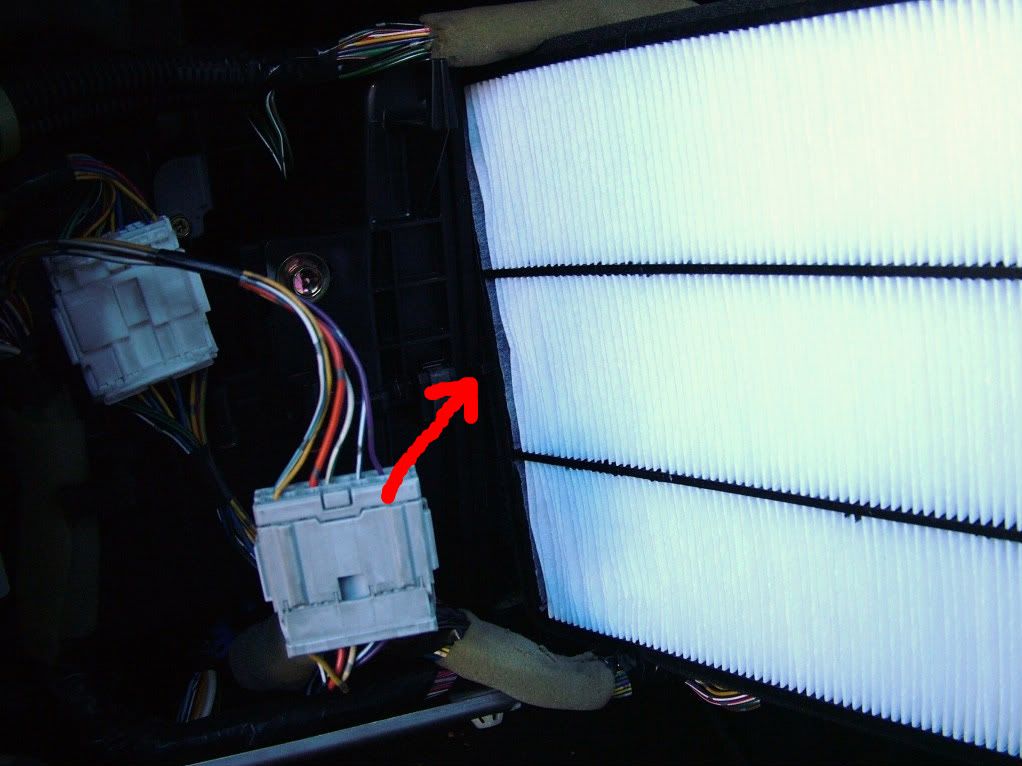
6e) The cabin filter is behind this protective lid, there is a release clip at the bottom, release the clip pulling towards you and then un-hook from the top lip.
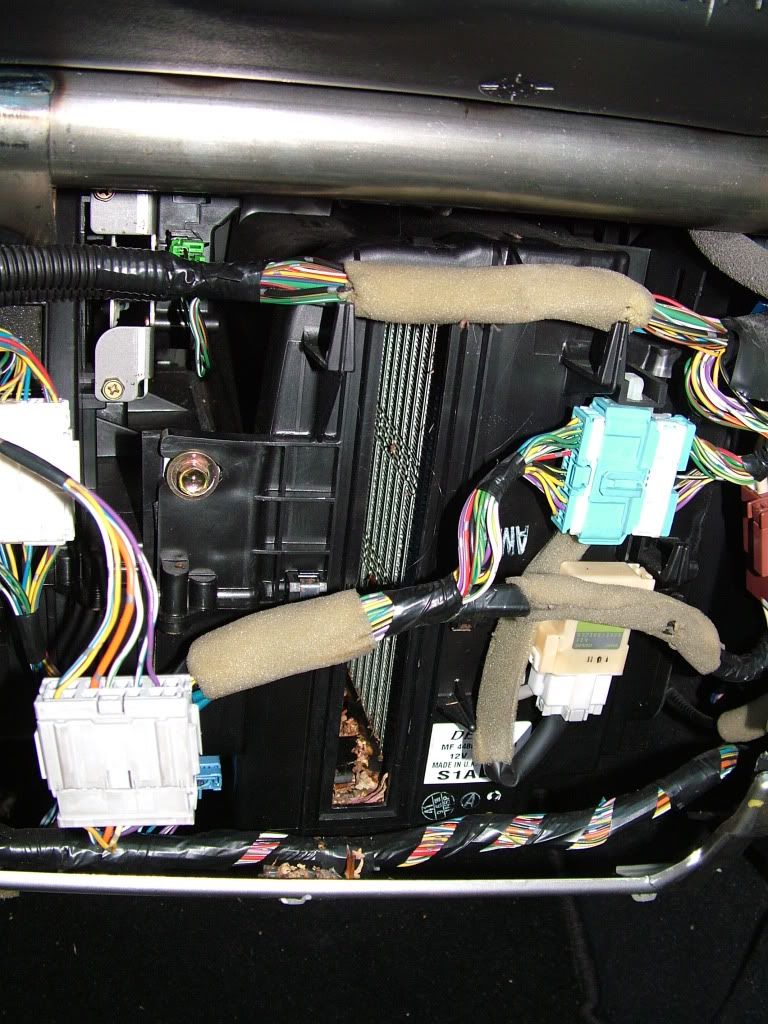
7 ) You should now see the filter and you just need to slide it out, making sure the cable is not in the way.
8 ) Once the filter is removed clear any leaves or seeds that have accumulated in the matrix floor, I used a vac and an old spoke to get all the ash seeds out, but be careful of the heater matrix on the right-hand side.
9 ) Put new filter in, being aware of which way around it goes, you should find that it is keyed so you can only get it in one way. (indicated on pic)
10 ) Refit filter lid
Put everything back in reverse order and that's it done!
8mm socket / ring key
10mm socket
Screwdriver
Optional tools:
Torch
Mini Vac / Car Vac
1 ) Open glove box and remove the two screws near the catch
2 ) Go to the bottom of the plastic fascia and pull outwards as indicated in the photo, the fascia is held on with clips.
Plastic fascia
3 ) Remove two 8mm bolts on left-hand side of metal bar supporting glove box
4 ) Remove the two 8mm bolts on the right-hand side of the metal bar supporting glove box
5 ) Remove 8mm bolt at bottom of glove box housing and lift glove box out
6a ) Un-connect loom connector (indicated) you may need to un-connect other loom connectors, depending on individual layout
6b ) Remove 8mm bolt holding bottom bracing bar on right hand side
6c ) Remove 10mm bolt holding bottom bracing bar on left hand side
6d ) There are two other 8mm bolts to the left out of shot of the picture, remove the top one and loosen the bottom one, the idea is to manoeuvre the mental bracing bar upwards until you can get it clear of the plastic lip to the right, then bring it back down.
6e) The cabin filter is behind this protective lid, there is a release clip at the bottom, release the clip pulling towards you and then un-hook from the top lip.
7 ) You should now see the filter and you just need to slide it out, making sure the cable is not in the way.
8 ) Once the filter is removed clear any leaves or seeds that have accumulated in the matrix floor, I used a vac and an old spoke to get all the ash seeds out, but be careful of the heater matrix on the right-hand side.
9 ) Put new filter in, being aware of which way around it goes, you should find that it is keyed so you can only get it in one way. (indicated on pic)
10 ) Refit filter lid
Put everything back in reverse order and that's it done!


