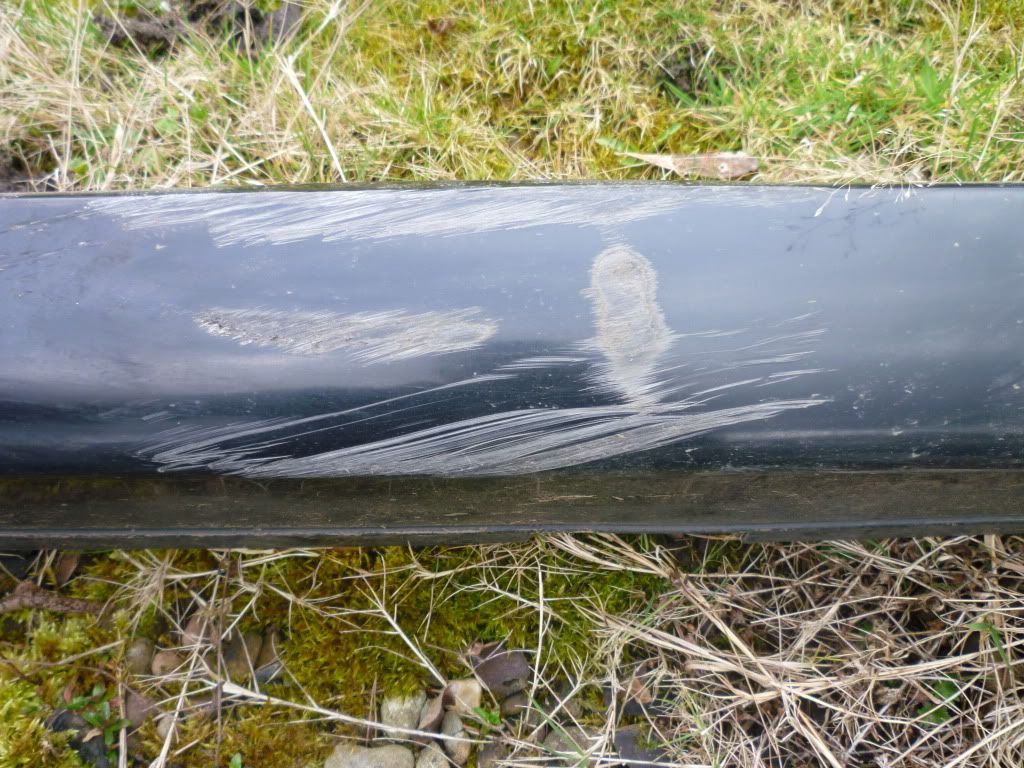
As you may know, my car met a raised kerb a few weeks ago, resulting in this damage to the skirt:
I’d thought about repairing the damage myself but Neil (Crespo) happened to have a spare skirt lying around that he sold me for a very decent price (thanks fella!). This weekend being rather nice I decided to swap them over. Apologies for the mucky car pics – I’d spent Tuesday giving it a wash, polish and wax but then took it for a blast over the moors and rather ruined all my hard work.
Tools needed:
Flat and crosshead screwdrivers
WD40
10mm socket
Jack and stands
An extra pair of hands – optional but makes a big difference!
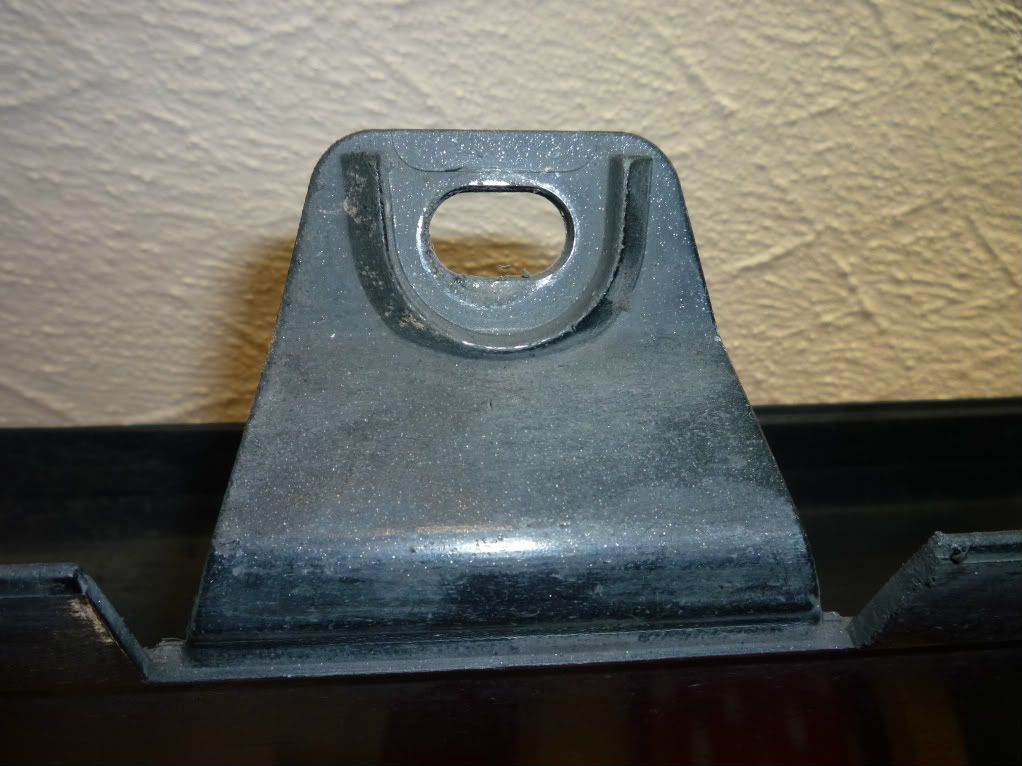
Starting with the replacement skirt, I was able to see how it fits on to the car, taking out a lot of the guesswork. The skirt is attached to the underside of the car with three brackets.
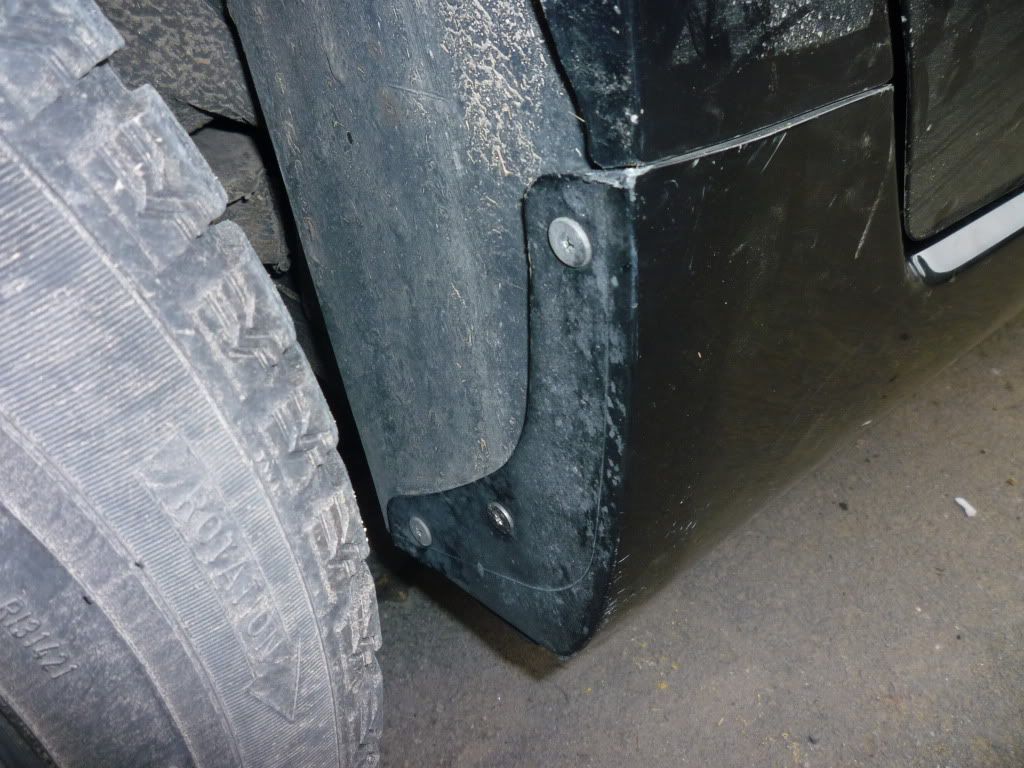
Its screwed in to the rear wheel arch with three crosshead screws.
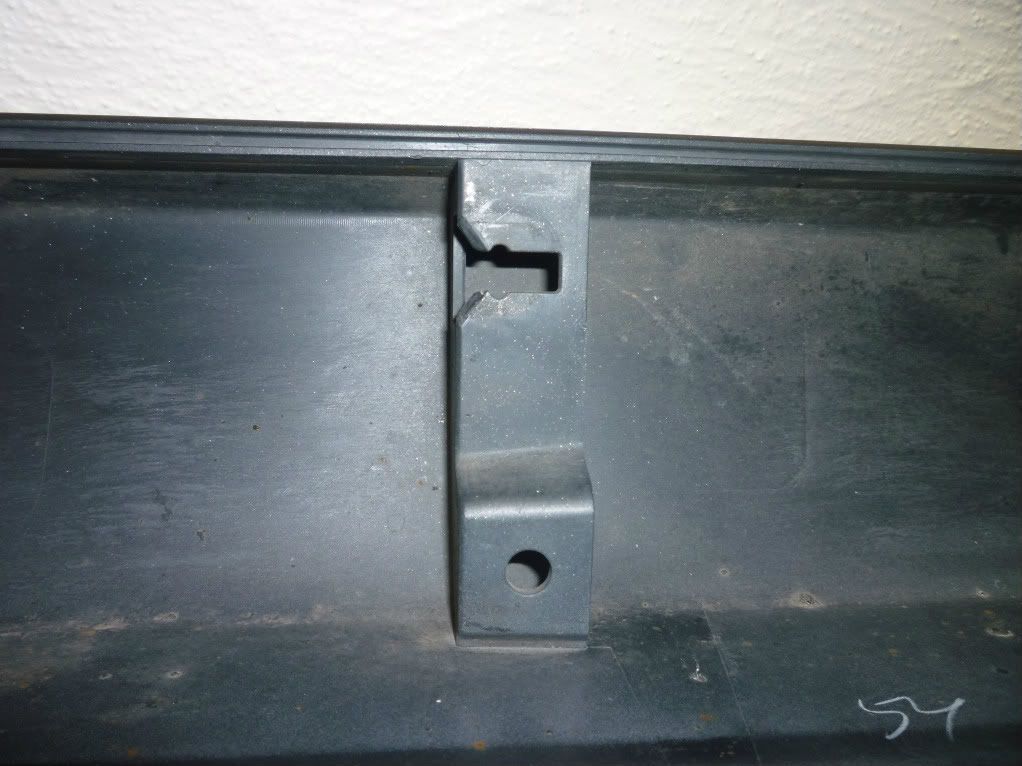
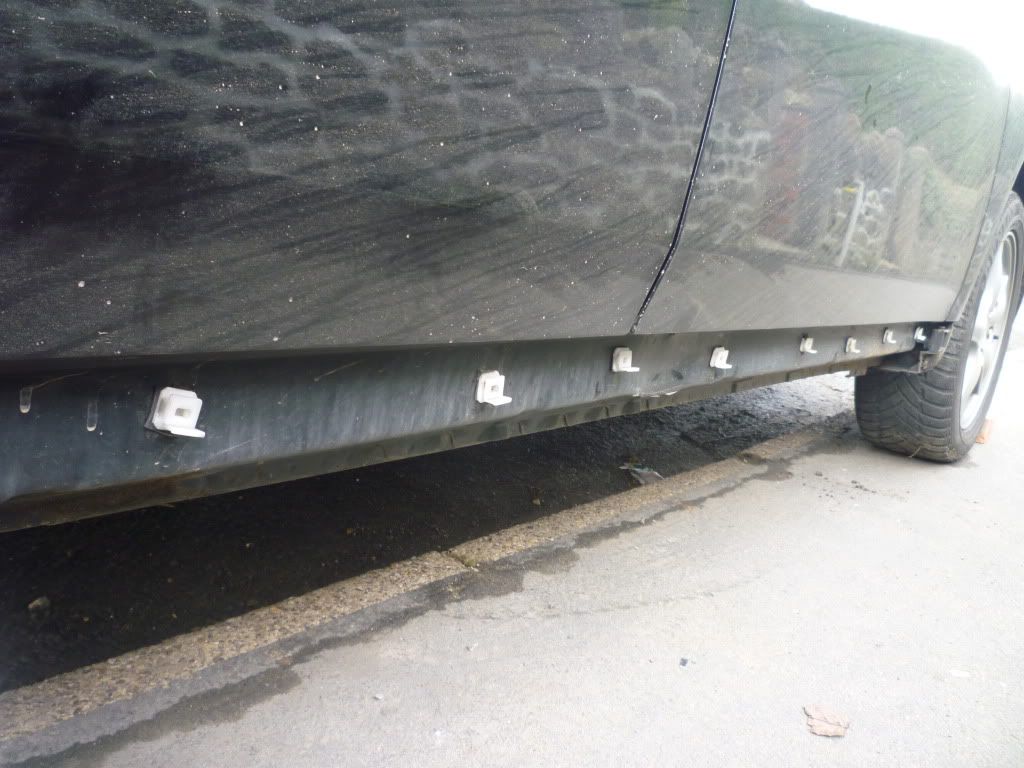
Running along on the inside of the skirt are about eight slots which match up with some little plastic lugs attached to the sill of the car.
The first thing I did was to unbolt the skirt from the underside of the car. The front and middle brackets are held in place with plastic rivets.
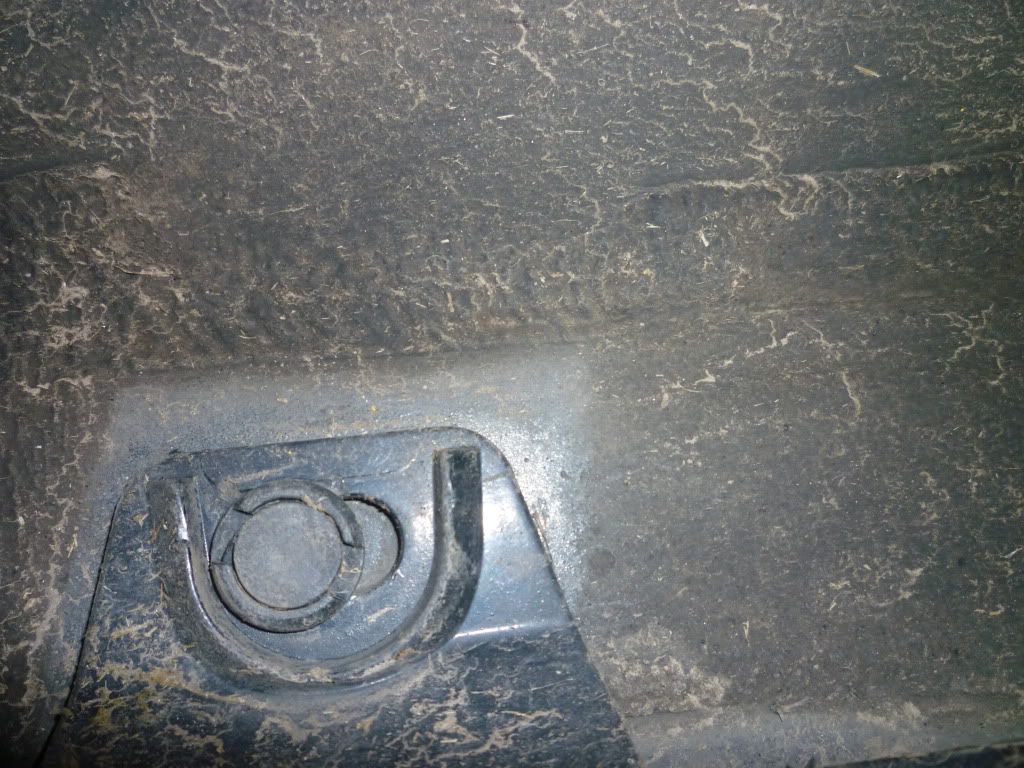
I found the easiest way to remove them was to place a flat-headed screwdriver in the notch to prise the centre section of the rivet out. The first one took me a while, but once I discovered the technique, the second one came out no problem.
The rear bracket is held in place with a rather rusty 10mm bolt so I got the WD40 out a left it a while. Then it was just a case of cracking it off and removing. You really need a socket here as I don’t think there would be access for a spanner.

After that, its just a case of removing the crosshead screws that connect the rear wheel arch with the skirt so jack the car up, remove the rear wheel and undo those screws.
With all the bolts and gubbins removed I opened the doors (I’d heard it makes things easier) got hold of the skirt, gave it a little pull towards the rear of the car and off it came.
Now you can see all the little white plastic lugs that match up with the slots on the inside of the skirt. These moved about quite a bit and kept coming out of alignment when I tried to put the new skirt on. I don’t know if that’s normal or if they got a bit damaged when I hit the kerb.
Refitting, as they say, is the reverse of removal and this is where you may need an extra pair of hands. I started off with fitting the front end of the skirt as there are a couple of slots that clip into the front wheel arch lining. Then its just a case of lining it all up and giving it a little encouragement back into place. It’s a bit fiddly to get it exactly right but shouldn’t take too long, especially if you can get your glamorous ***istant to hold one end while you work on the other. Put all the fixings and the wheel back on, drop the car then pop the kettle on. Job done!

I’d thought about repairing the damage myself but Neil (Crespo) happened to have a spare skirt lying around that he sold me for a very decent price (thanks fella!). This weekend being rather nice I decided to swap them over. Apologies for the mucky car pics – I’d spent Tuesday giving it a wash, polish and wax but then took it for a blast over the moors and rather ruined all my hard work.
Tools needed:
Flat and crosshead screwdrivers
WD40
10mm socket
Jack and stands
An extra pair of hands – optional but makes a big difference!
Starting with the replacement skirt, I was able to see how it fits on to the car, taking out a lot of the guesswork. The skirt is attached to the underside of the car with three brackets.
Its screwed in to the rear wheel arch with three crosshead screws.
Running along on the inside of the skirt are about eight slots which match up with some little plastic lugs attached to the sill of the car.
The first thing I did was to unbolt the skirt from the underside of the car. The front and middle brackets are held in place with plastic rivets.
I found the easiest way to remove them was to place a flat-headed screwdriver in the notch to prise the centre section of the rivet out. The first one took me a while, but once I discovered the technique, the second one came out no problem.
The rear bracket is held in place with a rather rusty 10mm bolt so I got the WD40 out a left it a while. Then it was just a case of cracking it off and removing. You really need a socket here as I don’t think there would be access for a spanner.
After that, its just a case of removing the crosshead screws that connect the rear wheel arch with the skirt so jack the car up, remove the rear wheel and undo those screws.
With all the bolts and gubbins removed I opened the doors (I’d heard it makes things easier) got hold of the skirt, gave it a little pull towards the rear of the car and off it came.
Now you can see all the little white plastic lugs that match up with the slots on the inside of the skirt. These moved about quite a bit and kept coming out of alignment when I tried to put the new skirt on. I don’t know if that’s normal or if they got a bit damaged when I hit the kerb.
Refitting, as they say, is the reverse of removal and this is where you may need an extra pair of hands. I started off with fitting the front end of the skirt as there are a couple of slots that clip into the front wheel arch lining. Then its just a case of lining it all up and giving it a little encouragement back into place. It’s a bit fiddly to get it exactly right but shouldn’t take too long, especially if you can get your glamorous ***istant to hold one end while you work on the other. Put all the fixings and the wheel back on, drop the car then pop the kettle on. Job done!