What's new

Accord handbrake adjustment

Great post, just a tip

Should your the handbrake cable require adjustment, after your happy with the clicks check both wheels spin freely when the handbrake is released :huh: one cable can stretch longer than the other causing an imbalance or even binding on one of the wheels, in the case of 6th Gen Hatch or Saloon or 7th Gen Saloon you will require a new cable.on the effected side or best replace both :mellow:

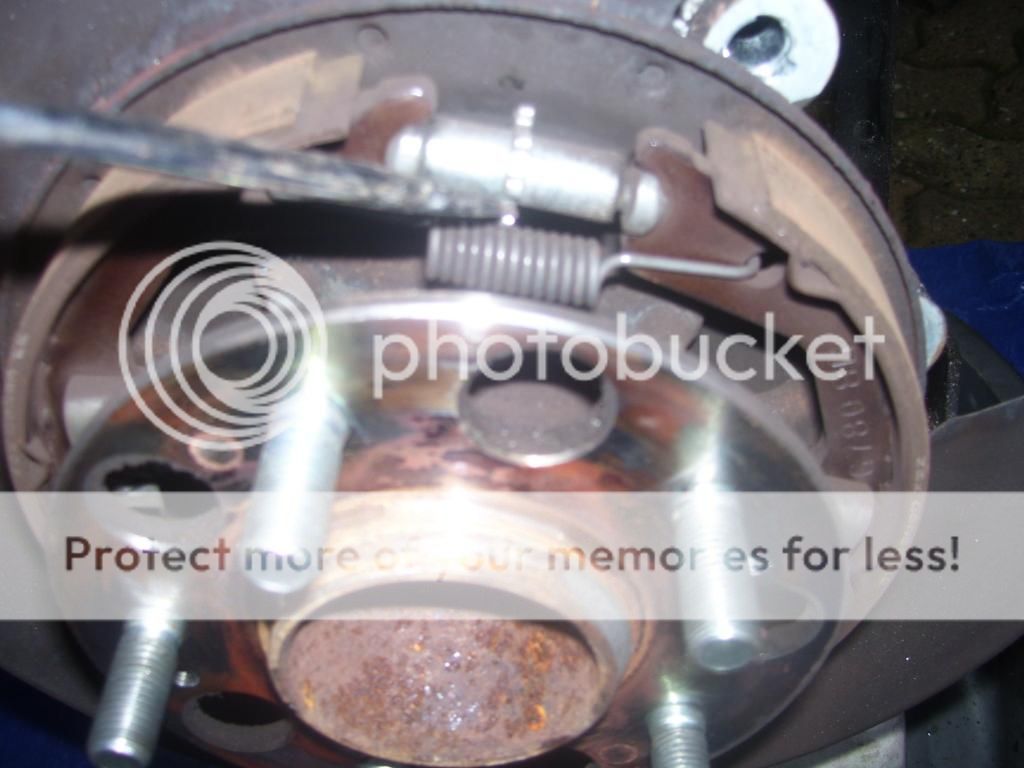
However in the case of 7th Gen Tourer you can adjust the parking brake shoes through the access hole on the disk and the adjuster is located bottom center, obviously the disk will need to be left in position to make the adjustment. The pictures below apply to a 8th Gen saloon or Tourer and as you can see the adjuster is located at almost top center.

100_1720_zpsc8c1222b.jpg


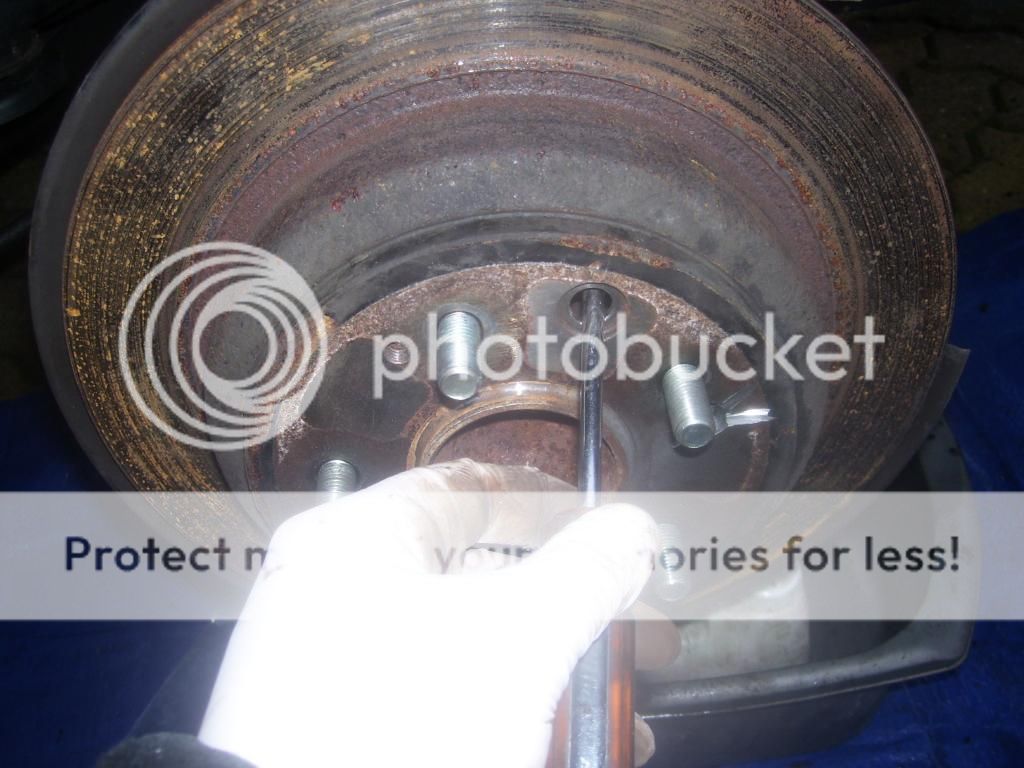
Disk/ Rotor removed to give you an idea what your gonna be adjusting ^_^

100_1722_zps42012a94.jpg
 
The adjustment through the disc method doesn't look to be a conventional screw...which direction will tighten?
 
Not at all certain but I'd hazard a guess that pushing the lips/prongs whatever, up the way would cause the adjuster to expand pushing the shoes closer to the drum?

On the other hand if it's a 7th gen and on the bottom, that's anyone guess without removing the disc to see the orientation
of the adjuster.
 
Evening Gents,

Hopefully you can give me some inspiration please! Having just had rear droplinks and ARB's replaced I noticed that the rear discs and pads were overdue replacement. I have ordered Pagid discs and pads. Having tried to fit them today, it apparent that the pad backings are very slightly to wide, no problem, having checked they are the correct ones, I can file them down, however I am having a nightmare with the handbrake shoes adjustment on the new discs. I have fully loosened the handbrake adjuster under the centre console and even with the shoes adjusted fully in, when I put the grub screws back in the disc pretty much locks solid. Any ideas? I am missing something really obvious? Thanks in advance.
 
Yes I have taken the drum adjuster both ways to make sure I knew which was which, it is now fully adjusted in so in theory should be no where near the disc unless I heavily adjusted the handbrake end. The discs spin freely u til I put the grubs in and tighten up. My next move is to adjust the shoes up to the disc and then leave grubs out and put wheels back on and see what happens, unless anydoby else has a better suggestion? Thanks
 
Worth a go but I think you'll find the problem comes back when you tighten the wheel nuts up.

I think the problem is that some aftermarket rear discs for the Tourer are 58mm wide and some are 61mm.
 
Another thought occured that given I am using the original grub screws which I believe are OEM, could the new discs be slightly thinner, making the grubs too long? Would this even make any difference? Cheers
 
Not sure - I changed mine the other day for aftermarket [Unipart] - one fitted fine, the other I had your problem & had to put the old disc back - very odd - that's why I looked into disc thickness.
 
Will measure them compared to what I took off. I wonder if removing the splash guard would help? I read somewhere that OEM discs have a lip that a rim on the splash guard fits into, my guards are rotten and adding to the noise so I think they will have to go.
 
I replaced my tourer rear disks last month and had the exact same problem with the hub locking up when the securing screws were tightened up. It was because the splash shield had become corroded and distorted so the lip no longer fitted neatly into the channel in the back of the new disc. I spent a bit of time dressing back/cutting off the knackered-looking shield lip until there was no bits left to foul the disc (one side only, the other side was so bad I pulled it off). Hope that makes sense? I did take a load of photos (still on my phone) but I'm caught up in the current PhotoBucket embedding nightmare.

Another tip I'd give is that you completely loosen off the under-console handbrake adjustment BEFORE making adjustments at the wheel. Then, after ensuring that the wheel brake adjustment is properly set (adjusted until the disc cannot turn, then backed off 8 clicks) re-tighten the under-console nut to get the handbrake lever travel correct (8 - 11 clicks, should start to cause braking at the second click). You will need a deep 12mm / ½" socket to get to the under-console nut (having first removed the console lid and rear panel).

I initially tried to fit Eicher rear discs, from ECP. But the access hole for the wheel adjuster is in the wrong place (offset towards one of the wheel stud holes)! So I fitted BluePrint ones instead.
 
Thanks for the reply Jon G, sounds like the splashguards are definitely being ground off tomorrow then. I have completely loosened the handbrake adjustment as per Monks how to, i had missed the 8 clicks back at the wheel from the manual, I only remembered the minor adjustment procedure. Did you do the preparation procedure? Thanks
 
Thanks Cliffordski, after looking on Pagid website, they are 61mm deep but surely they should still fit? will remove splash guards and try again, if they dont fit they are going back to ECP.
 
joeyboo21 said:
Thanks for the reply Jon G, sounds like the splashguards are definitely being ground off tomorrow then. I have completely loosened the handbrake adjustment as per Monks how to, i had missed the 8 clicks back at the wheel from the manual, I only remembered the minor adjustment procedure. Did you do the preparation procedure? Thanks
Ah, I hadn't read the start of this old thread before posting in reply to your problem! Not sure what you mean by 'preparation procedure' but I started by loosening the under-console adjustment nut (obviously be careful that it doesn't come right off, that would be a nightmare!). I did read the Honda workshop manual before starting.

Even with discs where the adjustment hole lined up properly, I found the brake adjustment through the hole very tricky to judge... I basically got it roughly right by repetitively removing the disc, moving the adjuster, refitting the disc, etc, until I felt I had the coarse adjustment about right, then finally doing the best I could through the hole. While this would be practically impossible with old discs, there's no wear lip/corrosion on the new discs so a reasonable alternative way, in my opinion. While the discs were off I brushed and blew out the dirt and dust, and applied ceramic grease to the brake shoe moving/contact parts.

Cliffordski said:
The Blue Print and TRW ones are advertised as thinner.
That's interesting. This would possibly make the problem I mentioned even worse?

I also noticed that the BluePrint discs (like the Brembo ones I recently fitted to the front) have a much nicer bright coating (nickel plating?) on the areas that get very rusty on the OEM discs. I've fitted Pagids all round on my Toyota in the last 18 months, they also lack this coating and are now rusting.
 
I fit Pagid to my tourer a few weeks ago and they came coated all over, hope they don't rust.
 
Pull the parking brake lever 88 N (9 kgf, 19.8 lbf) of force while driving the vehicle for 400 m (1/4 mile).

  1. Drive the vehicle for 400 m (1/4 mile) at 50 km/h (31 mph).

  1. Stop the vehicle and release the parking brake for 5−10 minutes to allow the brake disc/drum to cool.

  1. Repeat steps 4 through 6 three more times.

  1. Check the parking brake lever adjustment.
 
Got ir sorted today, removed the splashguards, they basically fell off, only used the grinder to tidy up the old weld points. Fitted the new discs and pads and managed to adjust the handbrake all good. Very strange having to drive along at 30 mph with your handbrake on! Handbrake fully on now at 8 clicks so all good. Cheers.
 
Jon_G said:
That's interesting. This would possibly make the problem I mentioned even worse?
For me it helped - the thicker Unipart disc was binding but the thinner TRW one didn't - I think what happens is when the screws are nipped up the rear of the disc binds against the backing plate. The rusty plates on our ageing Accords don't help I suspect.
 
Yeah it looks like the lip on the rusty backing plate was too tight up again at the rim of the new disc when the screws were done up, simple solution was to remove the rusted plate and problem disappears.
 
Hi, can you please re-upload the pictures, as all I can see is "Please update your account to enable 3rd party hosting". Thank you.
 
barkaba said:
Hi, can you please re-upload the pictures, as all I can see is "Please update your account to enable 3rd party hosting". Thank you.
This is because Photobucket changed their requirements so pictures can no longer be shared for free !

A new free photo hosting site is needed.
 
Just had a similar problem with fitting a new rear disc that was locking up when tightened. Thankfully found this thread as couldn't see the problem even though disc pads were fully backed off.

Even though my splash guard has been removed for years, the rust on the remaining mounting/backing plate has expanded enough to press against the back of the new disc. A screwdriver to chip thick rust then a metal file fixed it. There was no sliver of light before and after between disc and plate that would have shown this.
 
Top