6th Gen 1998-2002 Oil & Filter Service
This is my 6th Gen F18B2 Oil & Filter replacement. You will require access to underneath the car so ensure you have axle stands/ramps before attempting the filter. The recommendation is for the oil to be warm for an quicker and more efficient drain. Remember the exhaust will be hot so let it cool a little or drain it cold.
The oil filter is located on the rear of the engine, under the intake manifold. The sump bolt is accessed from the near side in this how-to although you could get it from anywhere underneath the car..
Remember to securely support any lifted vehicle.
http://www.hse.gov.uk/pubns/indg434.pdf
Tool List
Trolley Jack- large(Arcan 1814kgs)
Axle Stands - (Halfords 2 ton)
Wheel Chocks - (Halfords)
Safety Goggles - (Screwfix)
Gloves - (Screwfix)
17mm socket, breaker bar/ratchet or spanner - (Halfords)
Torque Wrench to cover 16ft-lbs & 33ft-lbs - (Halfords Professional Torque Wrench 8-60Nm)
Oil Filter Removal Tool 65mm- (Ebay)
Drain pan(s) – (B&Q) Drip Tray and (Amazon) Draper SlimLine Non-Spill 30ltr Drain Pan
Consumables
Oil Filter (Holdcroft Honda)
Sump Washer (Holdcroft Honda)
Oil 4.4ltr 10w-40 (for f18b2, f18b3, f20b6) - use any grade of your preference, however this is the official Honda spec and amount.
Lifting and Supporting the car.
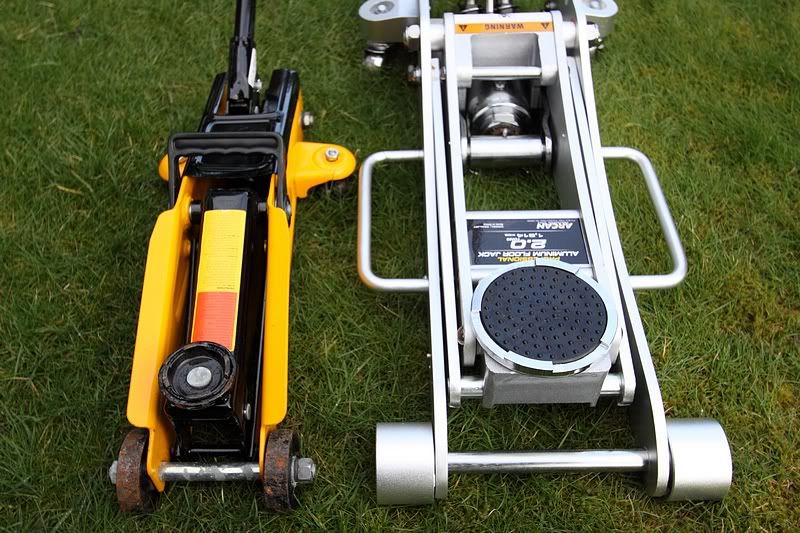
I use a large jack to lift the front. I tried this before with a Halfords 2 tonner but it struggled and started to twist slightly. So I bought an Arcan via Ebay a few years ago and although it is effectively rated the same lifting weight as the little Halfords one, the Arcan is more substantial with its width giving it a more solid base.
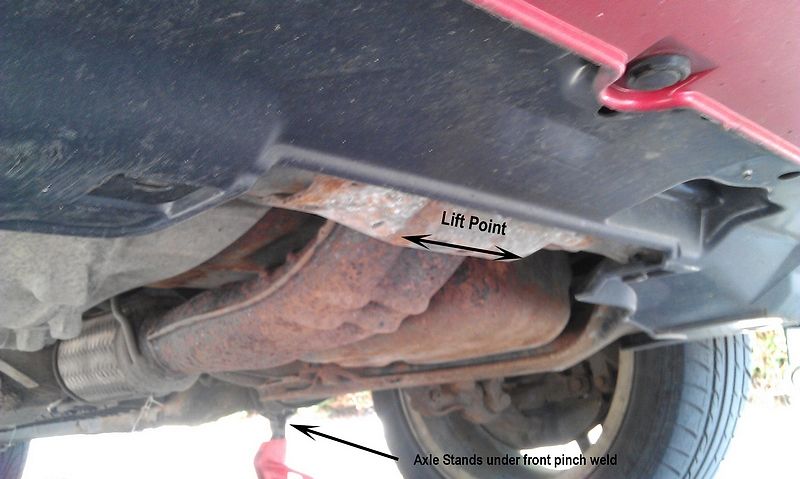
The lift point is at the front, in the centre as indicated. Handbrake on, both rear wheels solidly chocked (x4 chocks). Once the car is up, secure it on axle stands. I will pull the jack out the way and place it under the nearside tow hook just as another safety measure (I do this on the road, not in the relative safety of a garage or drive)
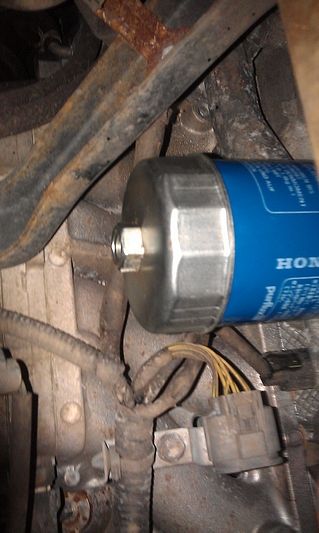
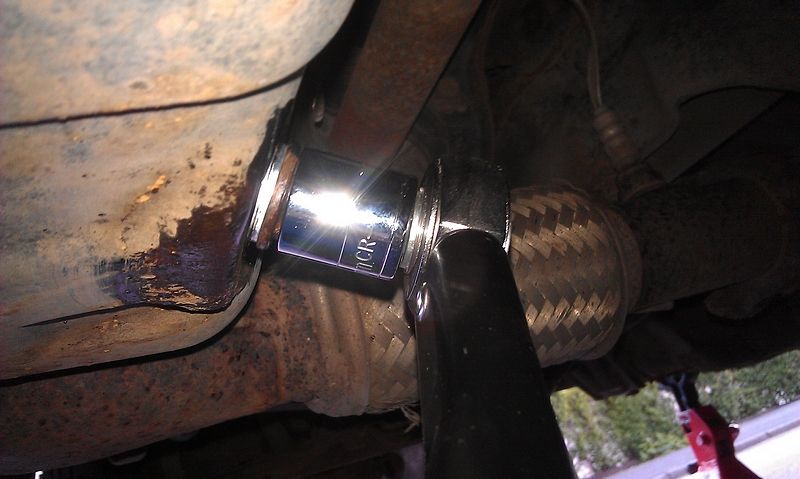
Accessing the Oil filter.
Now you need to ease yourself underneath the car. The filter is on the back of the engine about halfway up and slightly nearside so you will be better placed nearer the offside rather than central. Safety glasses a good idea here, you don't want oil or debris in your eyes.
I read some tips on the best way to get the filter off, chain, strap, universal adaptors etc. The best advice was to buy a Honda Filter Removal Tool or generic variant. I got mine of Ebay for just over £5, its slim, perfect fit and has a 17mm nut on the back – great for access and use with socket and (torque) wrench.
So socket and ratchet or spanner, the longer the easier it will be to get the filter moving.....
Now before you spin off the filter, use a small drain tray to catch the spill whilst under there. Be prepared for oil running out as you back the filter off. It might be a good idea to have some old papers, cardboard underneath to keep any spills and drips onto the ground to an absolute minimum.
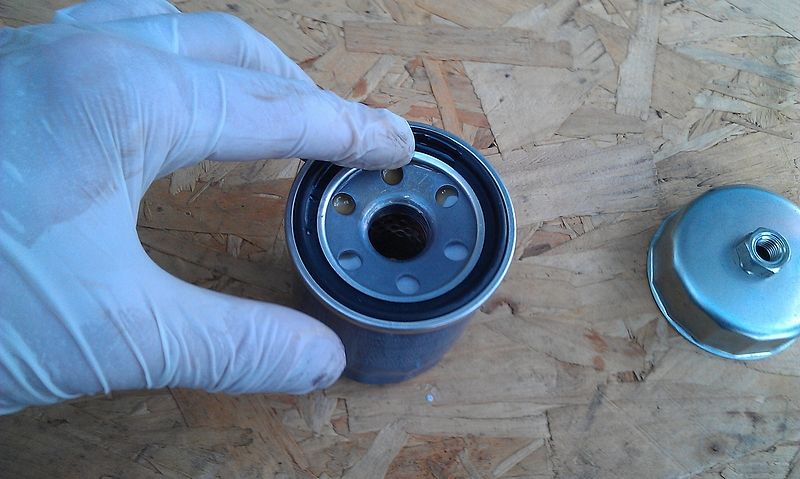
Once the filter is off, wipe around the threads and surface area checking that there is no filter gasket left behind and clean off any spills to engine, chassis or driveshafts.
Here is the gasket intact on the old filter.
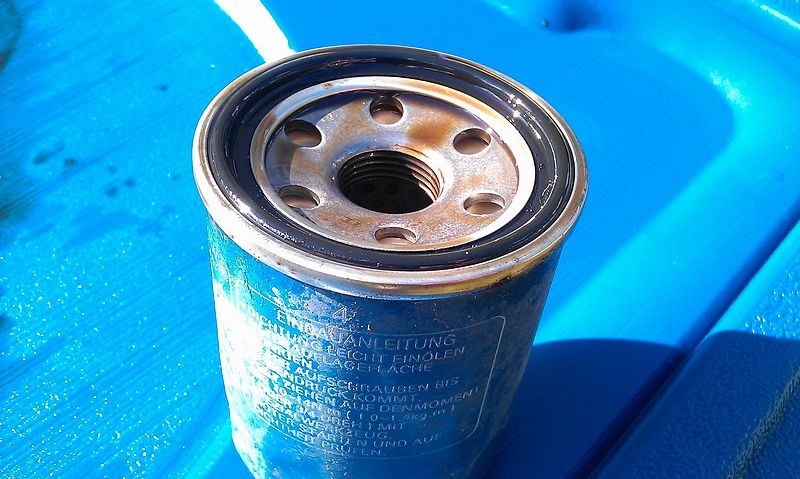
Lubricate the new filter gasket with some fresh oil.
Now slide back under the car and turn the filter on by hand. Some suggest hand tight, the manual recommends 7/8ths turns or 16ft-lbs. I find it far easier just to snug it up by hand then torque with a 17mm socket to specified force.
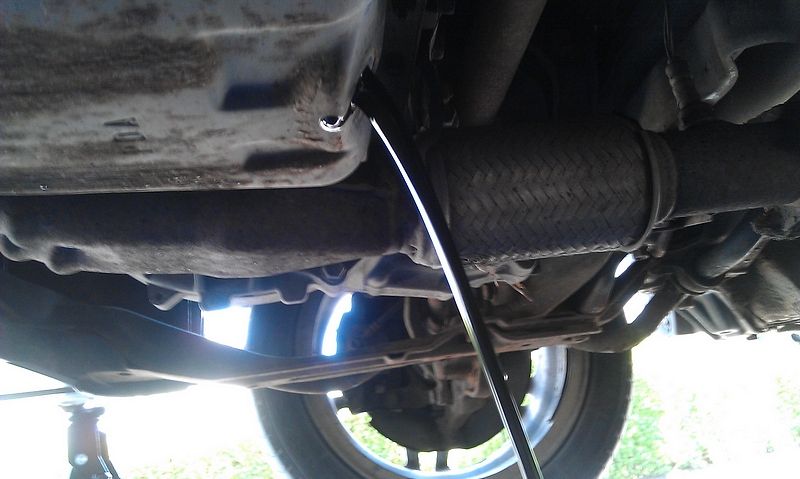
Sump bolt and draining oil.
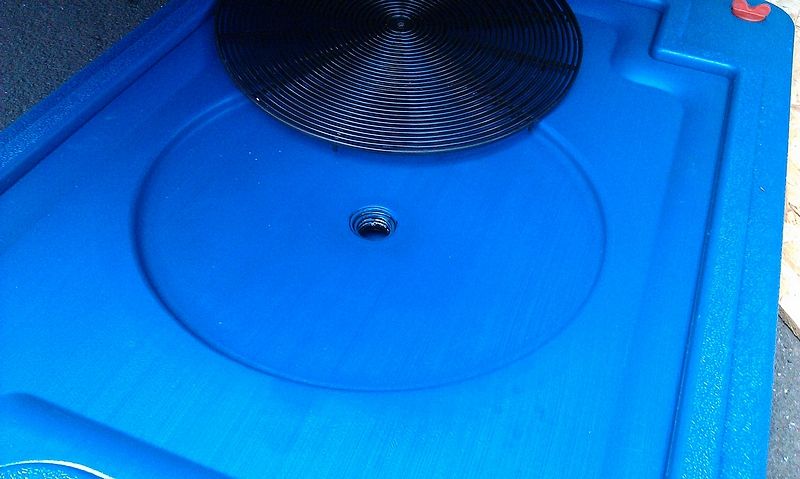
Position your drain pan under the sump. If you have a larger pan like mine, you probably won't need additional papers, cardboard or rags to catch oil splash, but DO REMEMBER to undo the plug under the splash guard.
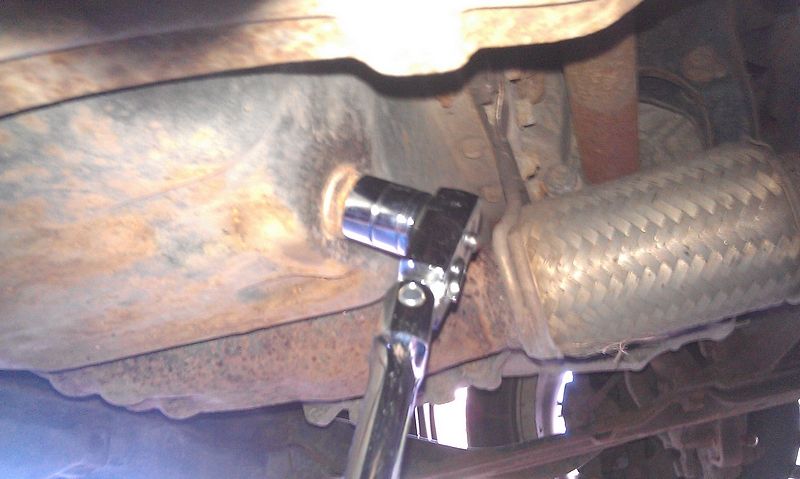
I always get to the sump bolt by reaching in from the front nearside. A 17mm socket and breaker bar will do the trick. I have a ratchet pictured but decided to switch to a breaker bar (not that I gained any leverage) just to save the ratchet mechanism. Once the bolt has cracked back it out by hand, at the last moment pull it away quickly to avoid oil over your gloves.
Now just let it drain. I don't rush this and once under way I'll undo the oil filler cap.
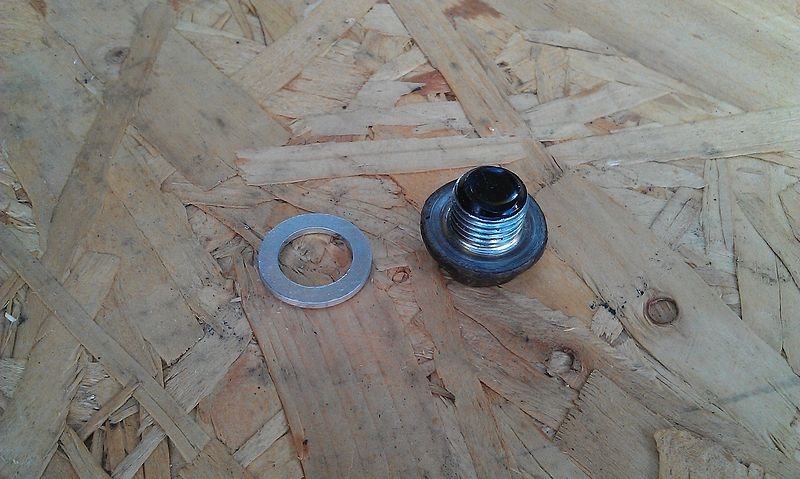
Clean up the bolt and get the sump washer ready. I put matt side of the washer to the sump, shiny side to the bolt.
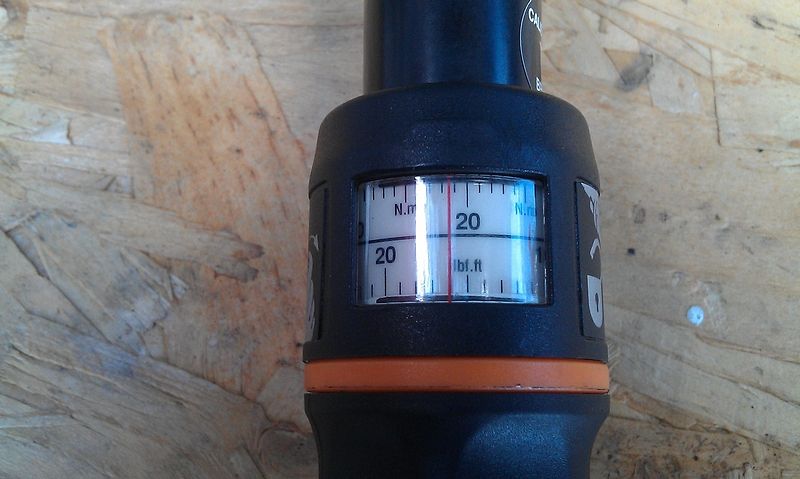
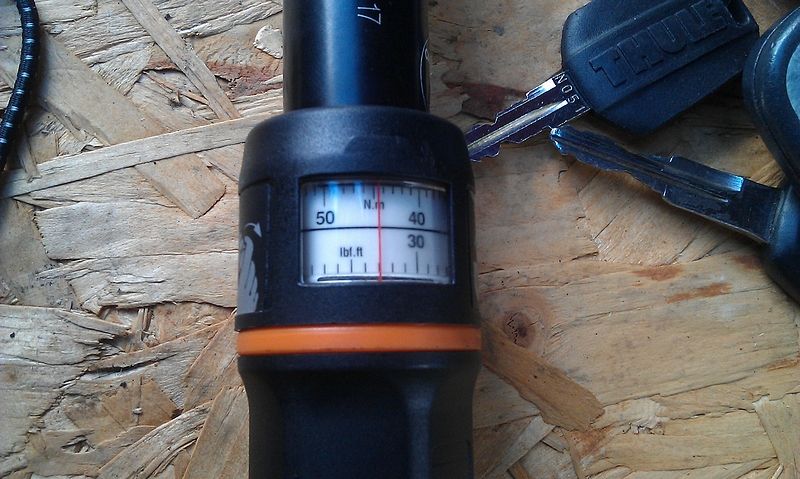
Once it has stopped dripping clean the sump surface of old oil and turn the bolt and washer in by hand. Once snug get your Torque Wrench set to 33ft-lb and slowly begin to tighten until the torque wrench clicks.
Finally clean the sump and around the bolt again as best you can. Any fresh oil will be more evident if you have a leak.
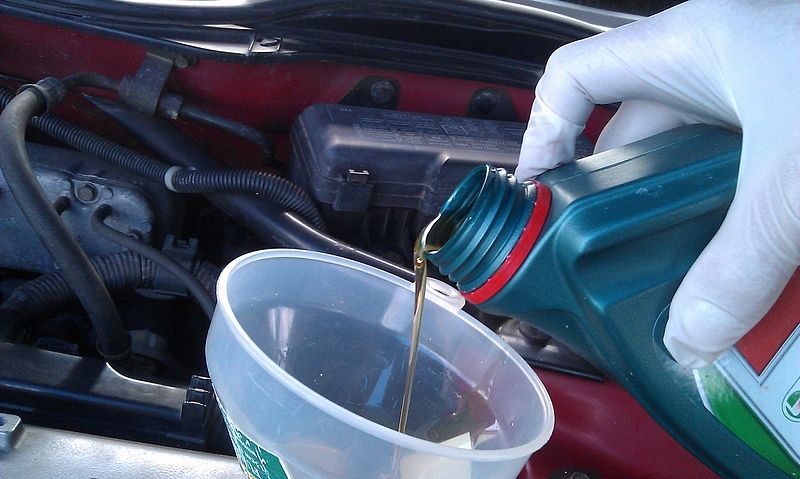
Now for the oil. Use whatever brand you prefer. I usually pour in 3ltrs and wait 20mins or so. Whilst waiting I'll start tidying the tools and rags away, last thing I'll check is for sump leaks and if ok I'll get the car off the axle stands and get it as level as I can.
Once all the gear is away I'll check the dipstick. You need to take into account the road camber if you are like me and are working on the road. This is an experience call here, no point trying to tell you where it should sit or whether you are on a slope or otherwise. Better to incrementally under fill than go way over max.
I'll aim for midway between min and max then let the engine run for a few mins whilst looking around for leaks. About 300ml will enter the filter. The final oil check will be performed with the car as level as possible, about 10mins after a warm up drive. I'll also check oil level in the immediate days afterward, topping up where necessary.
Now take your old oil and filter to the local council recycling centre and you have completed your oil and filter service.
_______________________________
edit- emphasis on vehicle lifting safety