What's new

DIY to replace the bulb on the headlight switch ***embly adjuster

Mr CL7

Members
Messages
1,322
Reaction score
53
Location
Eltham/Gravesend
Car
2.0 petrol CL7
Tools needed

Flat head slim screw driver
Star screw driver to remove two screws from fascia
Wire cutters maybe required depending on length of bulb wires

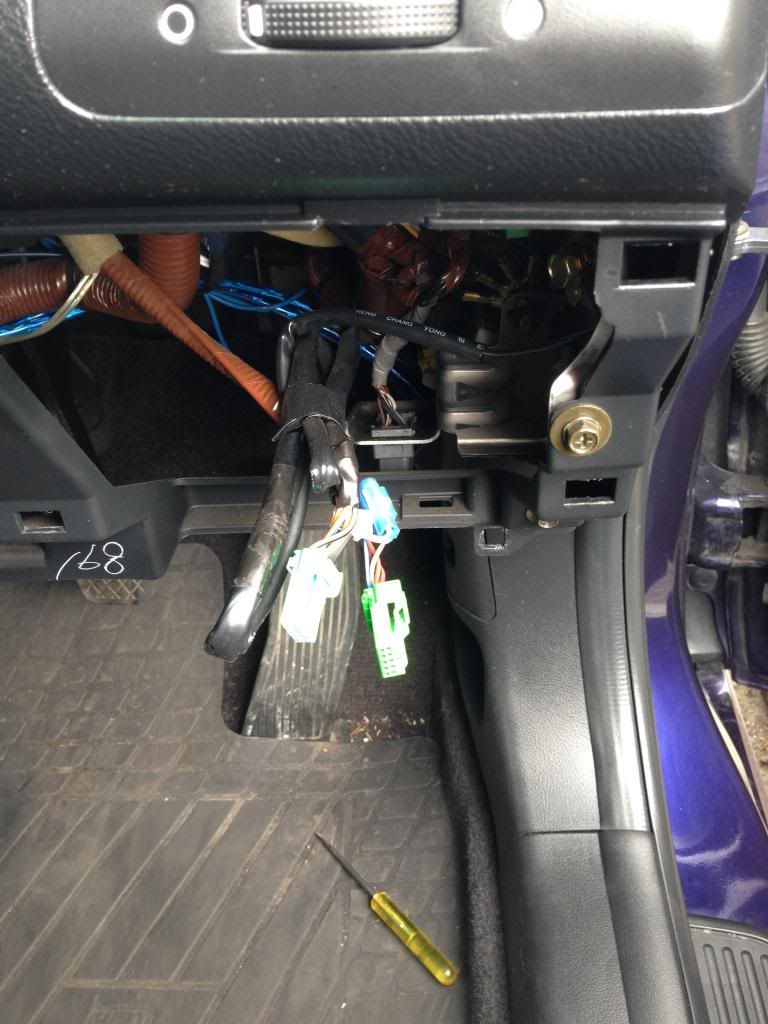
Feel for two screws at the bottom of the large fascia which has the coin pocket. One left side, one right. Once they're out you can gently pull the whole section away.

Make sure to disconnect the plugs for the fog light and headlight switch. Mine is the far right in the pic below

IMG_7171_zps74fa31a0.jpg


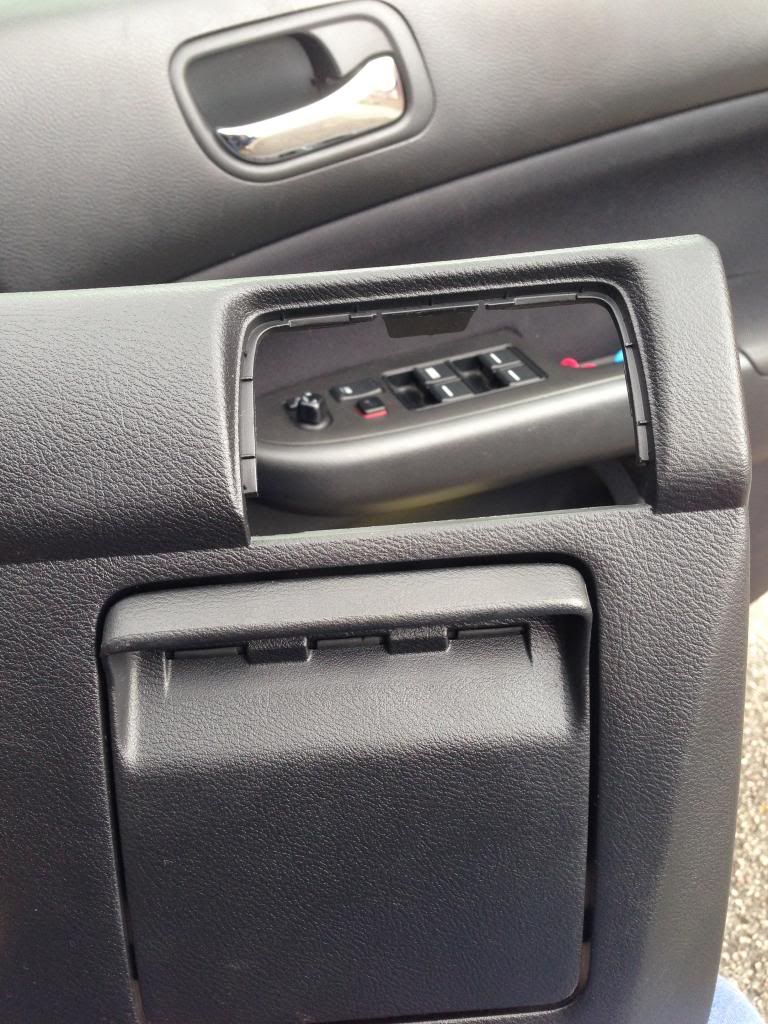
Pop out this window by pushing from the back gently
IMG_7172_zpsb8b50890.jpg


IMG_7173_zpsa31a861d.jpg


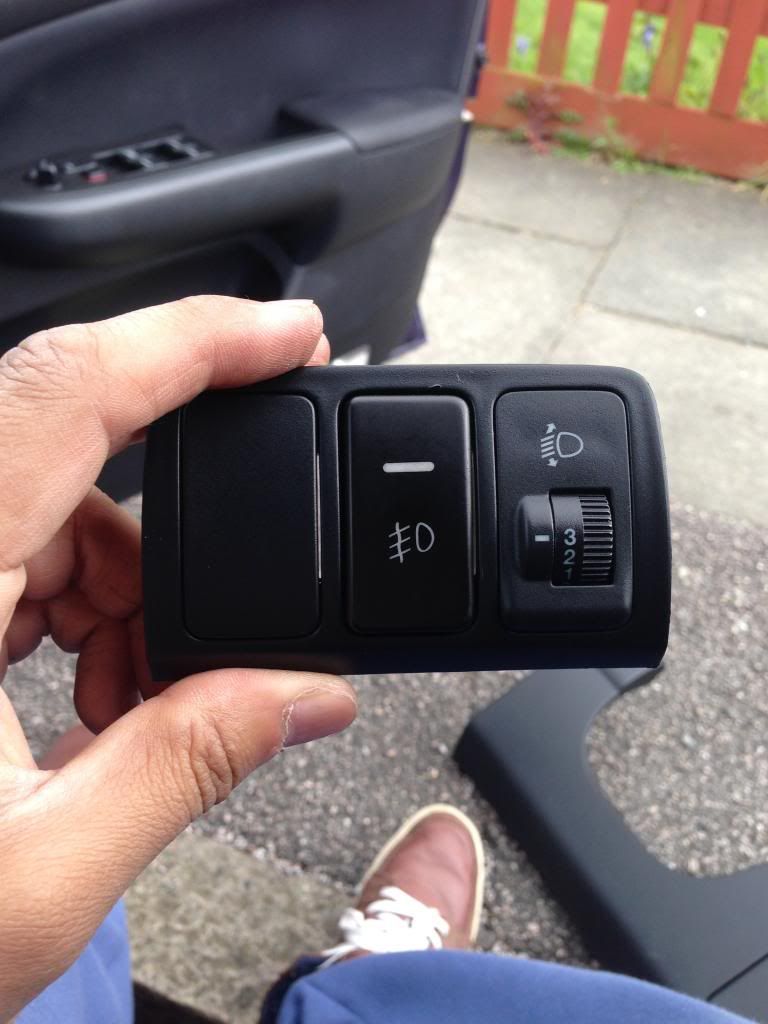
Push out the switch from the back of the window gently
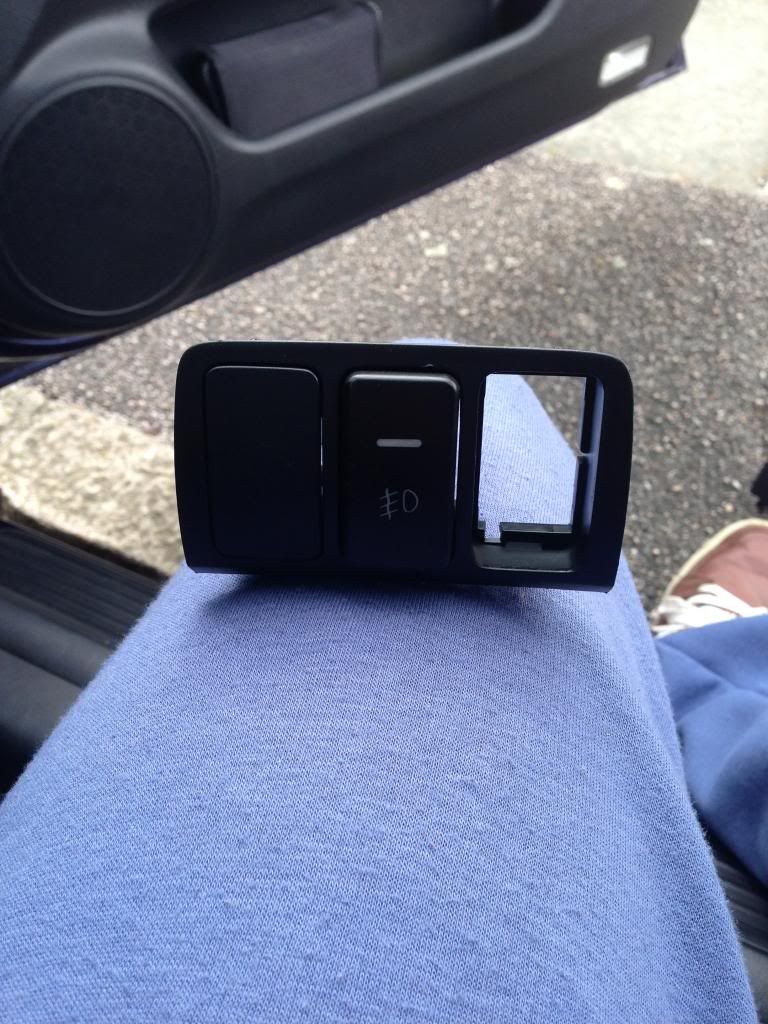
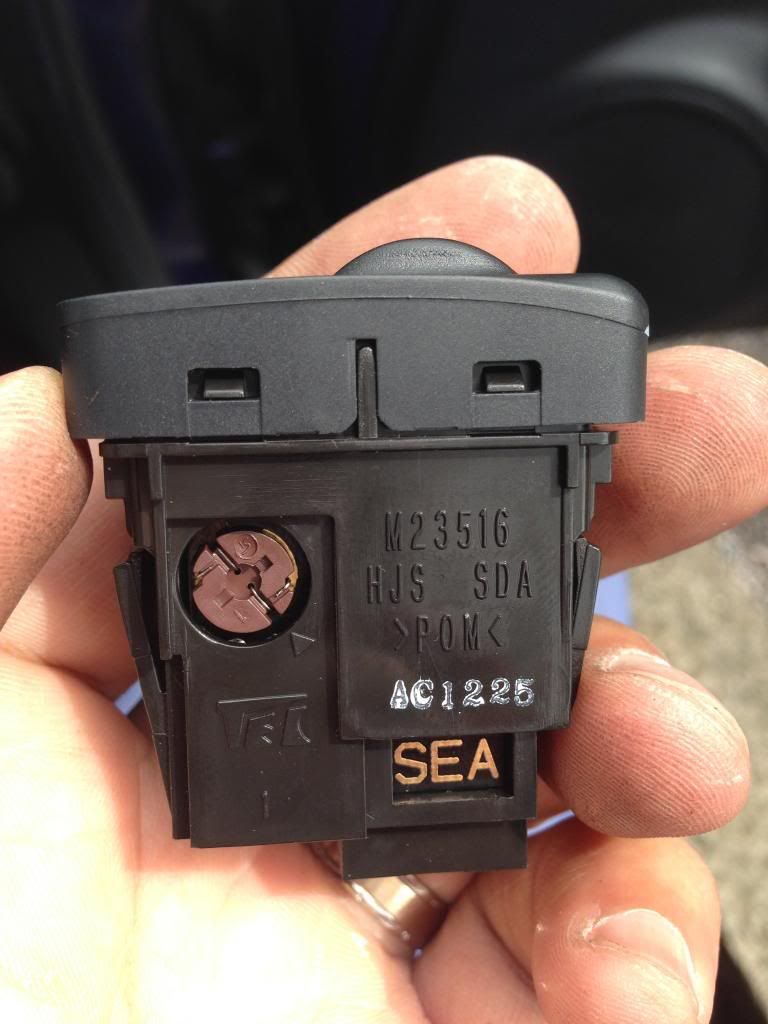
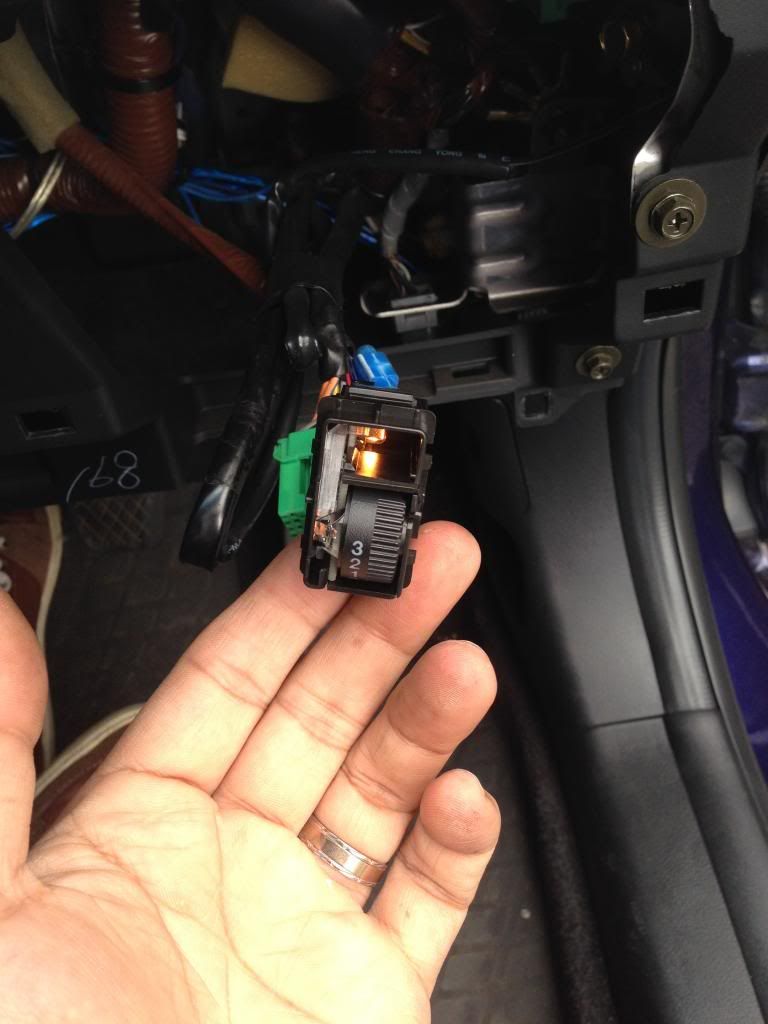
IMG_7174_zps217a577b.jpg


Switch in hand
IMG_7175_zpsbe3ccbd0.jpg


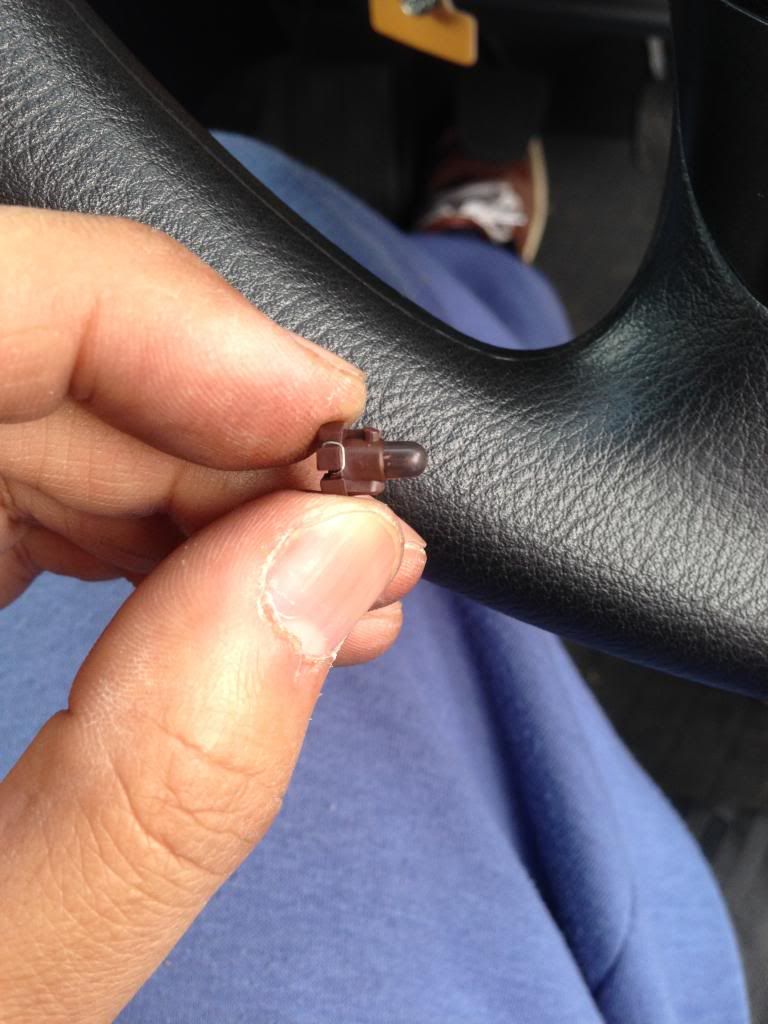
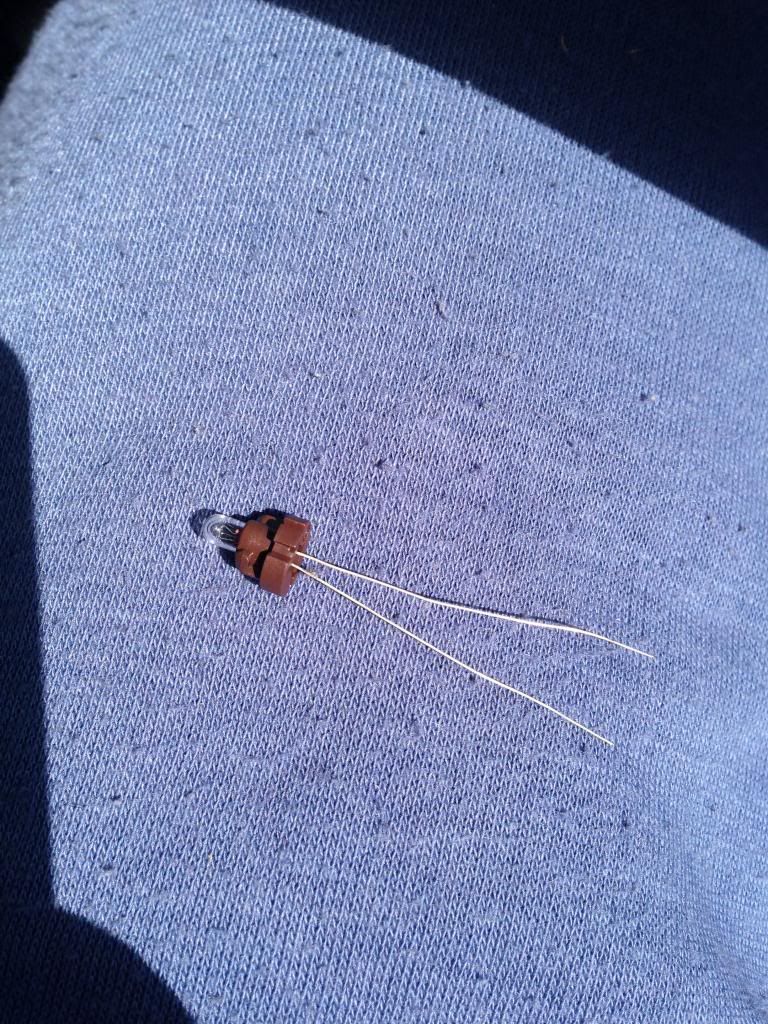
Here we see the side of the switch. The brown circle part is the back of the bulb holder with the wires attached as you can see
IMG_7176_zpsf9e72bb0.jpg


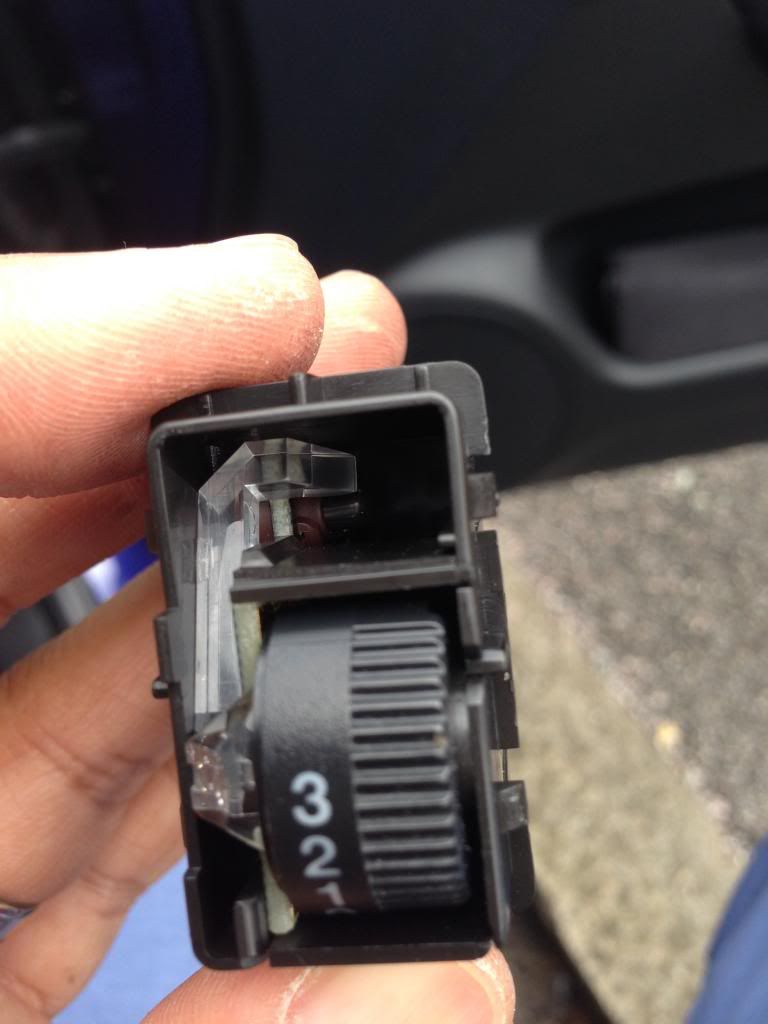
I have removed the adjuster switch from the front by using a slim flat head screw driver to prize it off
IMG_7177_zps1edcc2d4.jpg


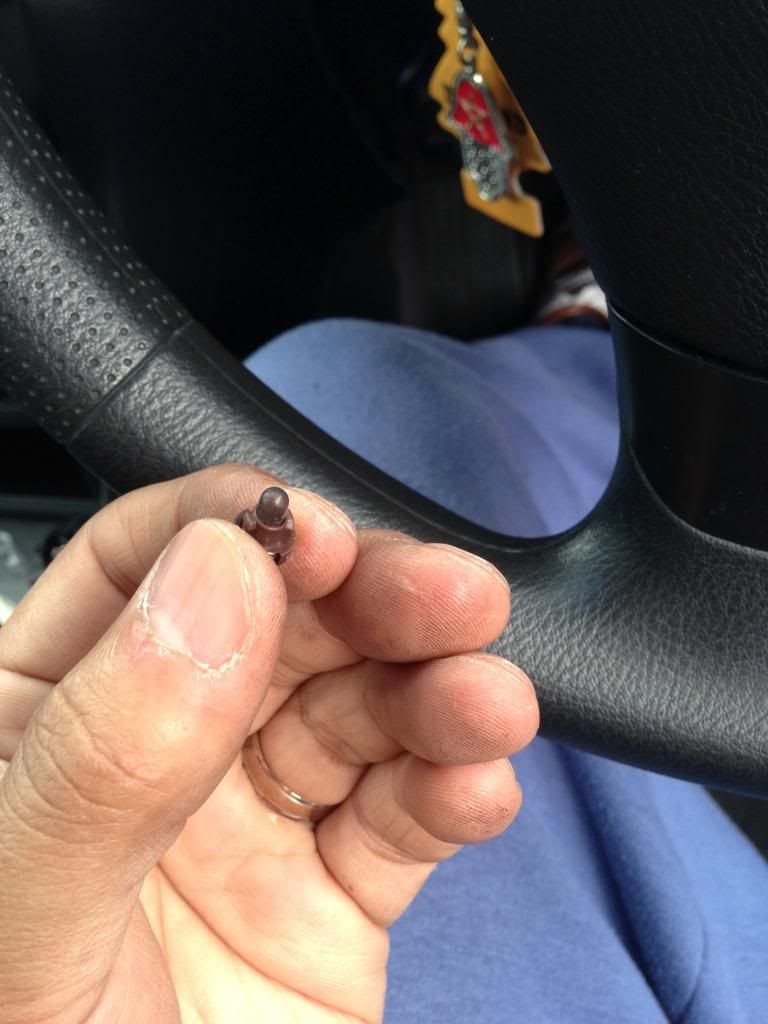
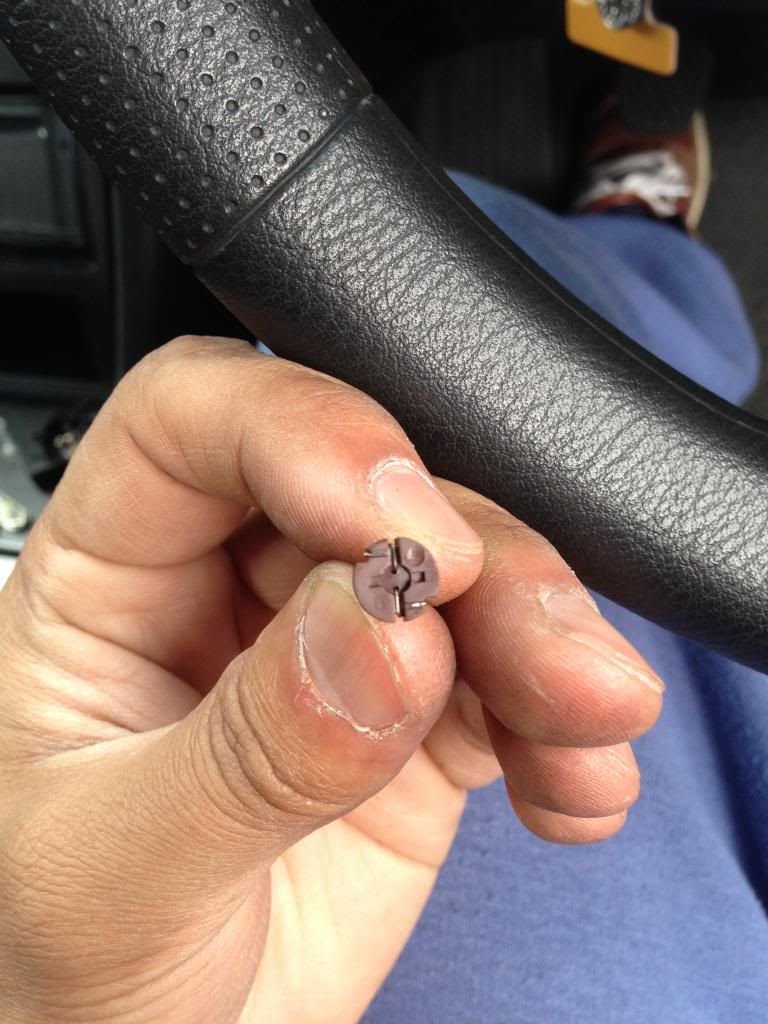
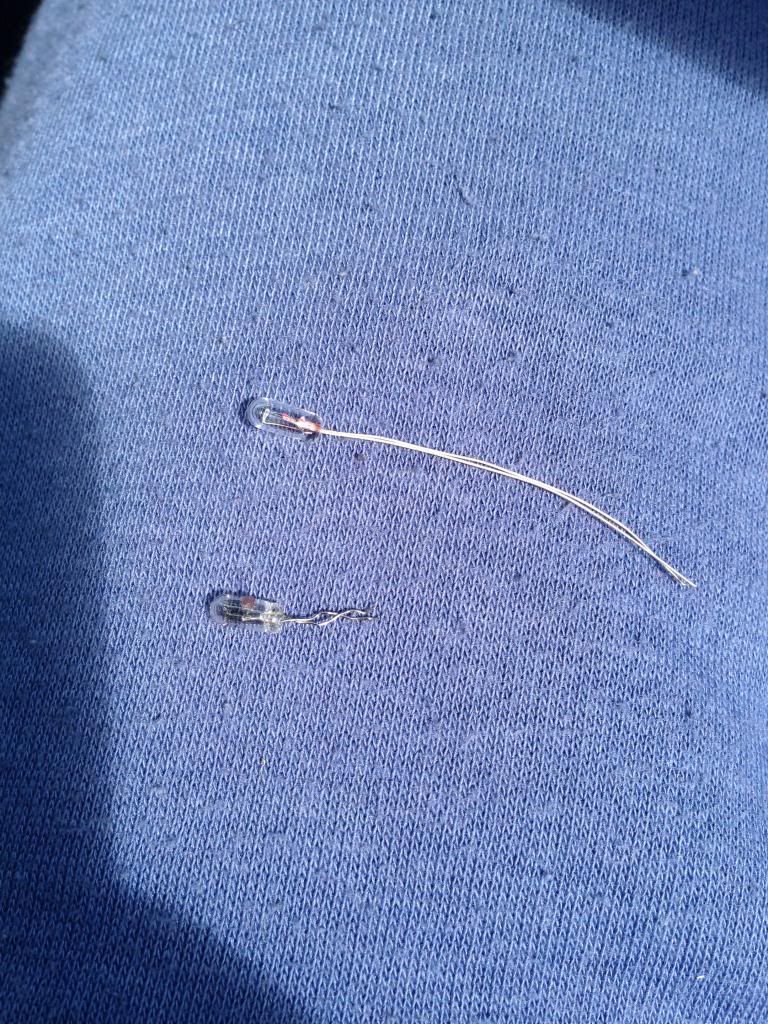
Close up of the bulb. You can just about see it inside
IMG_7178_zps337cf802.jpg


IMG_7179_zpsd6837a64.jpg


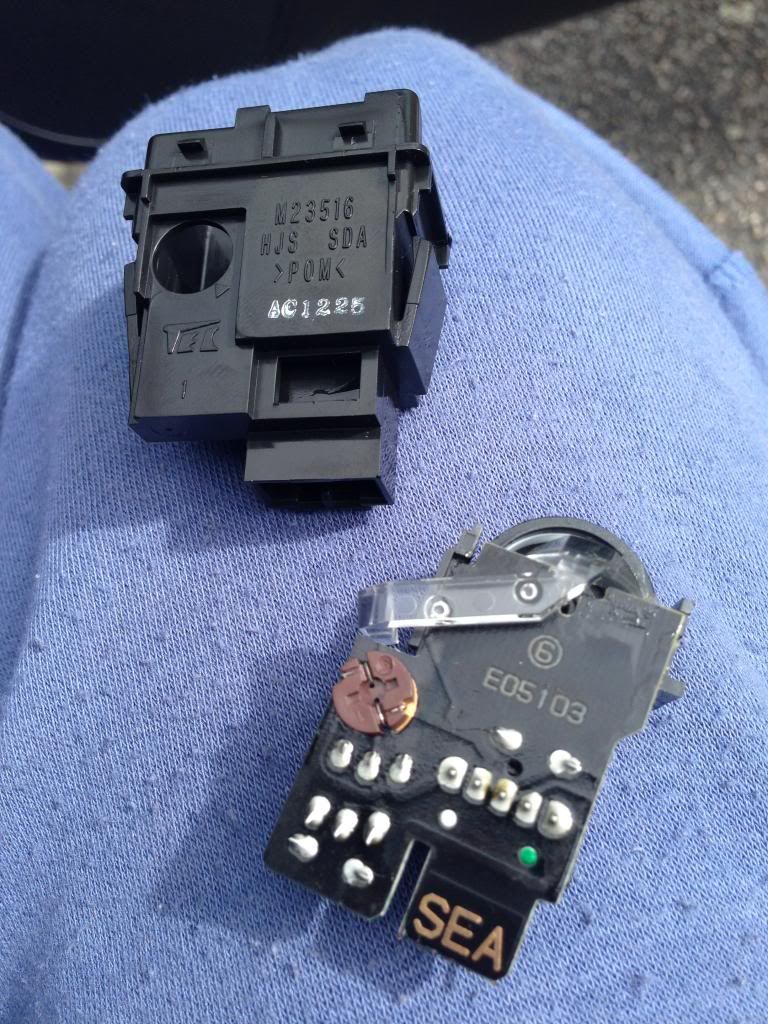
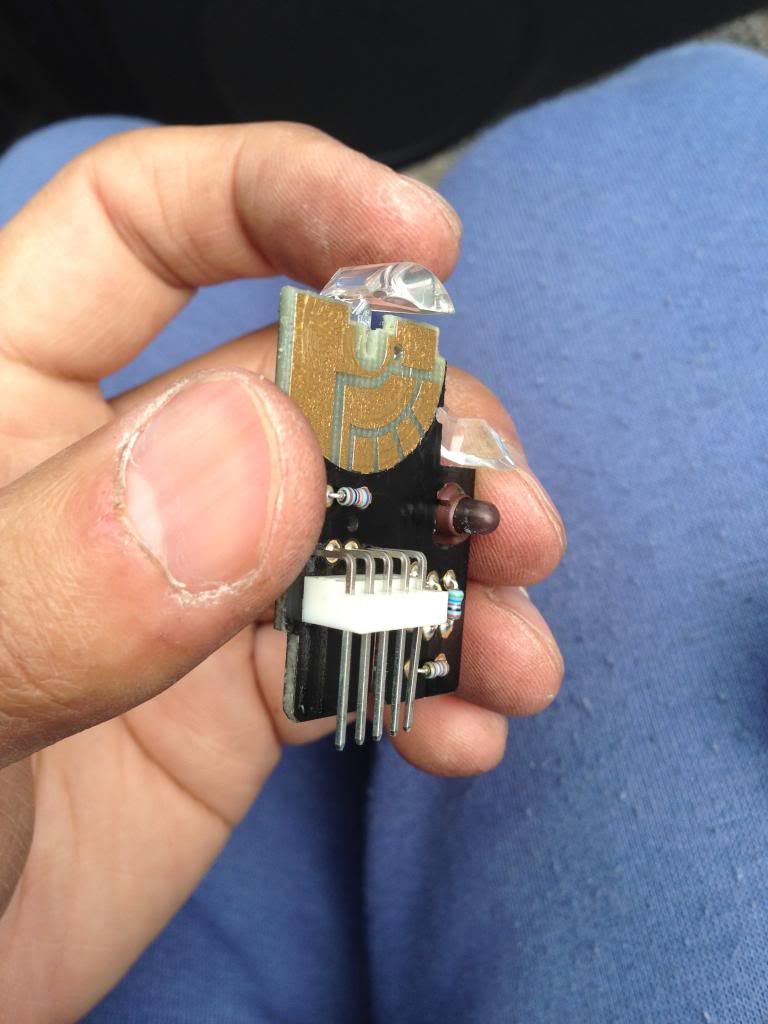
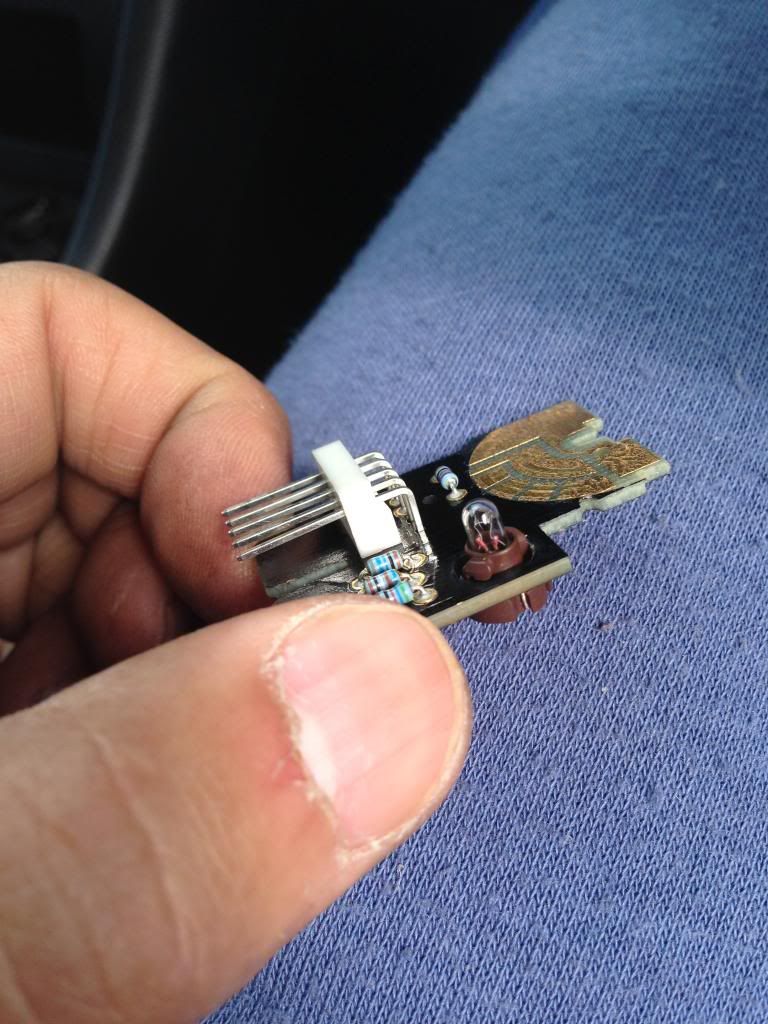
Circuit board removed from switch. It comes off easily enough
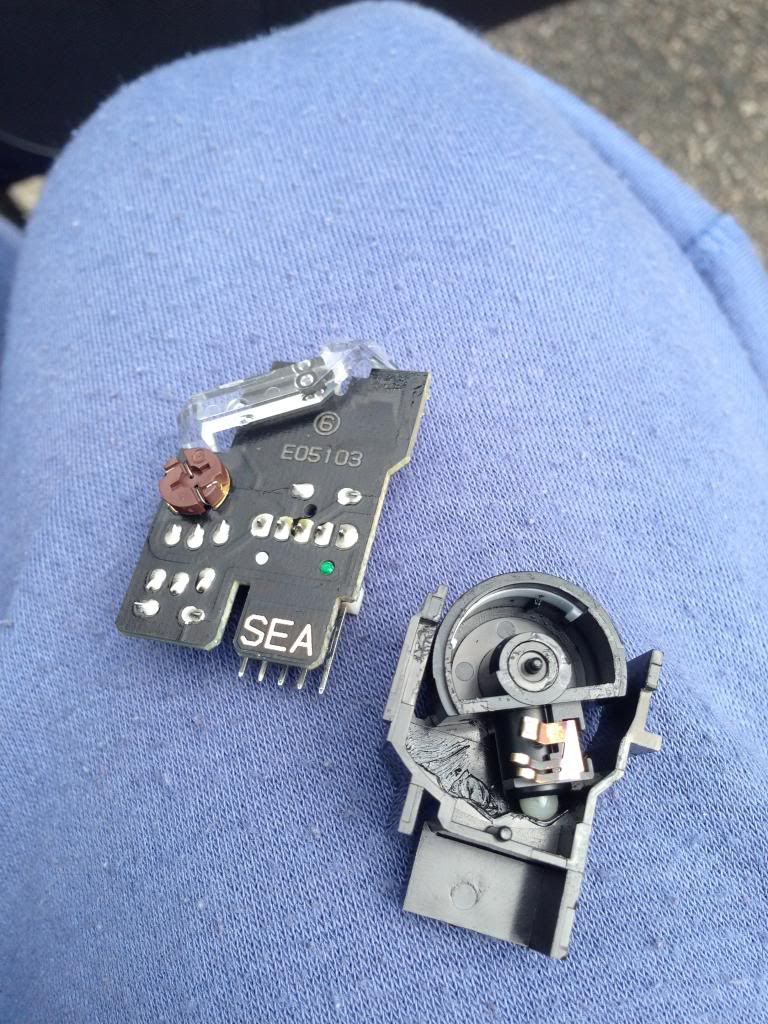
IMG_7180_zpsfb84d326.jpg


Circuit board
IMG_7181_zps25cd45b1.jpg


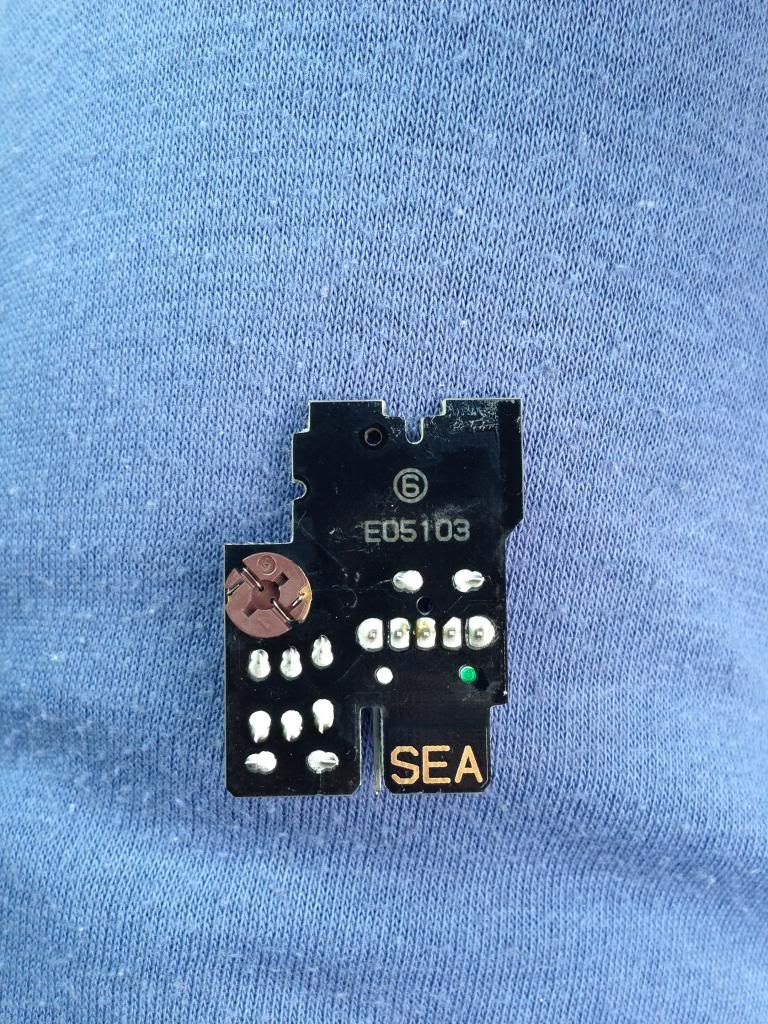
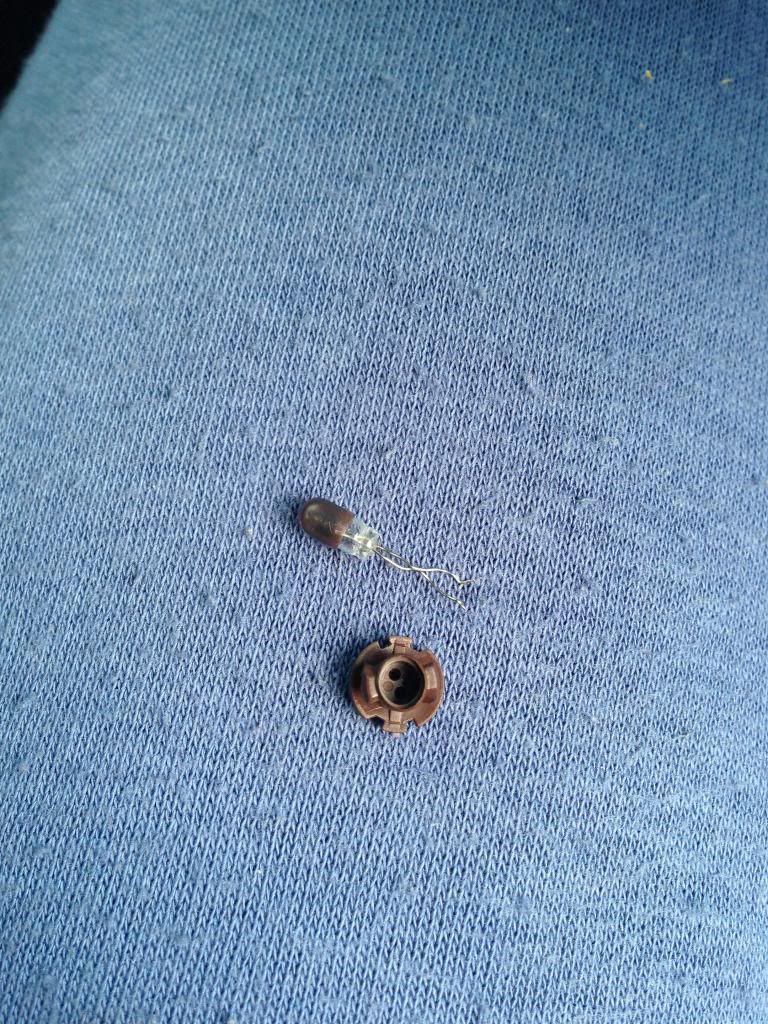
Back of circuit showing brown circle bulb bottom
IMG_7182_zpsd5de3b0b.jpg


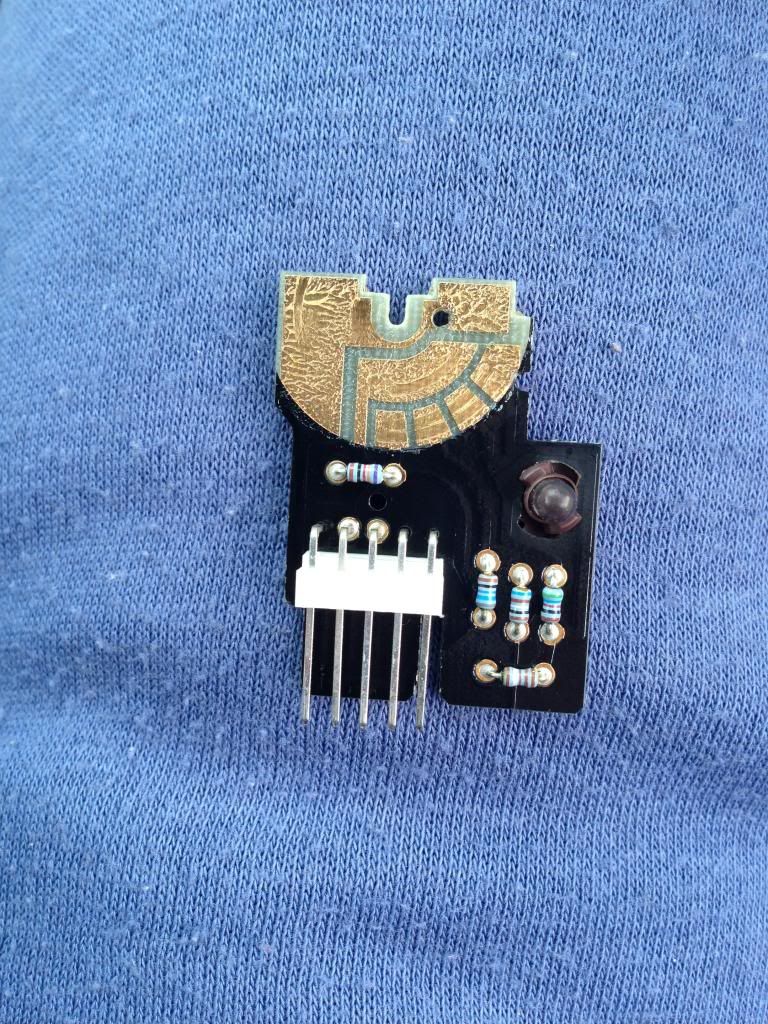
Front of circuit showing bulb
IMG_7183_zps6b4ea437.jpg
 
To extract bulb holder just turn anti clock wise on the circuit board
IMG_7184_zpsc825cdcb.jpg


Here's the tiny bulb
IMG_7185_zps233b9baf.jpg


Bulb holder with 2 tiny holes for the bulb wires to feed through
IMG_7186_zpsf2d9a215.jpg


Bulb separated from holder
IMG_7187_zpsedcd201f.jpg


A friend had a spare bulb this is the company he bought it from in the USA. From Lings Honda parts its £4.30 for this bulb. I don't know how much Holdcroft Honda would sell this to us for though?
IMG_7188_zps683d9866.jpg


IMG_7190_zpsea31347e.jpg


New vs old
IMG_7193_zps79e87ab0.jpg


New bulb placed in holder. Be careful when poking the bulb wires through not to bend them as they are delicate. I had to cut the excess wires shown here you will see why in the picture after this.
IMG_7194_zps8cc66461.jpg


Here's the new bulb attached
IMG_7196_zps58fb5712.jpg


Quick check before it all goes back together and hey presto. Bulb is now working
IMG_7197_zps44252ab7.jpg


Just reassemble everything and your good to go.

It took me about 45 minutes to do as I have never replaced this. However it can be done in less time rather than striping everything apart like I did as I have been informed.

I hope this helps folks.
 
Awesome write up Faz. Nice one buddy. You can get these bulbs for about 79p from Maplins by the way folk. Don't spend too much on them.

Also, it's worth noting: The old bulb has what looks like a tiny brown condom on it. That's basically a tinted cover. It will slide off the old bulb with a little gentle persuasion. You can then fit this on the new bulb. It takes the edge off the brightness, giving the light a warmer, softer glow. It's the same with the heated seat switch lights and others. I found I preferred the light with them on as opposed to off.
 
No offense, but all this work for that one bulb? You could have taken it out on picture 6, and replace that with a new one.

5 minutes work.

That's how i did it yesterday with my heated seats switch with a broken bulb.
 
Stevearcade said:
Awesome write up Faz. Nice one buddy. You can get these bulbs for about 79p from Maplins by the way folk. Don't spend too much on them.

Also, it's worth noting: The old bulb has what looks like a tiny brown condom on it. That's basically a tinted cover. It will slide off the old bulb with a little gentle persuasion. You can then fit this on the new bulb. It takes the edge off the brightness, giving the light a warmer, softer glow. It's the same with the heated seat switch lights and others. I found I preferred the light with them on as opposed to off.
Cheers Steve. Thanks for the heads up about Maplin stocking these. I didn't pay anything my mate gave it to me for free. I tried sliding the brown chappy off but it was bonded so split.
 
Nasty1984 said:
No offense, but all this work for that one bulb? You could have taken it out on picture 6, and replace that with a new one.

5 minutes work.

That's how i did it yesterday with my heated seats switch with a broken bulb.
Point taken. Will remember in future.
 
Great DIY Faz I had this lamp blow on my 7th gen as well.Its not to bad of a job from memory and i got the lamp from maplins like steve said.
 
Faz great DIY, i'm like you as I have to take apart then fully replace. My VSA light bulb is out so great heads up on stock.
 
Nasty1984 said:
No offense, but all this work for that one bulb? You could have taken it out on picture 6, and replace that with a new one.

5 minutes work.

That's how i did it yesterday with my heated seats switch with a broken bulb.
Wheres the fun in that
 
:lol: Indeed! You can do the job and then feel like this guy:

success_baby_meme.png
 
TypeR said:
Wheres the fun in that
No fun at all, but i won't feel secure dismantling the swith to the electric circuit :)

I'm such a guy who ends up with more screws and bolts then where i started with :D
 
brett said:
Great DIY Faz I had this lamp blow on my 7th gen as well.Its not to bad of a job from memory and i got the lamp from maplins like steve said.
Cheers Brett. I haven't been to Maplins for years
 
Nasty1984 said:
No fun at all, but i won't feel secure dismantling the swith to the electric circuit :)

I'm such a guy who ends up with more screws and bolts then where i started with :D
Don't sweat it! Manufacturer always use more screws than you need :lol:
 
Jon_G said:
Nice write up!

I had no idea there was a bulb in there :huh:
You were thinking the light you saw in there was coming from the sun?
 
Nice write up. This bulb has gone on mine but I can't see myself changing it unless I literally have nothing else at all to do, including washing up. Seems like a a lot of hassle to replace a bulb that I don't even look at on a control I never use.
 
Osiris said:
Nice write up. This bulb has gone on mine but I can't see myself changing it unless I literally have nothing else at all to do, including washing up. Seems like a a lot of hassle to replace a bulb that I don't even look at on a control I never use.
Cheers. If your really **** like me then you would do it. I like everything in working order but that's how I am.
 
Another one I need to do too. Looked for the switch in the dark when I was loaded up and couldn't find it.
 
Top