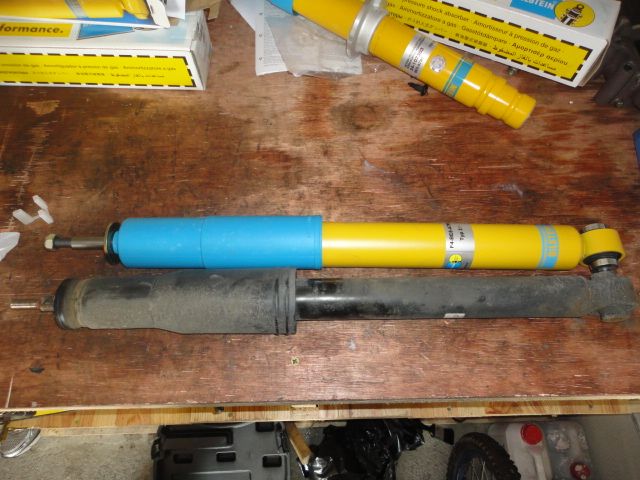
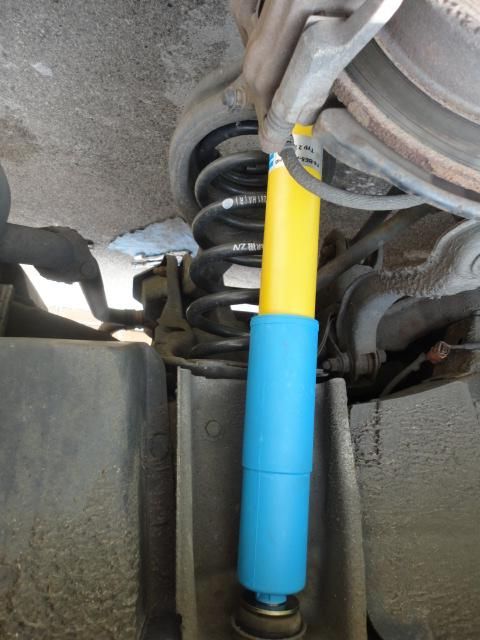
After six months on my H&R lowered Accord Tourer the OEM shocks finally wore out. I ordered some Bilstein B8s for the rear and took to fit these as the B8s are specifically designed for lowered cars. This DIY is for replacing the rear shocks on a tourer only. The Saloon has a different suspension make up where the spring and shock are a single coilover, on the tourer these are separate so it's easier to do. Anyway onto the DIY.
Before we start the usual safety rules apply, make sure the car is well supported with axle stands and don't pull it onto you!
Ok you'll need the following tools/equipment
1. Axle stands
2. Car jack
3. 17mm socket (preferably six sided)
4. 14mm spanner (open or closed)
5. 5mm allen key
6. Penetrating fluid e.g. PB blaster, PlusGas, etc (fyi WD40 is not a penetrating fluid!!)
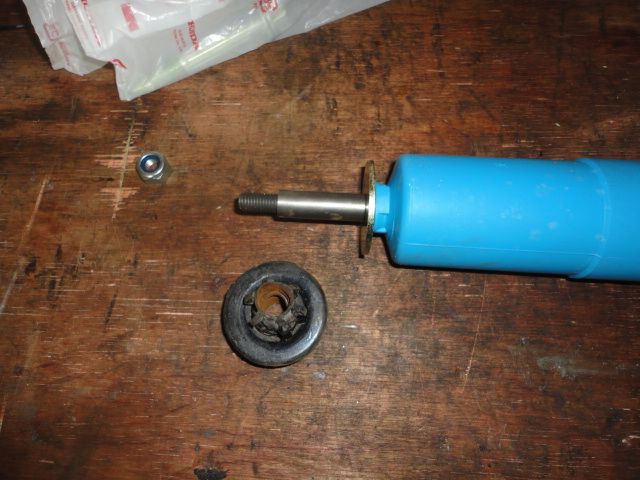
For parts you will need the replacement shocks x 2 (always replace in pairs). In addition I also purchased 2 new dampener bolts, these were not essential but when I done the springs they were pretty rusted so I wanted to get them done (they cost about £10 each).
1. Jack up the car and support with axle stands.
2. Remove the wheel
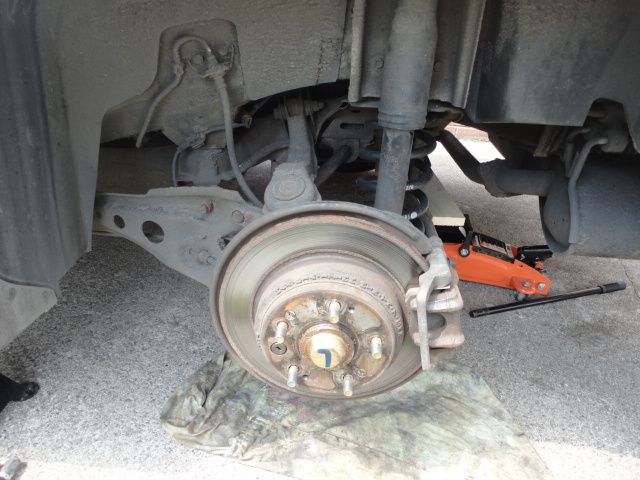
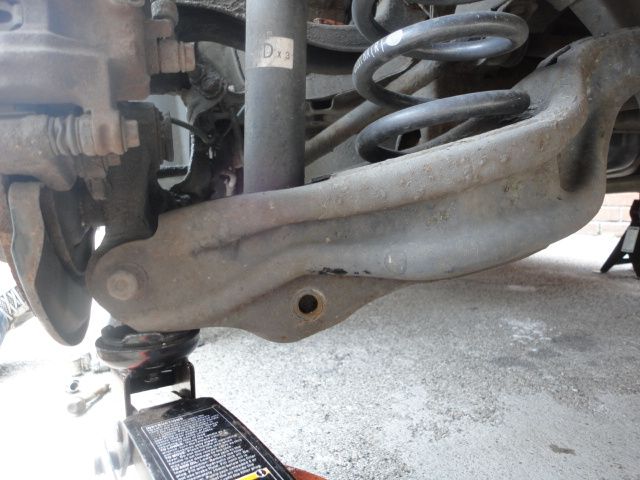
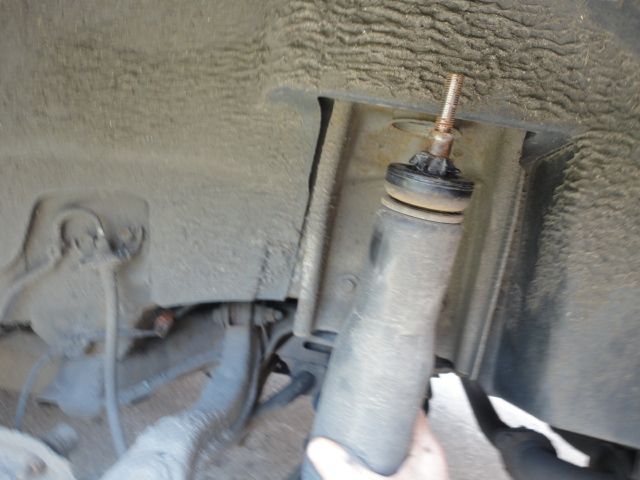
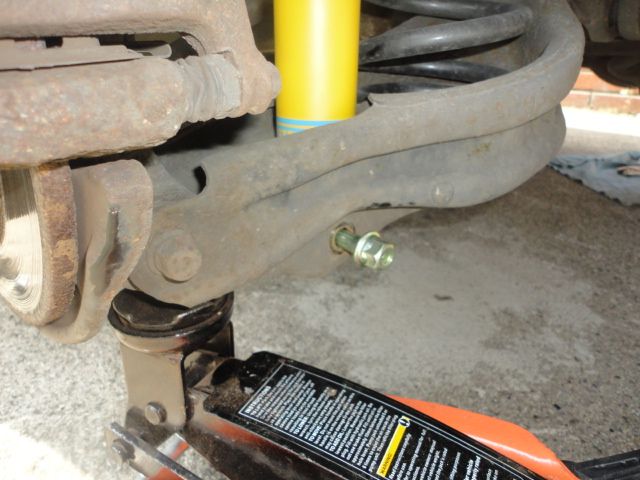
3. Locate the bolt connecting the shock to the lower control arm. This is a 17mm bolt that was torqued to 107Nm
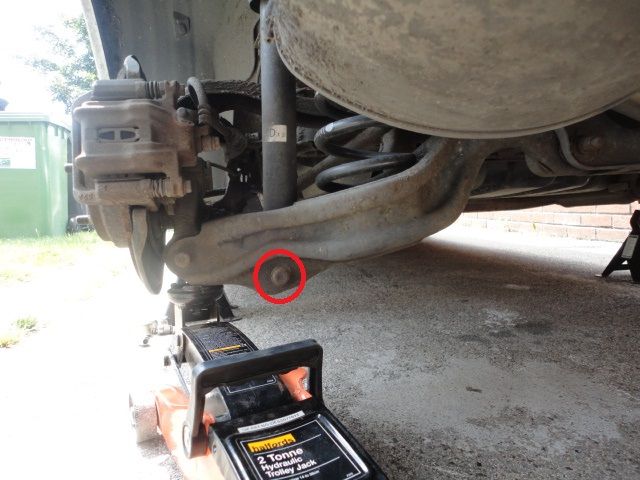
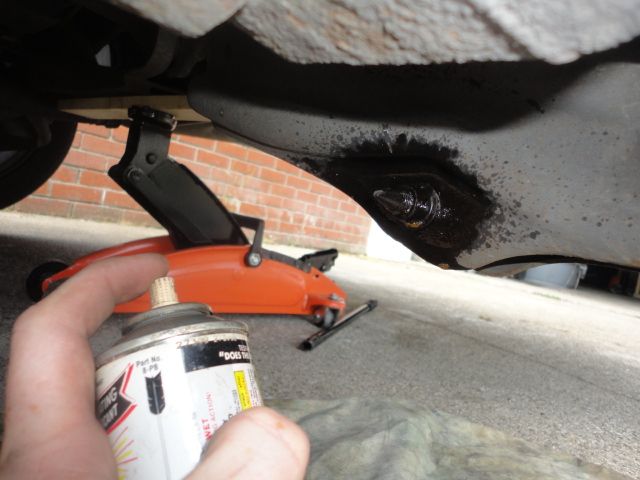
4. Before going at this apply some penetrating fluid to the threaded side (opposite the bolt) and let it work it stuff. Give it a few applications.
Now, these can be very, very stiff. It's also possible that the steel core of the bushing in the OEM shock has seized onto the bolt itself. If this is the case, you'll need to burn off the rubber (with a torch) and crack the seize. This is probably not a DIY job unless you've the tools. Most times though it should move easily - I've done a few at this stage.
5. Get your 17mm socket onto the bolt and start turning the bolt anti-clockwise . I had to just a cheater bar (breaker bar) to get the required torque. Now, if this is stuck don't over force it, but try tightening and loosing the bolt a few times. Eventually it should come free. The bolt is SAE grade 8 steel, so it's pretty tough stuff.
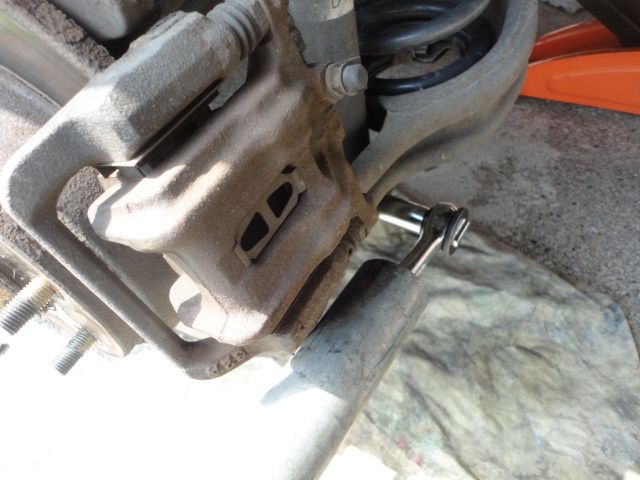
6. Once the bolt starts turning, remove the socket and support the lower control arm via a jack. Raise the arm a small bit (say 2-3 cm) to take pressure off the bolt. The reason for this is that the damper at full stretch supports this control arm. If you don't jack this you will be undoing against the weight of the arm.
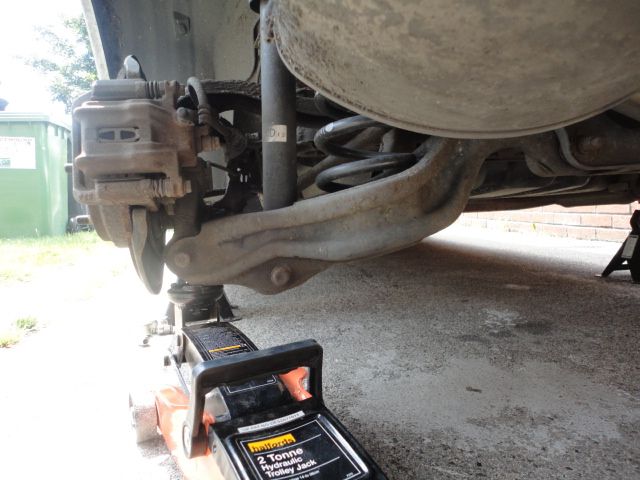
7. Socket back on and complete the removal of the 17mm bolt.
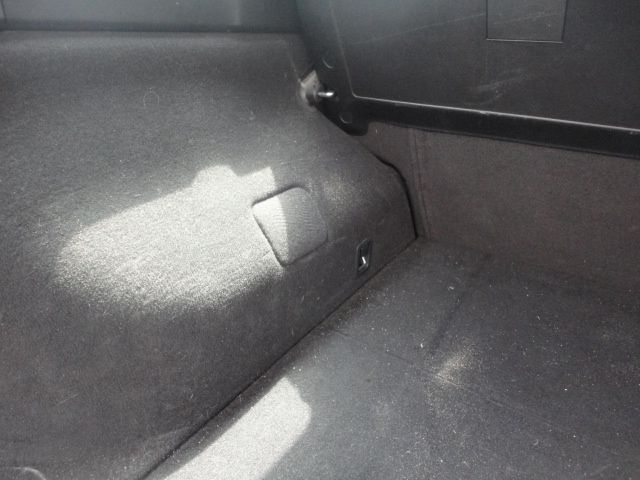
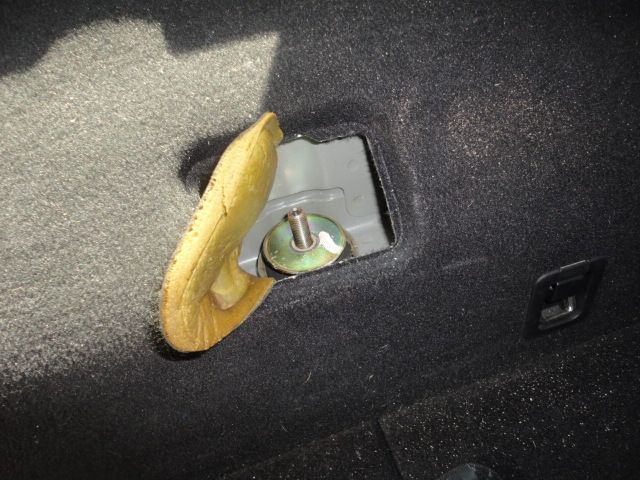
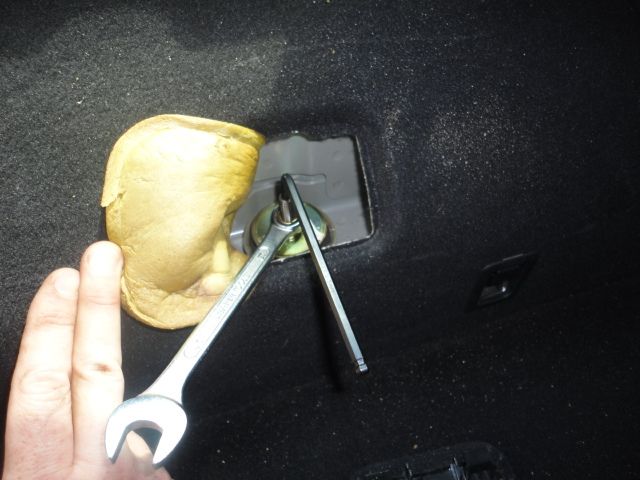
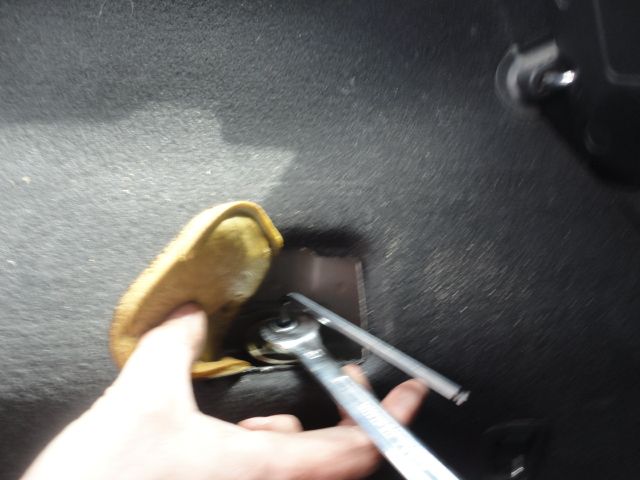
Now open the boot of the car and locate the top locknut of the damper.... (in next post)
Before we start the usual safety rules apply, make sure the car is well supported with axle stands and don't pull it onto you!
Ok you'll need the following tools/equipment
1. Axle stands
2. Car jack
3. 17mm socket (preferably six sided)
4. 14mm spanner (open or closed)
5. 5mm allen key
6. Penetrating fluid e.g. PB blaster, PlusGas, etc (fyi WD40 is not a penetrating fluid!!)
For parts you will need the replacement shocks x 2 (always replace in pairs). In addition I also purchased 2 new dampener bolts, these were not essential but when I done the springs they were pretty rusted so I wanted to get them done (they cost about £10 each).
1. Jack up the car and support with axle stands.
2. Remove the wheel
3. Locate the bolt connecting the shock to the lower control arm. This is a 17mm bolt that was torqued to 107Nm
4. Before going at this apply some penetrating fluid to the threaded side (opposite the bolt) and let it work it stuff. Give it a few applications.
Now, these can be very, very stiff. It's also possible that the steel core of the bushing in the OEM shock has seized onto the bolt itself. If this is the case, you'll need to burn off the rubber (with a torch) and crack the seize. This is probably not a DIY job unless you've the tools. Most times though it should move easily - I've done a few at this stage.
5. Get your 17mm socket onto the bolt and start turning the bolt anti-clockwise . I had to just a cheater bar (breaker bar) to get the required torque. Now, if this is stuck don't over force it, but try tightening and loosing the bolt a few times. Eventually it should come free. The bolt is SAE grade 8 steel, so it's pretty tough stuff.
6. Once the bolt starts turning, remove the socket and support the lower control arm via a jack. Raise the arm a small bit (say 2-3 cm) to take pressure off the bolt. The reason for this is that the damper at full stretch supports this control arm. If you don't jack this you will be undoing against the weight of the arm.
7. Socket back on and complete the removal of the 17mm bolt.
Now open the boot of the car and locate the top locknut of the damper.... (in next post)

")