What's new

2009 i-DTEC EX Tourer D-Pillar Trim/Speaker Cover Removal

ANZACTinHat

New Member
Messages
13
Reaction score
1
Location
Bangor, North West Wales
Car
8th i-DTEC Tourer EX
Advice needed, please.

i-DTEC EX tourer model with Premium (hah!) Audio System.

I want to replace a crackly speaker and need to know how to get the nearside rear (boot) pillar trim off, please.

I've seen the speaker on a bracket on spares photos (speaker part EAS8PM193E - 4 ohm 15 watts), I just want to know where to lever off with trim tool to not break anything, if that's the way to do it and speaker cover comes off with trim.

Anyone know of a better quality speaker that fits? No joy researching there either.

Have searched high and low, online service manuals only seem to be for US saloons.

Love the car!
 
Service manual for euro accords is called ESM, It's a bit finnicky as it was designed for old web browsers but there are some instructions to get it working and a link to an online version here

You might be able to find a PDF one by searching for Acura TSX service manuals, from 2009 onwards - our cars (Accord "Euro") were sold in the USA under that name. The US "accord" is a different car (nice and confusing I know)


Personally I have a Windows XP virtual machine that I use for it as on the web version some of the diagrams don't work (and the web version could disappear any time). If you search for "Honda ESM Accord 2009" (or words to that effect) there's a download link kicking about

Normally i'd post a screenshot but the instructions are quite long with many links - try this to start with:

With regards to the replacement speaker, I think the best thing is to remove the old one and measure it

Speaker part number I found the following:

39125-TL4-G01 SPEAKER ***Y., R. SATELLITE (8CM) (PANASONIC)
39125-TL4-G11 SPEAKER ***Y., L. SATELLITE (8CM) (PANASONIC)

You can order them from Japan pretty cheaply. I would guess any 8cm speaker would work, but you'd need to measure the depth and mounting holes as I haven't been able to find anyone whos posted online what speaker they used
 
Last edited:
This is outstandingly helpful, thank you very much.

I read just removing the rear quarter pillar trim (at step four, after the previous steps!) requires SRS inspection and some replacement of a sacrificial grommet, which will be fun sourcing.

CW3,2009( TL19E00J26273413801KDAT00 )
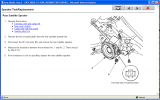
Rear Pillar Trim
SRS components are located in this area. Review the SRS component locations and the precautions and procedures before doing repairs or service.
NOTE:
  • Follow the rear pillar trim installation procedure carefully; improper installation could cause the side curtain airbag to deploy improperly and possibly cause injury.
  • Put on gloves to protect your hands.
  • When removing components, use the trim tools or equivalent.
  • Take care not to scratch the trim and the panels.
  • The upper clip in the rear pillar trim (A) consists of a resin grommet (B) and a metal pin (C). The grommet expanded with the pin secures it to the body panel (D). The grommet must be replaced with a new one when the trim is reinstalled.


  1. Remove these items:

  1. Fold the seat-back forward.

  1. Hit the upper clip in the rear pillar trim (A) with a rubber mallet. The clip is located under the point where the triangle mark (B) on the edge of the trim indicates. Hitting the clip slides the projections (C) on the pin (D) and pushes it into the grommet (E) and against the body (F).
    NOTE: The grommet must be replaced with a new one when the rear pillar trim is reinstalled.


  1. Pull the top of the rear pillar trim (A) back by hand to remove the upper clip (B) from the body (C).


  1. Pull the rear pillar trim (A) by hand to detach the clips and to release the hook (B), then pull the trim out from the rear shelf (C).

  1. If the side curtain airbag has been deployed, replace the rear pillar trim with a new one.


  1. If the side curtain airbag has not been deployed, check the rear pillar trim (A) and note the following:
    • To prevent the side curtain airbags from deploying improperly and possibly causing injury, inspect the rear pillar trim and replace it if it has any of these types of damage:
    • -​
      Any cracks, deformations, or stress-whitened areas in the rear pillar trim
      -​
      Any cracks or stress-whitened areas in the clip seating surfaces (B)
    • Remove the grommet (C) from the pin (D), and discard the grommet because it was damaged during removal.
    • Replace the grommet with a new one.
    • Do not install the grommet to the pin before checking the overlap between the headliner and the rear pillar trim.
    • If the clips (E) are damaged or stress-whitened, replace them with new ones.


  1. If the new rear pillar trim (A) will be installed, before installing the trim, temporarily remove a new upper clip (B).

  1. Check the overlap between the headliner and the rear pillar trim, and if necessary, adjust it.


  1. Carefully reinstall a new upper clip (A) to the rear pillar trim (B). Be sure that the grommet (C) is nearest to the top of the pin (D) as shown.


  1. If the old rear pillar trim (A) will be reinstalled, install the new grommet (B) to the pin (C). Do not push the grommet too hard. Be sure that the grommet is nearest to the top of the pin as shown.


  1. Reinstall the rear pillar trim (A).

    -1.​
    Set the bottom hook (B) and the projections (C) of the trim to the rear shelf (D).​

    -2.​
    Place the trim over the rear pillar (E), and fit its upper clip (F) and the lower clips into the holes (G) in the rear pillar, then lightly push the trim into place.
    NOTE:​
    • Make sure the side curtain airbag isn't tucked down under the clips and the ribs.
    • Apply pressure to the areas of the trim on the upper clip until these clip fittings are felt. If you push too hard, the clip will be damaged, and it will not hold the trim properly.
    • Make sure the upper clip portions of the trim don't come off the body by tugging on the trim.

  1. Reinstall the rear door opening seal.
 
Last edited:
Glad you're going in the right direction

I'll have a read up on the srs grommet thing as I'd be curious to know

I have had my front windscreen pillar trims off to run wires for my aftermarket DAB antenna and head unit mic, these have an airbag behind too maybe I was supposed to do something similar there
 
I think the SRS part is just for safety purposes (probably the Honda lawyers wanted that in there as you've been near an airbag!) so I wouldnt worry as long as you're being careful not jabbing the airbag with screwdrivers etc ;)

I think by the sounds of things the clip just breaks on removal! (Like a lot of other fastenings that aren't supposed to...) Couldnt find any part number for it but hopefully you could find it on this website once you have it out and can measure it https://vehicleclips.co.uk/en-fr/collections/honda-car-trim-clips-fixings-fasteners
 
I thought similar considering location but thanks for saying.

I also found that clips website and can buy some I need for other minor maintenance.

I will update here what I find on the resin grommet and how I get on when I actually address the repair. Tempted to just try Bluetac!
 
Top