Mr CL7
Members
I don't know if anybody has attempted this yet but here is my guide.
Tools required
gloves
star head screw driver
flat head screw driver
wrench with extender
10mm socket
nose pliers
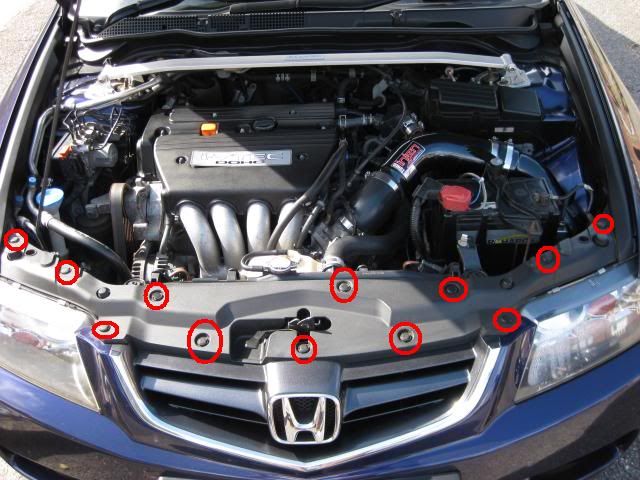
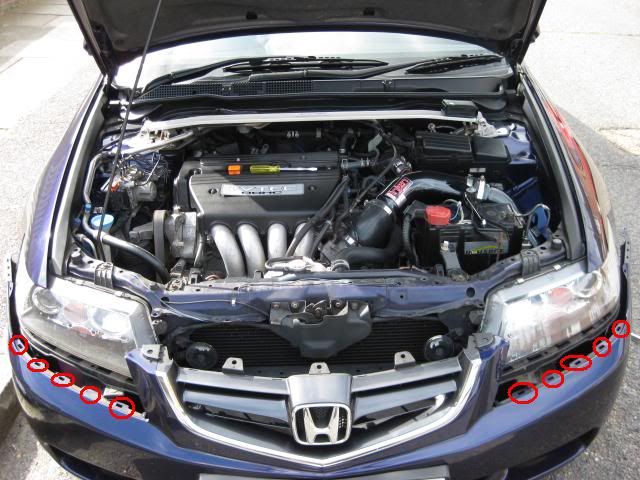
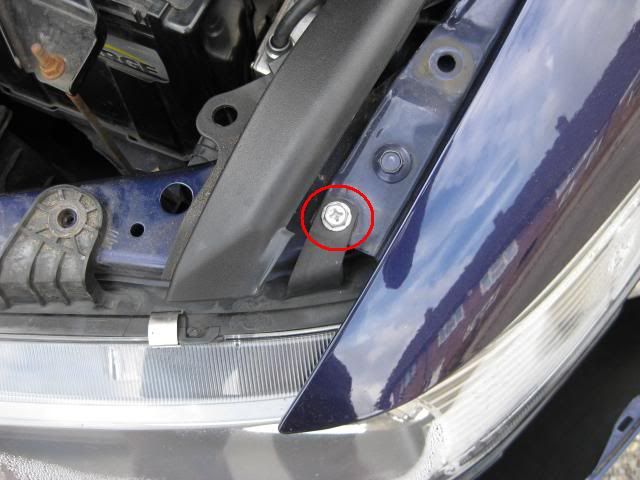
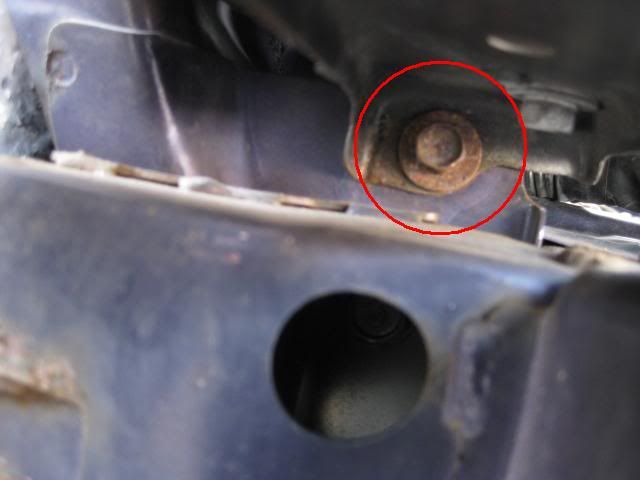
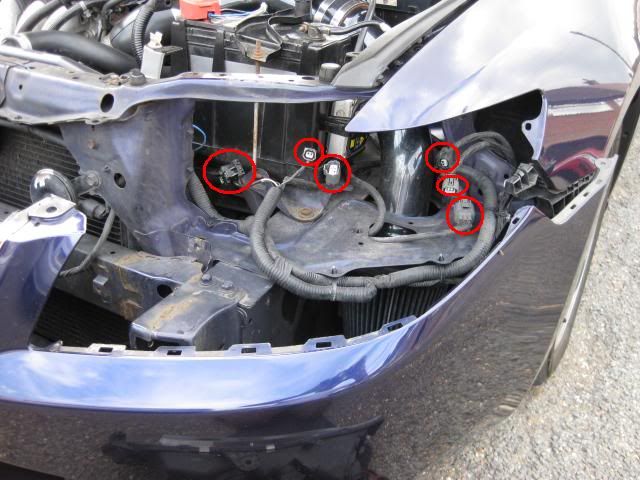
Red circles are areas you need to work in.
One thing that most of you may suffer from is the plastic clips breaking which hold down the slam panel. When you try to prize them up and away with a flat head screw driver they become brittle and break. I know of an Ebay contact who sells similar clips that are a lot cheaper than paying dealer prices. I have bought some. Msg me for the Ebay seller.
Right here we go...
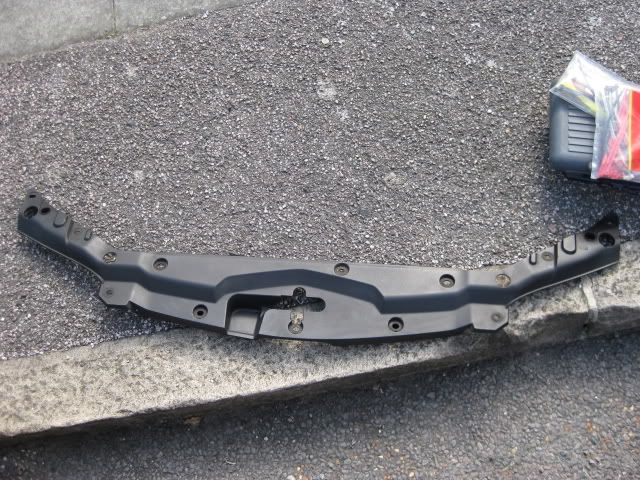

Gently prize corner of bumper towards you on both sides. One this is done gently pull down and prize away the bumper. This is what it will look like
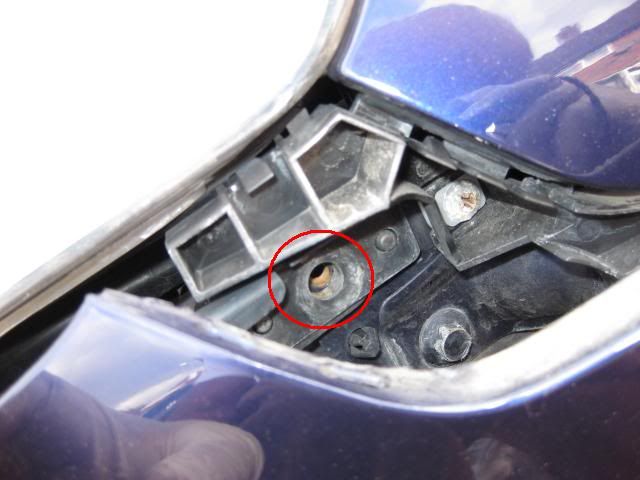
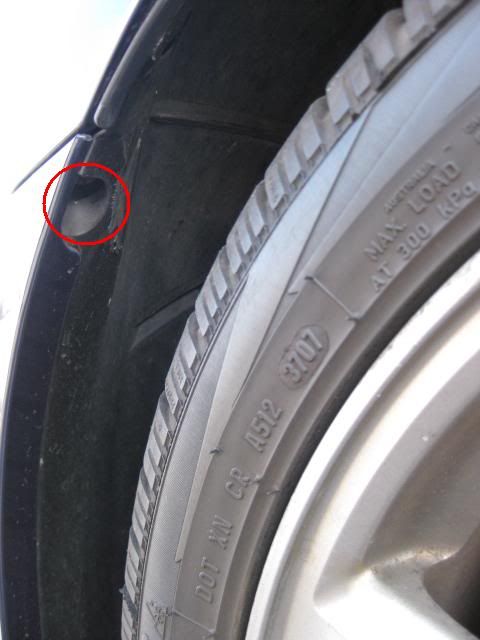
Pull the plastic up and towards the left to expose the star screw
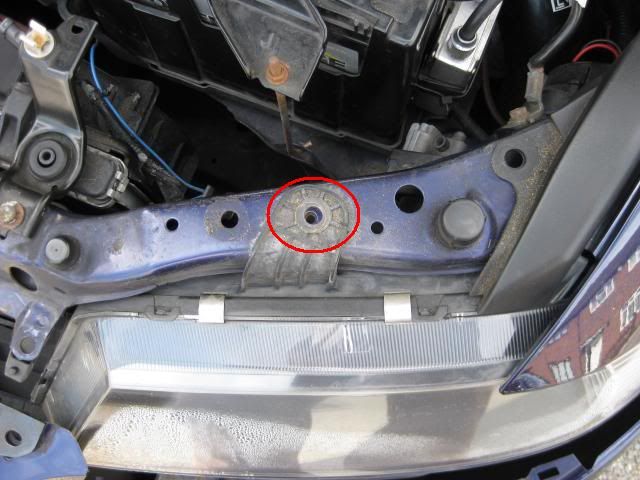
This can be a little tricky as the bolt is situated underneath the headlight connected to the body frame, be careful not to drop your socket here!
One this has been done gently pull the headlamp towards you and disconnect the main beam, high beam, indicator, dipped light connectors from the back it is self explanatory really. You may need to use the nose pliers to push down on some connectors then pull with your hands.
It took me about an hour and a half to remove headlight, part of the bumper and put the new headlight in.
I have done it since then and i can get the whole job done in about an hour.
Hope this write up helps
Faz
Tools required
gloves
star head screw driver
flat head screw driver
wrench with extender
10mm socket
nose pliers
Red circles are areas you need to work in.
One thing that most of you may suffer from is the plastic clips breaking which hold down the slam panel. When you try to prize them up and away with a flat head screw driver they become brittle and break. I know of an Ebay contact who sells similar clips that are a lot cheaper than paying dealer prices. I have bought some. Msg me for the Ebay seller.
Right here we go...
Gently prize corner of bumper towards you on both sides. One this is done gently pull down and prize away the bumper. This is what it will look like
Pull the plastic up and towards the left to expose the star screw
This can be a little tricky as the bolt is situated underneath the headlight connected to the body frame, be careful not to drop your socket here!
One this has been done gently pull the headlamp towards you and disconnect the main beam, high beam, indicator, dipped light connectors from the back it is self explanatory really. You may need to use the nose pliers to push down on some connectors then pull with your hands.
It took me about an hour and a half to remove headlight, part of the bumper and put the new headlight in.
I have done it since then and i can get the whole job done in about an hour.
Hope this write up helps
Faz
")
