Hi Guys,
For many new members this could be the first time you've joined a forum or you may be used to using forums that offer image hosting (something this forum's software doesn't). Therefore posting images may seem a bit awkward or confusing. No worries. We've all been there.
Inserting a picture of something you've seen on the internet
First, find the picture you wish to insert. You may already know where to find it, or you can use Google Image Search to find what you're after. E.g this picture of a nice red car I just found:
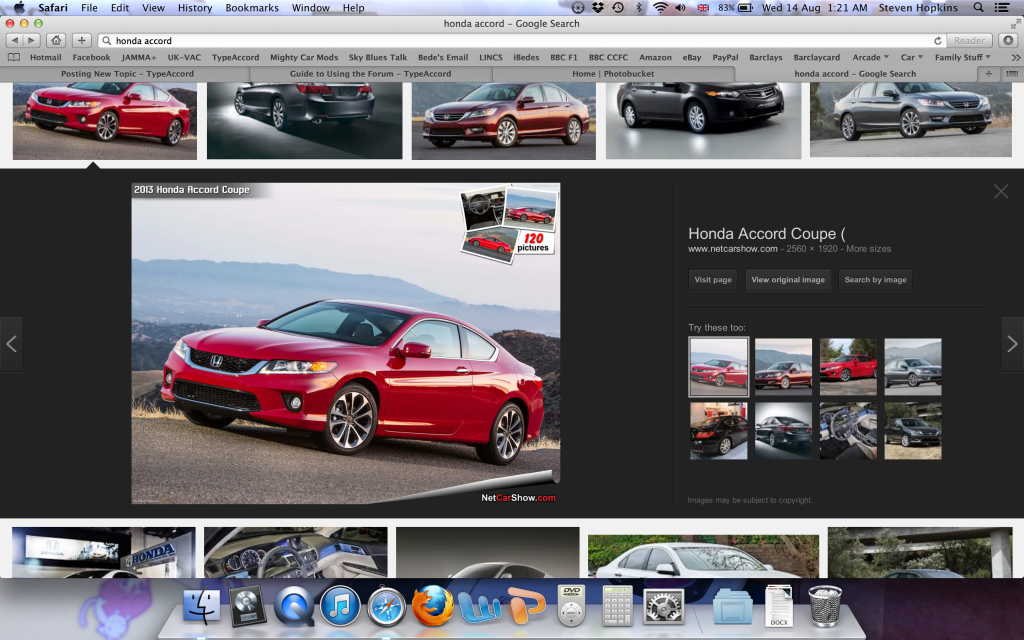
Right click on the picture and select "Copy Image Address"
Return to the post you're composing and click the "Insert Image" icon at the top of the reply box. It's the picture of a photo of a tree between the paperclip and envelop")

This will present you with the following dialogue box
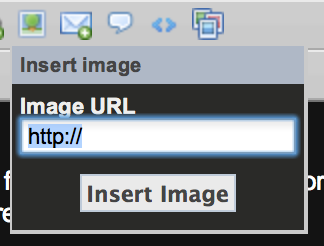
Copy and paste the URL of the picture you want to post in this dialogue box
I've done exactly this, and below is the picture of the US Spec Red Accord from the above example:

Job Done
But What About Photo's I've Taken Myself ?
When I first joined TA, I'd never used image hosting, so it was new to me too. After some time using image hosting, I'd recommend creating an account on Photobucket. It's free and allows you to upload lots of pictures for hosting on forums, facebook and so on.
Once you've signed up, you can upload pictures by clicking on the big orange "Upload" tabs. They put them everywhere, you can't miss them:

View your image library and organise the pictures into albums etc with the various navigation features:
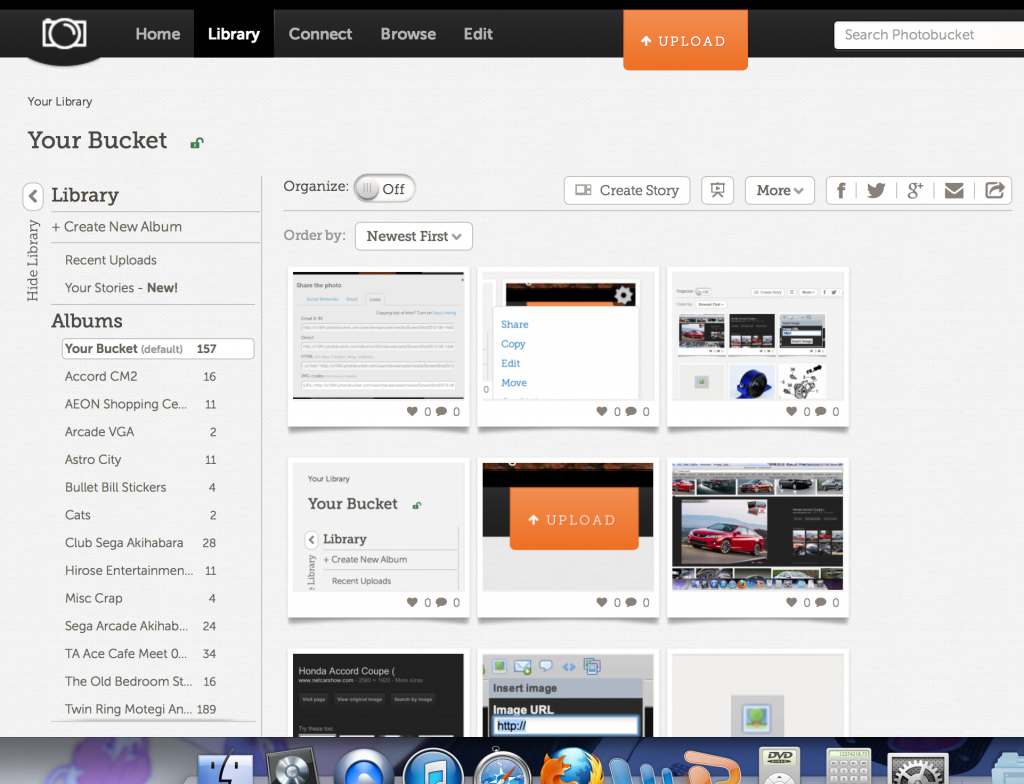
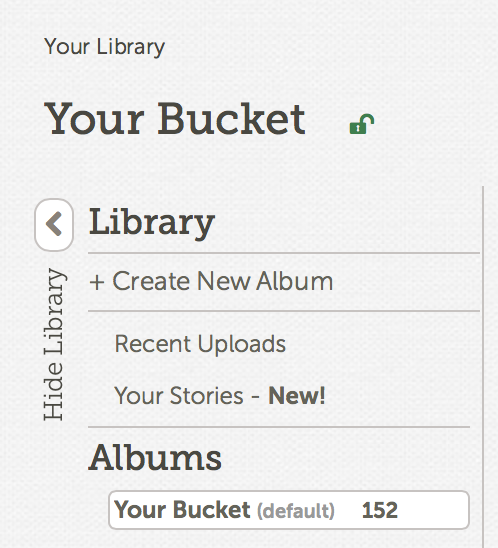
You can see in my example above, I've uploaded my screenshots I'm using for this walkthrough. Also notice there's an Edit Tab. You can add arrows and other graphics which are great should you wish to make a detailed, picture based DIY thread.
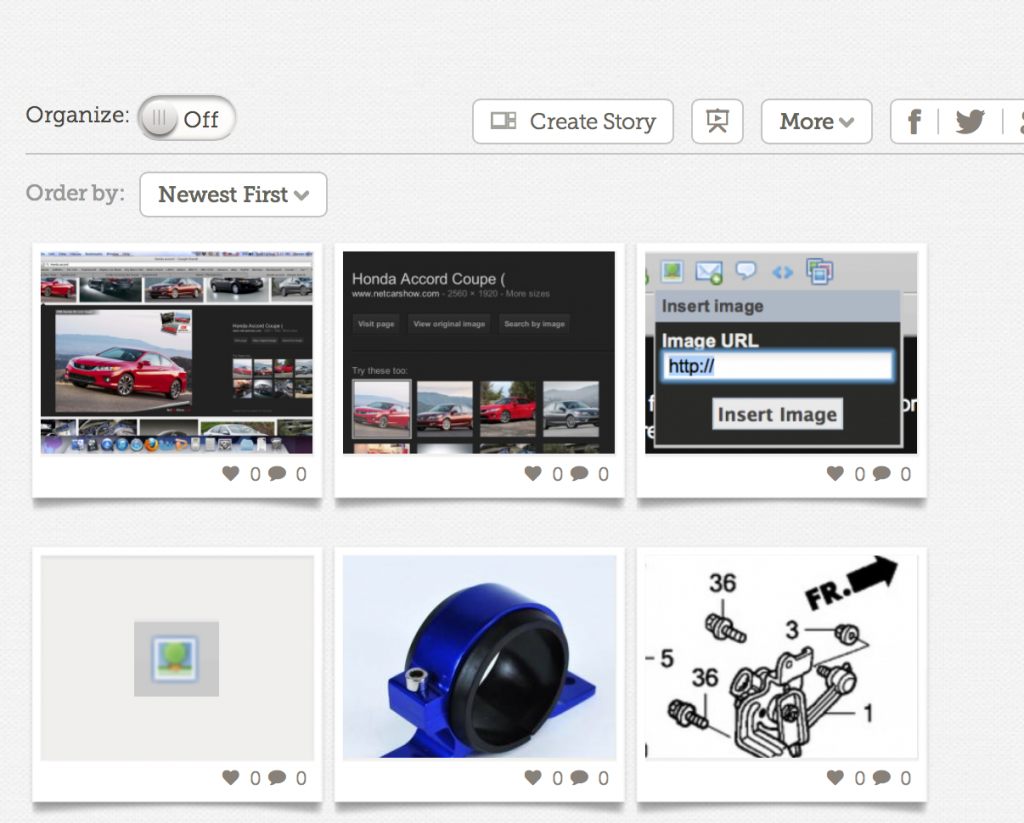
Once you've organised your pictures and are ready to roll, hover your mouse over the image you wish to insert on the forum and you'll see a cog with a drop down menu in the top right hand corner of the picture:
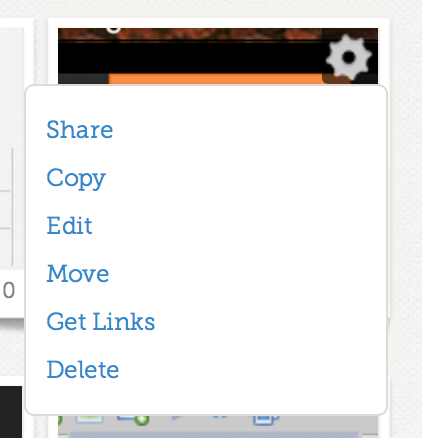
Select "Get Links" and you'll see an option box like this:
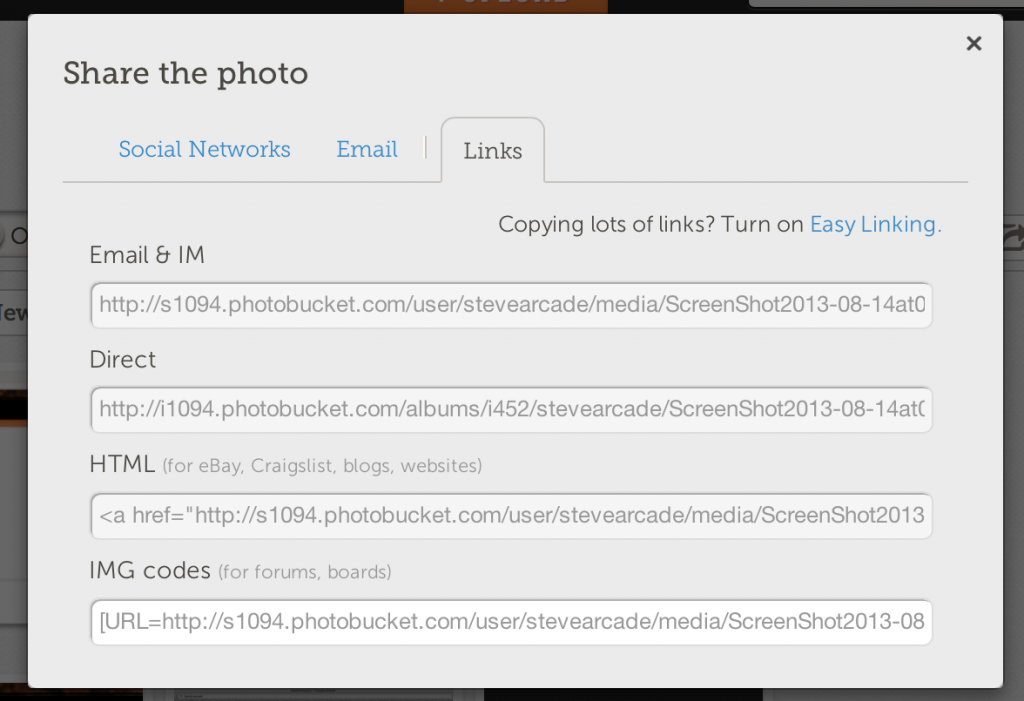
Click on the IMG Codes and it will automatically copy the URL to your Copy & Paste clipboard. Then simply go to your post and Paste the code in.
That's how all the photos in this walkthrough are inserted
A Few Of Things To Note
If you move your image in Photobucket, e.g. from one album to another, it will change the image's URL and thus the picture link will no longer work! Once linked, please leave it where it is.
The default for Photobucket is to provide both the image and a link (i.e. if you click on the image it opens a new tab in your browser that takes you to the Photobucket picture). If you don't want this to happen, you'll need to delete the text from the code Photobucket giv...t images :lol: ... :blush: I'll get my coat)
For many new members this could be the first time you've joined a forum or you may be used to using forums that offer image hosting (something this forum's software doesn't). Therefore posting images may seem a bit awkward or confusing. No worries. We've all been there.
Inserting a picture of something you've seen on the internet
First, find the picture you wish to insert. You may already know where to find it, or you can use Google Image Search to find what you're after. E.g this picture of a nice red car I just found:
Right click on the picture and select "Copy Image Address"
Return to the post you're composing and click the "Insert Image" icon at the top of the reply box. It's the picture of a photo of a tree between the paperclip and envelop
This will present you with the following dialogue box
Copy and paste the URL of the picture you want to post in this dialogue box
I've done exactly this, and below is the picture of the US Spec Red Accord from the above example:
Job Done
But What About Photo's I've Taken Myself ?
When I first joined TA, I'd never used image hosting, so it was new to me too. After some time using image hosting, I'd recommend creating an account on Photobucket. It's free and allows you to upload lots of pictures for hosting on forums, facebook and so on.
Once you've signed up, you can upload pictures by clicking on the big orange "Upload" tabs. They put them everywhere, you can't miss them:
View your image library and organise the pictures into albums etc with the various navigation features:
You can see in my example above, I've uploaded my screenshots I'm using for this walkthrough. Also notice there's an Edit Tab. You can add arrows and other graphics which are great should you wish to make a detailed, picture based DIY thread.
Once you've organised your pictures and are ready to roll, hover your mouse over the image you wish to insert on the forum and you'll see a cog with a drop down menu in the top right hand corner of the picture:
Select "Get Links" and you'll see an option box like this:
Click on the IMG Codes and it will automatically copy the URL to your Copy & Paste clipboard. Then simply go to your post and Paste the code in.
That's how all the photos in this walkthrough are inserted
A Few Of Things To Note
If you move your image in Photobucket, e.g. from one album to another, it will change the image's URL and thus the picture link will no longer work! Once linked, please leave it where it is.
The default for Photobucket is to provide both the image and a link (i.e. if you click on the image it opens a new tab in your browser that takes you to the Photobucket picture). If you don't want this to happen, you'll need to delete the text from the code Photobucket giv...t images :lol: ... :blush: I'll get my coat)

